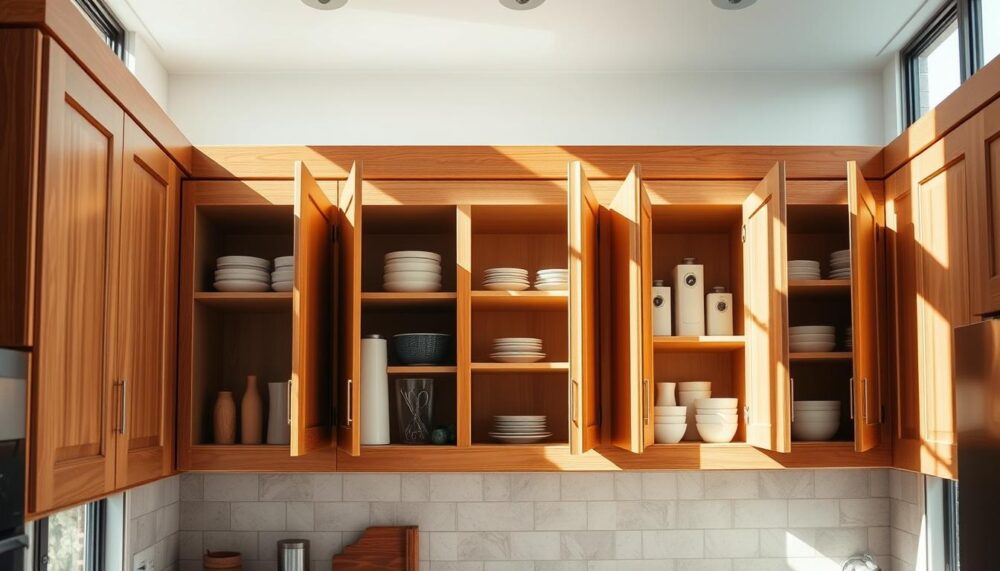
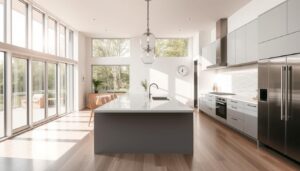
Giving your kitchen a fresh look doesn’t require a complete overhaul. With some clever techniques, you can revitalise your cabinet fronts and achieve a stunning transformation.
This comprehensive guide shows you various approaches to refresh your storage units. From simple cosmetic updates to more involved techniques, there’s an option for every skill level.
The cost-saving benefits are significant compared to full replacement. Proper planning and preparation ensure successful results that can increase your home’s value.
Whether you’re a DIY beginner or experienced improver, our step-by-step instructions will help you create a beautiful space. Get ready to enjoy your renewed kitchen for years to come.
Ready to Transform Your Kitchen?
AVO Renovations delivers expert kitchen installations across Edinburgh
✔ Free consultation ⭐ Rated 5/5 ✔ Projects delivered on time
Key Takeaways
- Cabinet door updates offer substantial savings versus complete replacement
- Multiple techniques cater to different skill levels and budget constraints
- Proper preparation ensures professional-looking finishing results
- Strategic planning maximises both aesthetic appeal and functional improvements
- Quality materials and hardware enhance durability and visual impact
- This transformation process can significantly increase property value
- The guide provides clear, actionable steps for successful implementation
Assessing Your Current Kitchen Cupboard Situation
Before diving into your cabinet refresh, taking stock of what you’re working with saves both time and money. A thorough assessment helps you choose the right approach for your space.
This initial evaluation stage determines whether simple updates or more comprehensive changes suit your storage units best. Careful planning now prevents costly mistakes later.
Evaluating Cabinet Condition and Structure
Begin by checking your cabinet boxes for structural integrity. Look for warping, cracks, or moisture damage that might affect your project’s success.
Measure each door’s width and length accurately, including hinge positions and swing directions. Don’t forget to account for false fronts and drawers in your calculations.
Consider sustainability by reusing existing cabinets when possible. This approach often delivers excellent results while reducing waste.
Determining Your Renovation Budget
Establishing a realistic budget early guides your decision-making process. Different methods offer varying cost implications.
Complete replacement represents the highest expense, while cosmetic updates provide significant savings. Your kitchen’s size and desired outcome influence final costs.
Factor in quality materials and hardware for lasting results. Investing in good components makes a noticeable difference in your finished look.
| Renovation Method | Estimated Cost Range | Skill Level Required | Time Investment |
|---|---|---|---|
| Complete Replacement | £800-£2,500 | Advanced | 2-4 weeks |
| MDF Transformation | £300-£800 | Intermediate | 1-2 weeks |
| Painting & Refinishing | £150-£400 | Beginner | 3-7 days |
| Hardware Update Only | £50-£200 | Beginner | 1-2 days |
Identifying Your Desired Style Outcome
Your cabinet fronts should complement your home’s overall design scheme. Consider whether modern, traditional, or shaker-style aesthetics suit your space best.
Research current trends while choosing timeless elements that won’t date quickly. This balance ensures your investment remains appealing for years.
Create a mood board with finishes, hardware options, and colour schemes. Visualising your desired outcome helps maintain focus throughout the project.
Set realistic expectations based on your budget and skill level. Even simple updates can dramatically transform your kitchen’s appearance.
Essential Preparation Steps Before Renovation
Proper groundwork transforms your cabinet refresh from daunting to delightful. These preliminary stages set the foundation for professional results that last.
Investing time in meticulous preparation pays dividends throughout your project. You’ll avoid frustrating setbacks and achieve that magazine-worthy finish.
Removing Doors and Hardware Properly
Begin by carefully detaching each cabinet door using the correct screwdriver. Support the weight as you remove the final screw to prevent dropping.
Label every component immediately after removal. Use masking tape with clear numbering that matches a simple sketch of your kitchen layout.
Store hinges and screws in labelled bags attached to their corresponding doors. This organisation saves hours during reassembly.
Check frames for any damage during removal. Note any repairs needed before proceeding with your makeover.
Thorough Cleaning and Degreasing Techniques
Years of cooking residue require powerful cleaning solutions. Trisodium phosphate (TSP) works wonders on stubborn grease buildup.
For milder cases, Dawn dish soap cuts through grease effectively. Always wear gloves and ensure good ventilation when using cleaners.
Scrub every surface thoroughly, including edges and detailed moulding. Rinse completely and allow adequate drying time before sanding.
This crucial step ensures proper paint adhesion and prevents future peeling. Don’t rush the cleaning process.
Surface Preparation for Different Materials
Solid wood surfaces need gentle sanding with 220-grit paper. Always sand along the grain to avoid visible scratches.
Laminate fronts require deglossing rather than heavy sanding. Use liquid deglosser for optimal primer adhesion.
MDF needs careful filling of any damaged edges. Apply wood filler smoothly and allow proper drying time.
Inspect for imperfections after cleaning. Fill holes and dents with quality spackling paste using a flexible putty knife.
Light sanding creates the perfect surface for your first coat. Wipe away all dust with a tack cloth before priming.
This attention to detail makes all the difference in your final results. Proper preparation ensures a flawless finish that enhances your entire space.
Complete Door Replacement Method
Opting for complete door replacement brings a fresh start to your kitchen design. This approach lets you achieve a cohesive look while addressing any structural issues with your existing cabinet fronts.
The process requires careful planning but delivers outstanding results. You’ll create a space that reflects your personal style while improving functionality.
Taking Accurate Measurements for New Doors
Precision measuring ensures your new components fit perfectly. Record width and height dimensions for each cabinet opening.
Note hinge positions and swing directions carefully. These details affect both installation and daily use.
Consider pre-bored hinge options if available. This feature simplifies alignment during the installation process.
“Measure twice, order once – this old carpenter’s wisdom saves both time and money when replacing cabinet fronts.”
Selecting Door Styles and Materials
Choose materials that suit your budget and design preferences. Solid wood offers durability and natural beauty that lasts for years.
Paint-grade maple provides excellent value for painted finishes. It takes primer and paint beautifully for a smooth, professional look.
Select timeless profiles rather than fleeting trends. Classic designs maintain their appeal through changing decor styles.
Ensure drawer fronts coordinate with your cabinet doors. This consistency creates visual harmony throughout your space.
| Material Type | Durability Rating | Cost Range | Best For |
|---|---|---|---|
| Solid Wood | Excellent | £40-£80 per door | Traditional and modern designs |
| Paint-Grade Maple | Very Good | £25-£50 per door | Painted finishes |
| MDF | Good | £20-£40 per door | Budget-conscious projects |
| Thermofoil | Good | £30-£60 per door | Modern, seamless looks |
Ordering Process and Lead Times
Reputable suppliers like The Cabinet Door Store streamline the ordering process. They typically require four weeks for production and delivery.
Upgrade to soft-close hinges for enhanced functionality. This small investment makes a significant difference in daily use.
Budget approximately £850 for an average-sized kitchen with eighteen pieces. This includes doors, drawer fronts, and necessary hardware.
Coordinate your door replacement with other kitchen elements. Time your project to minimise disruption to your household routine.
Consider professional installation if you lack advanced DIY skills. The investment ensures perfect alignment and operation of your new cabinet fronts.
How to Renovate Kitchen Cupboard Doors with MDF Transformation
Medium-density fibreboard offers an incredible opportunity to revitalise your cabinet fronts without breaking the bank. This versatile material creates stunning shaker-style effects that elevate your entire space.
The cost-effective approach delivers premium results at a fraction of replacement expenses. With careful execution, your storage units will appear completely renewed.
Materials and Tools Required for MDF Application
Gathering the right components ensures smooth progress throughout your project. You’ll need quarter-inch MDF sheets cut into specific dimensions.
For doors, prepare three-inch strips while drawer fronts require two-inch pieces. This sizing creates proportional framing that enhances your kitchen’s aesthetic.
Essential materials include liquid nails adhesive, five-eighths inch brad nails, and quality wood filler. Don’t forget caulk for seamless finishing touches.
Your tool collection should feature a miter saw for precise angled cuts. Add a nail gun, caulk applicator, and orbital sander to your equipment list.
Safety gear remains non-negotiable when working with power tools and MDF particles. Protective glasses and masks ensure your wellbeing during the process.
Cutting and Applying MDF Trim Pieces
Begin by measuring your existing cabinet fronts accurately. Mark your MDF strips according to these dimensions before cutting.
Use your miter saw to create perfect forty-five-degree angles at each corner. This technique guarantees professional-looking joints that appear seamless.
Sand all edges thoroughly with 220-grit paper before application. Smooth surfaces ensure better adhesion and cleaner finishing results.
Apply liquid nails in zig-zag patterns across each trim piece’s back. This method provides maximum contact and superior bonding strength.
Position your MDF frames carefully onto the cabinet surfaces. Use your nail gun with five-eighths inch brads for secure attachment.
Creating the Shaker-Style Effect
After securing all trim pieces, fill nail holes with quality wood filler. Smooth applications prevent visible imperfections in your final finish.
Allow adequate drying time before sanding surfaces to perfection. Your orbital sander creates the ideal foundation for paint application.
Apply caulk around all inner edges where MDF meets the original surface. This step eliminates gaps and creates that coveted seamless appearance.
The entire transformation costs approximately £42 excluding paint and primer. This represents phenomenal value compared to full replacement options.
Your renewed cabinet fronts will serve your home beautifully for years. The shaker-style design maintains timeless appeal that transcends fleeting trends.
Painting Techniques for Cabinet Door Makeovers
A fresh coat of paint transforms your storage units dramatically. This approach offers incredible value while delivering professional results.
Proper technique makes all the difference between amateur and expert finishes. Our guide helps you achieve that magazine-worthy look everyone desires.
Choosing the Right Paint and Primer
Benjamin Moore’s Advance paint stands out for its self-leveling properties. The satin finish provides excellent durability in busy cooking spaces.
Different materials require specific primer types. Wood surfaces need oil-based options for optimal adhesion and stain blocking.
Laminate fronts benefit from bonding primers designed for slick surfaces. These specialised products prevent peeling and ensure long-lasting results.
Consider your kitchen’s moisture levels when selecting finishes. Higher gloss options offer better protection against steam and splashes.
Brush vs Roller vs Spray Application Methods
Brushes work beautifully for detailed profiles and hard-to-reach areas. High-quality synthetic bristles minimise streak marks.
High-density foam rollers create incredibly smooth surfaces on flat panels. They distribute paint evenly without leaving texture.
Spray systems deliver the most professional results but require significant preparation. This method works best for experienced DIY enthusiasts.
Many professionals combine techniques for perfect outcomes. They use brushes for edges and rollers for large flat surfaces.
Achieving Professional-looking Finish Coats
Multiple thin coats outperform single thick applications. Aim for three to four passes with proper drying time between each.
Light sanding with 220-grit paper between coats ensures flawless surfaces. Always wipe away dust with a tack cloth before recoating.
Drying time varies based on temperature and humidity conditions. Allow at least four hours between coats for best results.
A clear topcoat adds extra protection for high-use areas. This step extends your paint job’s lifespan significantly.
Proper cleanup maintains your brushes and rollers for future projects. Latex options simplify this process with soap and water.
Your renewed cabinet fronts will serve your home beautifully for years. The transformation makes your entire space feel fresh and inviting.
Creative Finishing and Distressing Techniques
Elevate your storage units with artistic touches that add personality and charm. These decorative approaches transform ordinary fronts into custom features that reflect your unique taste.
Creative finishes offer incredible flexibility for personal expression. They let you achieve high-end looks without the premium price tag.
Whitewashing and Two-Tone Effects
Whitewashing creates a beautiful translucent finish that highlights wood grain. Begin with a white basecoat on your prepared surfaces.
Mix white paint with water in a 3:1 ratio for the perfect consistency. Apply this mixture evenly across your cabinet fronts.
Wait approximately fifteen minutes before wiping away excess product. This technique allows subtle wood characteristics to show through beautifully.
Seal your work with a clear topcoat for protection and durability. The result is a light, airy feel that brightens any cooking area.
Two-tone schemes create visual interest through colour contrast. Paint upper and lower storage units in complementary shades.
Lighter colours above and darker tones below often work beautifully. This approach adds depth and dimension to your entire space.
Distressing for Vintage Character
Distressing techniques impart wonderful aged character to your project. Start with a light basecoat on all surfaces.
Apply a darker shade over your initial colour layer. Allow proper drying time between applications for best results.
Strategically sand edges and surfaces where natural wear would occur. Focus on corners and raised details for authentic appearance.
The technique creates the illusion of years of loving use. It adds warmth and history to newer components.
Seal your distressed finish with appropriate protective products. This preserves your artistic work while ensuring easy cleaning.
Adding Moulding and Decorative Elements
Decorative moulding elevates plain fronts into sophisticated features. Choose profiles that complement your overall design scheme.
Apply trim pieces using strong adhesive or quality caulk. Ensure proper alignment before the bonding agent sets.
Consider these popular decorative options:
- Beadboard inserts for cottage charm
- Geometric patterns for modern appeal
- Classic raised panels for traditional elegance
- Glass inserts that showcase beautiful dishware
Balance ornamental elements with practical considerations. Ensure your enhancements don’t interfere with daily functionality.
Protect decorative finishes with appropriate topcoats and sealants. This maintenance step preserves your artistic investment for years.
Combining multiple techniques creates truly unique, custom looks. Experiment on sample pieces before committing to entire projects.
Updating Hardware for Instant Transformation
Swapping out your cabinet fittings delivers remarkable visual impact with minimal effort. This quick update completely changes your storage units’ character without major renovation work.
New handles and hinges offer one of the most cost-effective ways to refresh your space. The transformation happens quickly, often within a single afternoon.
Selecting Handles and Knobs That Complement Your Style
Choose hardware that enhances your kitchen’s overall design theme. Consider whether modern bar pulls or traditional knobs suit your aesthetic vision.
Your selection should coordinate with other metallic elements in the room. Taps and light fixtures often influence these decisions.
Budget-friendly options available through retailers like Amazon provide excellent quality. You can achieve luxury looks without premium prices.
Think about practical aspects alongside visual appeal. Ergonomics matter for daily use comfort and functionality.
Proper Installation Techniques
Always measure existing holes before purchasing new fittings. This prevents unnecessary drilling and maintains your cabinet fronts’ integrity.
Use a template for consistency when creating new attachment points. This ensures perfect alignment across all your storage units.
Upgrade to soft-close hinges for enhanced operation. These mechanisms prevent slamming and extend your cabinet doors’ lifespan.
Follow these steps for flawless installation:
- Mark hole positions accurately using measuring tape
- Use sharp drill bits for clean entry points
- Secure fittings firmly without overtightening
- Test operation and make adjustments as needed
Mixing Metals and Styles Effectively
Combining different finishes creates dynamic, contemporary looks. This approach works beautifully in eclectic design schemes.
Balance bold statements with subtle complementary elements. Your hardware can serve as focal points or blend seamlessly.
Consider finishes that withstand kitchen wear and tear. Brushed metals often hide fingerprints better than polished alternatives.
This table shows popular hardware options and their characteristics:
| Hardware Type | Finish Options | Average Cost | Best Suited For |
|---|---|---|---|
| Bar Pulls | Brushed Nickel, Black, Brass | £3-£12 each | Modern and transitional designs |
| Knobs | Porcelain, Crystal, Metal | £2-£8 each | Traditional and cottage styles |
| Cup Pulls | Antique Brass, Iron, Copper | £4-£15 each | Vintage and farmhouse aesthetics |
| Soft-Close Hinges | White, Silver, Black | £5-£20 per set | All kitchen styles for functionality |
Your hardware update makes a significant difference in your kitchen’s overall appearance. This simple change refreshes your space with minimal investment of time and money.
Additional Enhancement Ideas
Your storage units’ transformation doesn’t end with fresh paint or new handles. Clever additions can elevate both functionality and visual appeal throughout your cooking space.
These supplementary projects deliver outstanding results with reasonable effort. They personalise your area while improving daily workflow efficiency.
Installing Under-Cabinet Lighting
Strategic illumination makes food preparation safer and more enjoyable. LED strip lights offer excellent brightness with minimal energy consumption.
Choose discreet locations that highlight work surfaces without creating glare. Most installations require basic drilling and wiring skills.
Consider these popular lighting options:
- Warm white LEDs for comfortable ambience
- Dimmable systems for adjustable brightness
- Battery-operated solutions for rental properties
- Motion-activated versions for hands-free operation
Proper switch placement ensures convenient access during cooking. Many homeowners prefer wall-mounted controls near the main work area.
Adding Interior Organisation Solutions
Customised storage transforms how you use your cabinet space. Pull-out shelves bring rear items within easy reach.
Spice racks maximise vertical space while keeping flavours organised. Adjustable dividers create perfect compartments for various items.
Measure your interior dimensions carefully before purchasing organisers. This ensures seamless integration with existing structures.
Quality materials withstand daily use while maintaining their appearance. Investing in good organisers pays dividends through years of service.
Incorporating Glass Inserts and Open Shelving
Glass panel additions create beautiful display opportunities for favourite dishware. They add visual lightness to solid cabinet fronts.
Open shelving provides accessible storage for frequently used items. This approach works beautifully alongside traditional storage units.
Consider reversible updates if you’re renting your property. Temporary solutions allow personalisation without permanent alterations.
Balance open and closed storage for both aesthetic and practical benefits. This combination keeps clutter hidden while showcasing decorative pieces.
Your enhanced space will serve your household beautifully for years. These thoughtful additions make daily kitchen activities more enjoyable.
Cost Comparison of Different Renovation Methods
Understanding the financial aspects of your cabinet refresh helps you make informed decisions. Different approaches offer varying price points and value propositions for your home improvement project.
Smart budgeting ensures you achieve beautiful results without overspending. Let’s examine the numbers behind each transformation method.
Budgeting for Complete Replacement
Opting for new components represents the most significant investment. A typical kitchen with eighteen primed maple doors and drawer fronts costs around £850.
This approach delivers a completely fresh start for your space. The expense remains a fraction of full cabinet replacement costs.
Professional installation adds approximately £300-£500 to your budget. This ensures perfect alignment and operation of your new storage solutions.
Consider these cost components:
- New doors and drawer fronts: £600-£800
- Quality hinges and hardware: £150-£250
- Professional installation (optional): £300-£500
- Additional supplies and tools: £50-£100
Allocate 10-15% of your budget for unexpected expenses. This contingency fund covers unforeseen issues during the installation process.
Cost Analysis of DIY MDF Transformation
The MDF method offers incredible savings while achieving premium results. Basic materials for this approach cost approximately £42 excluding paint and primer.
Adding quality paint and primer brings the total to around £120. This represents phenomenal value compared to replacement options.
“The MDF transformation method delivers custom looks at off-the-shelf prices, making high-end designs accessible to budget-conscious homeowners.”
Tool investments might include a miter saw (£100-£200) and nail gun (£60-£120). These become valuable additions to your DIY arsenal for future projects.
This approach proves much more cost-effective than starting from scratch. It also offers a faster, cleaner option for busy households.
Pricing for Cosmetic Updates and Refinishing
Simple refreshes provide the most budget-friendly transformation path. Painting existing fronts costs between £150-£400 depending on kitchen size.
Hardware updates represent the most affordable change at £50-£200. This quick update delivers remarkable visual impact for minimal investment.
Consider this comparative breakdown:
| Renovation Type | Material Costs | Tool Expenses | Total Investment |
|---|---|---|---|
| Complete Replacement | £750-£900 | £50-£100 | £800-£1,000 |
| MDF Transformation | £120-£160 | £160-£320 | £280-£480 |
| Painting & Refinishing | £150-£250 | £30-£60 | £180-£310 |
| Hardware Only | £50-£150 | £10-£20 | £60-£170 |
Focus your budget on areas that deliver the most visual impact. Quality paint and distinctive hardware often make the biggest difference.
Remember that DIY efforts save labour costs but require time investment. Balance your available resources with desired outcomes for the best results.
Your renewed space will serve your family beautifully for years. Smart financial planning ensures you achieve stunning transformations within your means.
Conclusion
Your cabinet transformation journey offers exciting possibilities without breaking the bank. Multiple methods suit different skill levels and budgets.
Simple updates like painting or hardware changes create dramatic visual impact. More involved techniques deliver custom looks at reasonable cost.
Careful planning ensures professional results that last for years. Quality materials make a noticeable difference in your final finish.
Start with smaller projects to build confidence before tackling larger renovations. Share your results and seek advice from fellow DIY enthusiasts.
Your renewed storage space will serve your home beautifully. Enjoy the satisfaction of creating a beautiful, functional kitchen through your own efforts.
FAQ
What is the most affordable way to give my cabinets a fresh look?
Painting your existing cabinet doors offers the most budget-friendly transformation. A good quality primer and paint can make a huge difference for a fraction of the cost of a full replacement.
Can I renovate my cupboard doors without replacing them?
Absolutely. Many homeowners opt for a DIY makeover. This process can involve painting, adding new mouldings for a shaker-style effect, or simply updating the hardware for an instant refresh.
How do I choose the right paint finish for my kitchen?
For a hardwearing and easy-to-clean surface, a satin or eggshell finish is highly recommended. These finishes offer a slight sheen and are excellent at resisting moisture and stains common in a kitchen space.
Is it necessary to remove the doors for painting?
Yes, for a professional and durable result. Taking the time to remove the doors, drawers, and all hardware allows for thorough cleaning, proper sanding, and even application of paint on all surfaces.
What type of new handles should I choose?
Select hardware that complements your kitchen’s overall design style. Consider the finish—popular options include brushed brass, matte black, or nickel. Ensure the size is proportionate to your cabinet doors and drawers for both aesthetics and function.
How long does a typical cabinet door renovation project take?
The timeline varies greatly depending on the method. A simple painting project might take a weekend, while a more complex MDF transformation or complete replacement will require several days of work and drying time between coats.
What is the average cost difference between replacing doors and refinishing them?
Refinishing your current doors is significantly less expensive. You primarily pay for materials like paint, primer, and sandpaper. Replacement costs involve purchasing new doors and potentially paying for professional installation, making it a much larger investment.

