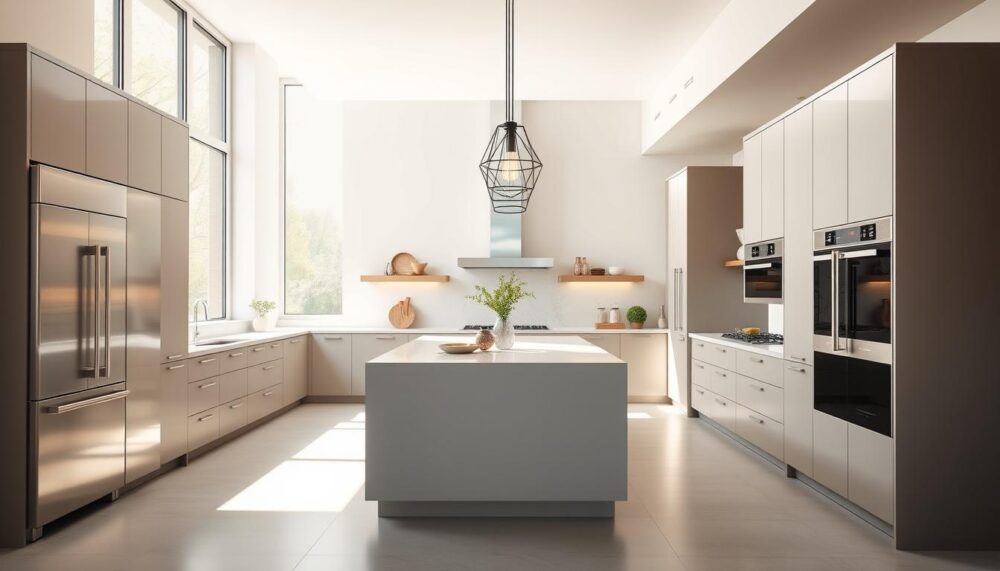
Revamping a dated kitchen can breathe new life into your home, adding both value and practicality. Whether you’re tackling structural changes or focusing on cosmetic upgrades, careful planning ensures a smooth renovation process.
One homeowner saved £3,500 by opting for a DIY approach, completing the project for just £5,680. Tools like 3D rendering software from DIY Kitchens help visualise the final look before committing to changes.
From cabinet updates to clever lighting solutions, small tweaks can make a big difference. Budget-friendly hacks and smart design choices ensure a stylish yet functional space.
Key Takeaways
- Kitchen makeovers enhance both aesthetics and property value.
- Assess structural needs versus cosmetic updates before starting.
- Planning tools like 3D software help avoid costly mistakes.
- DIY projects can yield significant savings on labour costs.
- Focus on lighting and cabinetry for impactful transformations.
Assessing Your Old Kitchen: Where to Begin
Before diving into changes, take time to evaluate your current kitchen thoroughly. A well-planned assessment helps prioritise tasks and avoid unnecessary expenses. Start by noting what works and what needs improvement.
Identifying Key Areas for Improvement
Begin with a detailed inspection of essential systems. Check plumbing, electrical wiring, and gas connections for safety and efficiency. Keeping appliances in their current positions can save over £1,500 on pipework adjustments.
Examine surfaces like cabinets, worktops, and flooring for wear. Minor fixes, such as replacing handles or resealing tiles, often refresh the space without a full overhaul. Focus on high-impact areas first.
Evaluating Structural and Cosmetic Changes
Separate must-do repairs from aesthetic upgrades. Structural issues, like subsidence or water damage, require immediate attention. Cosmetic changes, such as repainting or new lighting, enhance the look without breaking the budget.
One homeowner saved £3,500 by maintaining existing appliance placements. Hidden costs, like cabinet door replacements (£1,200–£2,400), should also factor into your plan. Prioritise wisely to achieve the best results.
A clear checklist ensures nothing is missed. Here’s a quick guide:
- Inspect plumbing and electrical systems
- Assess cabinet and worktop condition
- Note flooring and tile wear
- Compare structural vs. cosmetic needs
With careful evaluation, your renovation will be both cost-effective and transformative.
Planning Your Kitchen Renovation: A Step-by-Step Guide
Smart planning is the backbone of any successful kitchen upgrade. Whether you’re overhauling the entire space or making strategic updates, a clear roadmap saves time, money, and stress.
Setting a Realistic Budget
Start by allocating 5–10% of your home’s value for the project, plus a 15% contingency fund. For a £300,000 property, that’s £15,000–£30,000. Prioritise high-impact areas like worktops and cabinetry, which offer long-term value.
Example breakdown:
- Cabinets: £3,000 (pre-built) or £1,800 (flat-pack, 4-week lead time)
- Appliances: £1,300 for mid-range models
- Labour: 20–30% of total costs if hiring professionals
Measuring and Sketching Your Layout
Precision prevents costly mistakes. Use DIY Kitchens’ template system to map your space, noting:
- Wall dimensions and door swings
- Existing plumbing and electrical points
- Clearance zones for appliances
Designate a temporary kitchen area during the renovation—a microwave and slow cooker can keep meals simple. With measurements and budget in place, your project will stay on track from start to finish.
Designing a Modern Kitchen: Inspiration and Ideas
Colour and cabinetry set the tone for a sleek, functional kitchen. Whether you prefer minimalist elegance or bold contrasts, thoughtful design choices elevate both the look and usability of your space.
Choosing a Colour Scheme
Lighter shades, like soft greys or creamy whites, make compact kitchens feel more spacious. For a contemporary twist, 60% of homeowners opt for dual-tone designs—pairing dark lower cabinets with light uppers. “Contrast creates depth without overwhelming the space,” notes a Third Source study.
Selecting Cabinetry Styles
Kitchen cabinets define the room’s character. Glass-front units and open shelving add airiness, while AVO Renovations’ crackle finishes introduce texture. Hardware finishes matter too:
- Brushed brass for warmth
- Polished chrome for a crisp, modern look
Worktops also play a role. Laminate offers affordability, while quartz delivers durability. Balance aesthetics and practicality for a kitchen that stands the test of time.
How to Renovate an Old Kitchen: DIY vs. Professional Help
Balancing DIY efforts with professional expertise ensures a smooth kitchen transformation. While hands-on projects can save money, certain tasks demand specialist skills for safety and compliance.
When to Call in the Experts
Some jobs are best left to certified professionals. Gas work, structural alterations, and complex electrical rewiring require licensed tradespeople. For a stunning kitchen makeover, it’s always worth hiring experienced fitters who know how to get the job done safely and to the highest standard. Which? Trusted Traders recommends vetting professionals for guaranteed quality.
Key tasks for experts:
- Gas appliance installations or repairs
- Load-bearing wall modifications
- Rewiring or fuse box upgrades
DIY Projects to Maximise Savings
Simple upgrades can slash costs without compromising results. Painting cabinets, installing tiles, or fitting pre-assembled units are manageable for confident DIYers. One homeowner saved £3,500 by self-installing cabinetry.
Essential tools for DIY success:
- Circular saw for precise cuts
- Spirit level for even installations
- Laser measure for accurate layouts
Always follow safety protocols for plumbing or electrical tweaks. When in doubt, consult a professional—budgeting for selective help avoids costly mistakes.
Updating Cabinets: Paint vs. Replacement
Giving your kitchen cabinets a fresh update can redefine the entire look of your space. Whether you opt for a budget-friendly paint job or a full replacement, the right choice depends on condition, budget, and style goals.
Simple Paint Techniques for a Fresh Look
Repainting saves up to 50% compared to replacements, according to Third Source. Start by sanding surfaces for better adhesion, then apply a primer before two finishing coats. “A high-gloss finish adds durability,” advises AVO Renovations, whose crackle technique adds vintage charm.
For a polished result:
- Replace doors handles (£1–£15 each) for instant modernisation.
- Use a mini-roller for smooth, streak-free coverage.
- Allow 24 hours drying time between coats.
When to Consider New Cabinets
Replacement becomes necessary with water damage, warped frames, or outdated layouts. BCIS data shows new kitchen cabinets cost £4,000–£8,000, but second-hand options from Pre Owned Kitchens or Rehome slash expenses.
Signs it’s time to replace:
- Structural instability or broken hinges.
- Irreparable wear on doors or drawer fronts.
- Desire for a completely new configuration.
Whether you refresh or replace, thoughtful updates ensure your cabinets enhance both function and look for years.
Revitalising Cabinet Doors and Drawers
Small changes to your cabinets can dramatically enhance your kitchen’s design. Swapping hardware or adding decorative touches refreshes the look without a full replacement. According to Third Source, 75% of homeowners notice an aesthetic boost from simple updates like new handles or glass inserts.
Replacing Handles and Knobs
Hardware is the jewellery of your cabinets. T-bar pulls suit modern designs, while cup pulls add vintage charm. “Matte black finishes are trending for a sleek contrast against light doors,” notes a Third Source report. Budget-friendly options start at £1 per piece.
Quick tips for a polished result:
- Measure screw spacing to ensure compatibility.
- Opt for brushed brass or chrome for durability.
- Mix styles (e.g., knobs on doors, pulls on drawers).
Adding Moulding or Glass Inserts
Fluted or reeded glass inserts elevate plain doors, diffusing light beautifully. For a DIY approach, attach pre-cut moulding with adhesive for a shaker-style look. A First Source case study achieved a £120 upgrade using reclaimed timber strips.
Cost comparison:
- New doors: £800–£1,200 (mid-range).
- Glass inserts: £30–£80 per panel.
- Moulding kits: £15–£40 per metre.
Whether refreshing handles or installing glass, these tweaks deliver high-impact style on a budget.
Transforming Your Kitchen with New Worktops
The right worktop can redefine your kitchen’s entire aesthetic and functionality. From meal prep to social gatherings, this surface endures daily wear while setting the room’s style tone. Whether you prioritise durability, cost, or visual appeal, strategic choices ensure long-term satisfaction.
Choosing the Right Material
Modern worktops offer diverse options, each with unique perks. Quartz resists stains and scratches, while laminate provides budget-friendly versatility. “Wood adds warmth but requires regular oiling,” notes a Second Source study comparing luxury vinyl tiles to ceramic.
| Material | Cost per m² | Best For |
|---|---|---|
| Quartz | £300–£600 | Busy households |
| Laminate | £40–£100 | Budget makeovers |
| Solid Wood | £200–£400 | Traditional styles |
Consider edge profiles too. A 20mm overhang (First Source standard) prevents spills from dripping, while waterfall edges create a sleek, contemporary look.
Installation Tips for a Flawless Finish
DIY fitting saves up to 60% on labour costs, but demands precision. Use templating kits for accurate cuts, especially around sinks or hobs.
“Professional installation guarantees warranties and perfect seams,”
advises a certified fitter from Which? Trusted Traders.
Key steps for success:
- Seal natural stone immediately to prevent staining
- Allow expansion gaps (3–5mm) for wood
- Use silicone sealant for water-resistant joints
For partial updates, one homeowner spent £250 extending their existing worktop with matching laminate. Whether tackling the project yourself or hiring experts, your new surface will become the kitchen’s crowning glory.
Enhancing Lighting for a Modern Ambiance
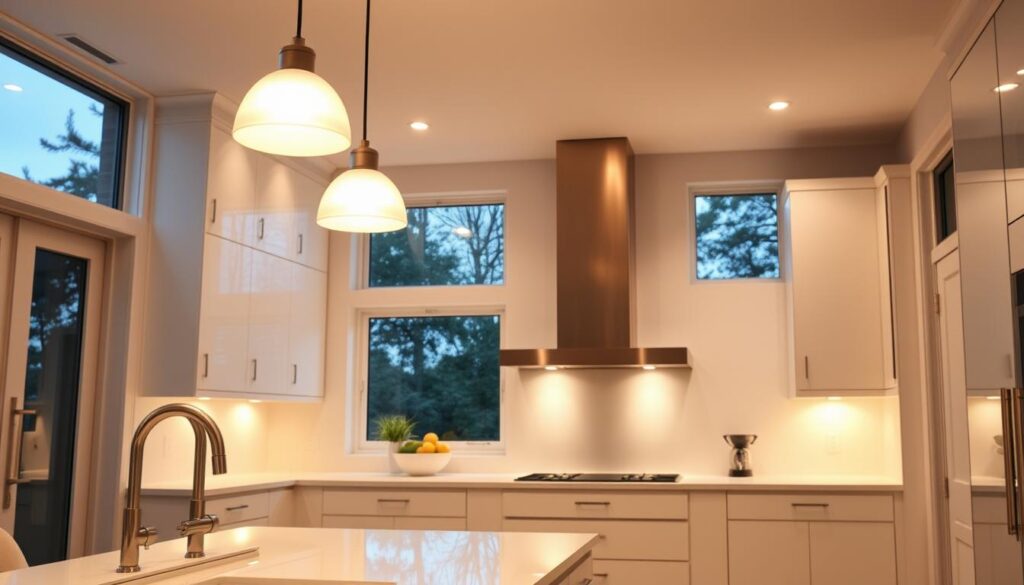
Strategic lighting placement enhances functionality while creating mood. The right combination transforms your kitchen from purely practical to a welcoming space. According to Third Source, LED options now offer 90% energy efficiency compared to traditional bulbs.
Under-Cabinet Lighting Solutions
First Source’s plug-in LED strips provide brilliant task lighting without complex wiring. These slim profiles fit discreetly beneath cabinets, illuminating work surfaces beautifully. Consider these ideas:
- Choose warm white (2700K) for cosy atmospheres
- Opt for dimmable versions to adjust brightness
- Position strips toward the wall to reduce shadows
“Task lighting should complement natural light patterns,” advises a lighting specialist from Which? Magazine. For DIY installations, always check existing wiring capacity before connecting new fixtures.
Pendant Lights and Spotlights
Statement pendants create focal points above islands or dining areas. Hang them 75-90cm above surfaces for optimal impact without obstructing views. Spotlights work well for general illumination, especially in kitchens with low ceilings.
Key considerations for your design:
- Cluster 3 small pendants for visual balance
- Use adjustable spotlights to highlight artwork
- Integrate smart controls for voice-activated dimming
This layered approach ensures your kitchen achieves both practicality and style. The right lighting look makes meal prep easier while setting the perfect evening mood.
Updating Flooring and Splashbacks
Fresh flooring and splashbacks instantly modernise any kitchen, blending practicality with striking design. These elements endure spills, stains, and daily wear while defining the room’s character. Whether you prefer sleek minimalism or bold patterns, smart choices ensure lasting appeal.
Budget-Friendly Flooring Options
Laminate flooring with click-lock systems offers DIY-friendly installation for under £15 per m². Vinyl planks mimic wood or stone textures convincingly, with moisture-resistant varieties ideal for busy households. “Peel-and-stick tiles transform surfaces in hours,” notes a Second Source case study showcasing £50 makeovers.
Key considerations when selecting materials:
- Thickness (8–12mm for durability)
- AC rating (3–5 for residential kitchens)
- Underlayment for noise reduction
| Material | Cost per m² | Lifespan |
|---|---|---|
| Laminate | £12–£25 | 15–25 years |
| Luxury Vinyl | £20–£40 | 10–20 years |
| Ceramic Tiles | £25–£60 | 20+ years |
Creative Splashback Designs
Splashbacks protect walls while adding personality. Glass panels (£80–£150 per m²) create seamless, hygienic surfaces, while PVC alternatives offer similar looks at half the cost. For renters or quick updates, peel-and-stick films replicate subway tiles effortlessly.
“Contrasting grout colours turn basic tiles into statement features,”
Innovative ideas to consider:
- Metallic finishes for industrial chic
- Chalkboard paint for functional notes
- Reclaimed wood for rustic charm
With moisture-resistant materials and clever design, these updates deliver style and practicality in equal measure. The right combination transforms your kitchen into a space that works as hard as you do.
Budget-Savvy Renovation Tips
Smart spending doesn’t mean compromising on style. With clever strategies, you can achieve a stunning kitchen makeover while keeping costs under control. Focus on high-impact changes that deliver maximum value for your budget.
Second-Hand and Ex-Display Kitchens
Pre-owned units offer incredible savings—up to 85% off retail prices, according to Second Source. Rehome and similar platforms specialise in quality used kitchens, often with minimal wear. Ex-display models from showrooms are another way to save money without sacrificing quality.
Key sourcing tips:
- Inspect for scratches or water damage before purchasing
- Verify all cabinet dimensions match your space
- Ask about included appliances or fittings
Cost-Effective DIY Hacks
Simple DIY projects can transform your kitchen for under £100. First Source’s £60 paint makeover proves creativity beats cash when refreshing tired surfaces. Multi-purpose chalk paint works on cabinets, walls, and even tiles for cohesive styling.
Clever concealment ideas:
- Use magnetic panels to hide dated appliances
- Install open shelving from reclaimed wood
- Upcycle existing handles with metallic spray paint
“Always allocate 15% of your budget for unexpected costs,”
advises a Which? Money expert. This contingency fund prevents stress when surprises arise during the renovation process.
Maintaining Your Newly Renovated Kitchen
Preserving your kitchen‘s fresh appeal requires consistent care and smart habits. A little effort extends the life of surfaces and fixtures, ensuring your space stays as stunning as the day it was completed.
Daily Cleaning and Care Tips
Microfibre cloths are a game-changer for daily wipe-downs. “They trap grease without harsh chemicals,” confirms a Third Source study on kitchen upkeep. For cabinets, use pH-neutral cleaners to avoid damaging finishes.
Quick routines to adopt:
- Wipe spills immediately to prevent stains on worktops.
- Lubricate hinges annually with silicone spray to avoid squeaky doors.
- Touch up painted surfaces using leftover paint for seamless repairs.
Long-Term Upkeep Strategies
Protect your investment with seasonal deep cleans. Reseal stone worktops every 1–2 years to guard against water damage—a £50 kit saves £500+ in replacements.
Preventative measures pay off:
- Check under-sink plumbing for leaks monthly.
- Rotate cabinet contents to evenly distribute wear.
- Use coasters and trivets to shield surfaces from heat and moisture.
“A 15-minute weekly tidy prevents overwhelming weekend clean-ups,”
advises a Which? home expert. With these steps, your kitchen will maintain its polished look while minimising long-term costs.
Conclusion
Transforming your kitchen requires smart choices and careful execution. Whether tackling a full renovation or phased updates, planning ensures cost-effective results. DIY projects, like painting cabinets, can save thousands—£5,680 versus £9,000+ for professional work.
AVO Renovations’ crackle finishes and durable materials promise lasting style. Focus on high-impact changes first, such as lighting or worktops, to refresh the look without overspending.
Ready to begin? Start with a single upgrade and build momentum. Your dream kitchen is closer than you think.
FAQ
What’s the best way to modernise an outdated kitchen?
Start by assessing key areas like cabinets, worktops, and lighting. A fresh coat of paint, new handles, and updated lighting can instantly refresh the space without major structural changes.
Should I replace or repaint my old kitchen cabinets?
Repainting is a cost-effective option if the cabinet frames are sturdy. For a complete transformation, consider replacement or refacing if the layout no longer works.
How can I make a small kitchen feel more spacious?
Use light colours, reflective surfaces, and clever storage solutions. Open shelving and under-cabinet lighting also help create an airy feel.
What’s the most budget-friendly flooring option for a kitchen renovation?
Vinyl or laminate flooring offers durability at a lower cost. Ex-display tiles or reclaimed wood can also save money while adding character.
Can I renovate my kitchen without professional help?
Yes! Tasks like painting, replacing handles, or installing splashbacks are DIY-friendly. For plumbing or electrical work, hiring experts ensures safety and compliance.
How do I choose the right worktop material?
Consider durability, maintenance, and budget. Laminate is affordable, quartz is low-maintenance, and granite offers a premium finish.
What lighting works best for a modern kitchen?
Layer lighting with spotlights for task areas, pendant lights over islands, and under-cabinet LEDs for a sleek, functional look.
Are second-hand kitchen units worth considering?
Absolutely! Ex-display or pre-owned units in good condition can save money. Just check for damage and ensure they fit your space.
How can I add storage without cluttering my kitchen?
Use pull-out drawers, corner carousels, and vertical storage. Open shelving keeps essentials handy while maintaining a clean look.
What’s the easiest way to update a tired splashback?
Peel-and-stick tiles or a fresh coat of gloss paint offer quick, affordable updates. For a statement look, try patterned tiles or mirrored panels.

