Turning your kitchen into a welcoming space is easy with a kitchen island. These units add storage, extra work space, and can be a dining area. But, making sure your island is stable and safe is key. This guide will show you how to install a kitchen island securely and safely.
Getting the planning right and executing it well is crucial. This article will teach you how to measure, secure, and stabilise your island. It will become a beautiful and useful part of your kitchen. This detailed guide will tell you all you need to know about tools, materials, and techniques for a sturdy island.
This article covers everything from attaching cleats to the floor to adding the final touches. Whether you’re doing it yourself or hiring a pro, you’ll learn how to make a kitchen island that looks great and works well1.
Understanding Kitchen Island Installation Basics
Planning a kitchen island installation needs a good grasp of the basics2. You must measure the space well and place the island right3. Choosing the right spot and size can make your kitchen better to use and look at.
Essential Tools and Materials Needed
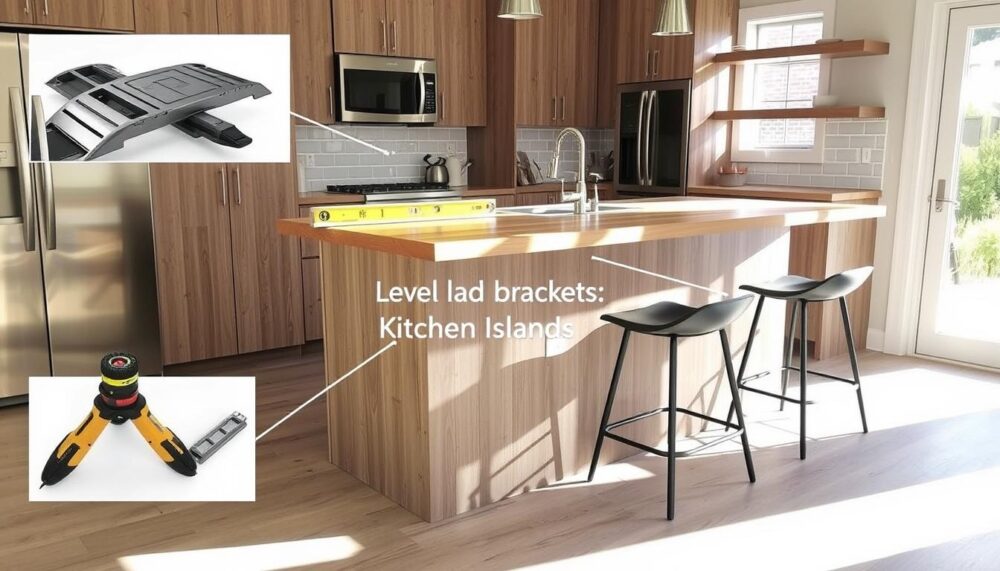
For a successful kitchen island setup, you need the right tools2. A drill, tile drill bit, and measuring tape are key2. Also, screws and 2×4 wood for cleats are important. With the right tools, the job will go smoothly and look great.
Space Requirements and Planning
The size and where you put your kitchen island matter a lot4. Make sure there’s enough room around it, at least 1200mm on all sides3. Think about how it fits with the rest of your kitchen and access to utilities4.
You Might Also Like:


Safety Considerations Before Installation
Safety is key when installing a kitchen island2. Use tools and materials safely and check the floor can hold the island’s weight2. Also, get licensed pros to handle water, gas, and electricity connections2.
Knowing the basics of tools, materials, space, and safety helps a lot3. With good planning and care, you can make your kitchen better and more beautiful. It will meet your needs and look great.
Preparing Your Kitchen Floor for Island Installation
Getting your kitchen floor ready for an island is key. First, check the floor type and its condition. For tile floors, you’ll need a special drill bit to make holes for screws5. Make sure the floor can handle the island’s weight. Use tape or markers to mark where the island will go6.
Clean the area well before you start. This makes sure the island fits perfectly and looks great7. Also, turn off nearby water, gas, and electricity to stay safe7.
- Evaluate the type and condition of your kitchen floor, such as tile or wood.
- Use a tile drill bit to create holes for securing the island to tiled floors.
- Ensure the subfloor is stable and can support the weight of the kitchen island.
- Mark the outline of the island on the floor using painter’s tape or washable markers.
- Thoroughly clean the installation area before beginning the process.
- Disconnect any relevant utilities, such as water, gas, or electricity, for safety.
By carefully preparing your floor, you set up a solid base for your island. This careful step ensures your island is stable and works well in your kitchen5.
How to Install a Kitchen Island to the Floor
Creating a kitchen island is a great way to upgrade your home. It needs careful planning and precise steps. We’ll show you how to install your island securely, making it sturdy and lasting.
Measuring and Marking the Installation Area
First, measure your kitchen island’s size. Islands should be at least four feet long for easy movement8. Mark where the island will go, considering your kitchen’s layout.
Installing Support Cleats
Now, set up a strong base for your island. Cut 2×4 cleats to fit inside the island’s base9. Place them around the area, making sure they’re level and fixed to the floor. Use 3-inch screws to attach them to the tile and subfloor9.
Securing Cabinets to the Floor
With the cleats ready, attach the cabinets to the floor. Align them with the marked area and cleats. Use screws to fix the cabinets to the cleats9. Check they’re level and aligned before finishing.
Success in installing a kitchen island comes from careful detail and a step-by-step approach. By following these steps, you’ll have a stable and beautiful island at the heart of your kitchen.
Connecting and Stabilising Multiple Cabinets
Installing a kitchen island with many cabinets needs careful connection for stability. Use clamps to keep the cabinets at the front. Then, add screws inside to make them strong10. Always pre-drill holes to avoid wood cracks10.
It’s important to make sure all cabinets are level and aligned before attaching them. Good alignment and multi-cabinet installation make your kitchen island stable and strong.
- Use clamps to hold cabinets flush at the front
- Add screws on the inside panel to join the cabinets
- Pre-drill holes to avoid cracking the cabinet wood
- Ensure all cabinets are level and properly aligned

“Careful attention to cabinet alignment and multi-cabinet installation is key to achieving a sturdy and stable kitchen island structure.”
Adding Finishing Touches and Support Features
Now it’s time to finish your kitchen island. You’ll need to add trim and baseboards to hide screws or gaps. Also, test the island’s stability and make any last adjustments. These steps will make your kitchen look great and last longer.
Installing Trim and Baseboards
First, put the island in place securely. Then, add trim and baseboards around the base for a polished look. Kitchen island trim comes in wood, PVC, or metal to match your kitchen style10.
Testing Island Stability
Before you’re done, check if the island is stable. Push it gently from different sides. If it wobbles, you might need to add screws or bracing to stabilise the island10.
Final Adjustments and Checks
Do a final check to make sure everything works right. Check that cabinet doors and drawers move smoothly. Also, make sure the island is level and fixed to the floor. Fix any small issues now to avoid problems later.
By finishing these steps, your kitchen island will be strong and look great for years.
| Metric | Value |
|---|---|
| Average cost of a professional kitchen island | $1,000 to $7,00010 |
| Electrical outlet requirement for permanent kitchen islands | National Electrical Code (NEC) requires it10 |
| Granite countertop cost range | $60 to $100 per square foot10 |
| Overhang length requiring additional support | Longer than 9 inches10 |
| Recommended space around kitchen island | 42 to 48 inches10 |
| Recommended paint for kitchen islands | Latex satin paints10 |
| Recommended attachment method for countertops to cabinets | 1-½ inch steel angles with #8 ⅝-inch screws10 |
Our team has over11 25 years of experience in kitchen sales and11 tens of thousands of kitchens installed. We offer a11 3D Online Kitchen Planner and detailed design tools. Our glossary and safety tips will help you install your kitchen island smoothly.
“To complete the installation of your kitchen island, it’s time to add the finishing touches. This includes installing trim and baseboards to cover any exposed screws or gaps, as well as testing the stability of the island and making any final adjustments.”
Conclusion
Adding a kitchen island to the floor can make your kitchen more functional and stylish12. It’s important to plan well, measure accurately, and attach it securely for a good DIY kitchen island job12. Think about how people move around, door swings, and nearby objects when picking a spot for the island12.
Make sure there’s enough room for chairs and that the island doesn’t block the way12. Also, think about how much countertop and storage space you need12.
13 A kitchen island can cost between £3,000 and £7,000, but it’s worth it for the look and value it adds to your home13. King Installation helps homeowners every step of the way, making the kitchen upgrade smooth13.
14 Keep at least 1 meter (about 3 feet) of space around the island for easy movement14. Follow the work triangle rule and place the island for better socialising14. Talking to design experts can help find the best spot and design for your island14.
FAQ
What are the key benefits of installing a kitchen island?
Kitchen islands add more storage and workspace. They make kitchens more functional.
What are the essential tools and materials needed for kitchen island installation?
You’ll need a drill, tile drill bit, and measuring tape. Also, screws and 2×4 wood for cleats.
How much clearance is typically required around a kitchen island for movement?
You need 48 inches of space around the island for easy movement.
What are the safety considerations when installing a kitchen island?
Always handle tools and materials safely. Make sure the floor can hold the island’s weight.
How should the floor be prepared for kitchen island installation?
Check the floor type and condition first. For tiled floors, use a tile drill bit for screw holes.
What is the process for measuring and marking the installation area?
Measure and mark the area carefully. Cut 2×4 cleats a bit shorter than the cabinet base.
How are the cabinets secured to the floor during installation?
Drill through wood into tile and subfloor for cleats. Use 3-inch screws. Then, screw cabinets to cleats through front and back panels.
How are multiple cabinets connected for added stability?
Connect multiple cabinets for stability. Use clamps to align them, then screw them together inside.
What finishing touches are added to the kitchen island installation?
Add trim and baseboards to hide screws. This improves the island’s look.
How is the stability and safety of the installed kitchen island tested?
Test stability by pushing the island gently. Make adjustments if needed. Add extra screws for extra support.