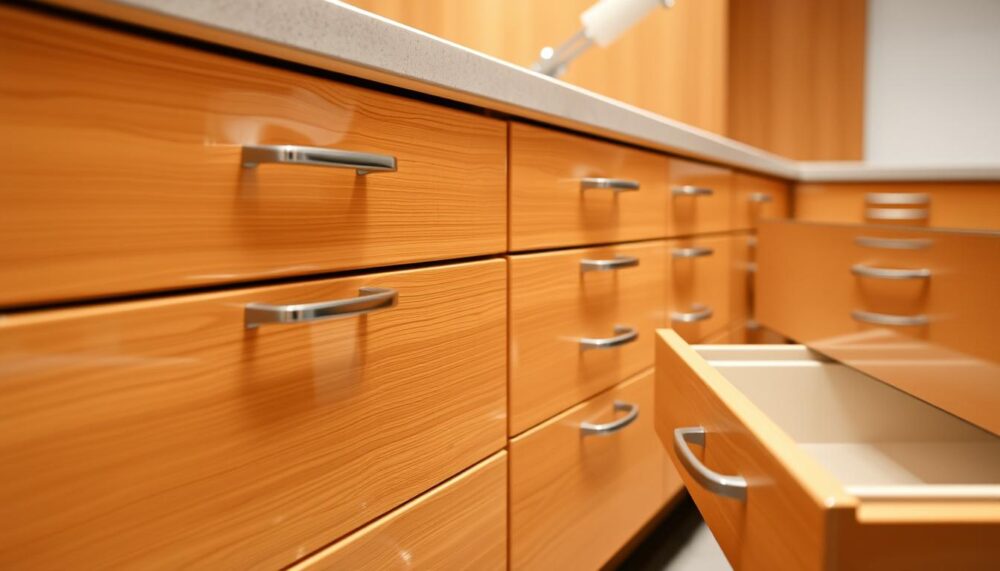
Nothing disrupts a kitchen’s harmony quite like a misaligned or sticking drawer. When your cabinets don’t function smoothly, it affects both daily use and the room’s overall aesthetic. This guide provides clear, step-by-step advice to rectify these common issues.
Proper alignment is crucial for smooth operation and can prevent long-term damage. With a little patience and the right approach, you can achieve professional results yourself. This process is designed to be DIY-friendly, saving you both time and money on call-outs.
We will focus on the vertical and horizontal screws that control the position of your units. Following the manufacturer’s instructions ensures safety and effectiveness. Regular maintenance through these simple adjustments can significantly extend the life of your kitchen furniture.
This advice is tailored for B&Q products but may apply to similar systems. By working methodically, you can confidently tackle this task and enjoy a seamlessly functioning kitchen.
Key Takeaways
- Correct alignment is essential for both functionality and the visual appeal of your kitchen.
- Simple adjustments can prevent common problems like drawers that stick or are misaligned.
- The process is a manageable DIY task that can save you money on professional services.
- Always consult the manufacturer’s guidance for the safest and most effective methods.
- Focus on the adjustment screws for vertical and horizontal positioning of the drawer fronts.
- Taking your time and working carefully will yield the best and most long-lasting results.
- For more on mastering self-closing cabinet drawers, explore our detailed resources.
Understanding How to Adjust B&Q Kitchen Drawers
A well-organised kitchen relies on drawers that function perfectly. When they slide smoothly and align neatly, your space feels more efficient and visually cohesive.
Why Proper Drawer Alignment Matters
Correct alignment prevents common frustrations. Drawers that stick or jam can damage their runners over time.
This wear reduces their lifespan and affects your kitchen’s efficiency. Neatly aligned fronts also create a uniform look alongside cabinet doors.
Types of B&Q Drawer Adjustment Systems
Most B&Q drawers use screw-based mechanisms. You will typically find vertical and horizontal adjustment screws.
These are often labelled as Screw B (rear) and Screw C (side). They allow precise movement of the drawer box.
Many models also use clips or brackets to attach the front panel. These must be released before making any changes.
Drawer construction varies between three-wall and four-wall boxes. This affects where you access the screws.
Always consult your model’s installation guide. This ensures you use the correct method and avoid over-tightening.
Understanding your system makes the process straightforward. It sets you up for a successful DIY project.
Essential Tools for Adjusting Your Kitchen Drawers
Having the right equipment makes all the difference when fine-tuning your storage solutions. A well-prepared toolkit ensures precise modifications without causing damage to components.
Most adjustments require simple hand tools rather than power equipment. This approach protects delicate mechanisms while giving you better control over small movements.
Basic Toolkit Requirements
Your core collection should include several fundamental items. A manual screwdriver proves essential for working with adjustment screws.
Choose the correct type to match your cabinet’s hardware. Many systems use pozidriv heads rather than standard Phillips designs.
A spirit level helps verify alignment during the process. Masking tape serves well for marking positions before making changes.
Consider these essential items:
- Manual screwdriver (pozidriv or Phillips as required)
- Quality spirit level for checking alignment
- Masking tape for temporary position marking
- Tape measure for ensuring equal spacing
- Small clamp for stabilising components if needed
Specialised Tools for Specific Adjustments
Most drawer modifications don’t require specialised equipment. However, certain situations might benefit from additional tools.
A clamp can help stabilise the front panel during work. This proves useful when dealing with heavier drawer fronts.
While installation guides sometimes mention power drills, they’re rarely needed for adjustments. Manual tools provide better feel and prevent over-tightening.
| Tool Type | Primary Use | When to Use |
|---|---|---|
| Manual Screwdriver | Turning adjustment screws | All alignment tasks |
| Spirit Level | Checking horizontal alignment | After each adjustment |
| Masking Tape | Marking original positions | Before making changes |
| Tape Measure | Ensuring equal spacing | When aligning multiple units |
| Small Clamp | Stabilising components | With heavier front panels |
Keep your tools organised throughout the process. This prevents misplacing small components like clips or brackets.
With these basic items, you can achieve professional-looking results. Your storage solutions will operate smoothly and look perfectly aligned.
Preparing Your Drawers for Adjustment
Proper preparation transforms alignment from frustrating chore to satisfying accomplishment. Taking these initial steps carefully prevents damage and ensures smooth operation afterwards.
Removing Front Panels Safely
Begin by locating the centre screw marked A on your unit’s connection plates. Turn this screw gently to unlock the brackets without applying force.
Painted surfaces require particular care during this process. Always support the panel as you detach it from the main box.
Accessing the Adjustment Mechanisms
Next, remove the clip-on cover caps from your storage unit’s sides. These protective covers conceal the vital adjustment points.
You’ll reveal screws B and C once the caps are removed. These control vertical and horizontal positioning respectively.
Identifying Screws and Clips
Check whether transport clips are already in place on your units. These should be properly engaged before beginning any modifications.
Consult your manufacturer’s guide if uncertain about component identification. Correct recognition prevents errors during the actual alignment process.
Consider labelling parts when working with multiple storage solutions. This simple step avoids confusion when reassembling your kitchen ensemble.
Clear the surrounding area provides better access and prevents accidents. This preparation makes the entire process more efficient and enjoyable.
Thorough preparation ensures professional results while protecting your investment. These careful steps guarantee smooth operation and perfect alignment throughout your space.
Adjusting Drawer Vertical Alignment
Getting your storage solutions sitting just right transforms their operation. When everything lines up perfectly, your space feels more organised and functions beautifully.
Mastering the Rear Adjustment Mechanism
Locate screw B on your unit’s rear plate. This clever component controls the vertical position of your storage box.
Turn it clockwise to raise the front panel. Counterclockwise movements lower it instead.
Small quarter-turns make subtle differences. This precision allows perfect alignment with neighbouring cabinets.
“Minor adjustments yield major improvements in functionality”
Achieving Consistent Spacing Throughout
Use a spirit level across multiple fronts. This ensures they sit uniformly throughout your space.
Measure gaps between panels with a tape measure. Equal spacing creates visual harmony alongside doors.
Work on one storage solution at a time. This maintains consistency across your entire installation.
Testing for Smooth Operation
Slide your storage box in and out repeatedly. It should move freely without catching or sticking.
If movement feels rough, make tiny screw B adjustments. Retest after each modification until perfect.
Proper vertical alignment prevents front panels rubbing. This protects finishes and ensures longevity.
| Adjustment Type | Tool Required | Expected Result |
|---|---|---|
| Vertical Positioning | Screwdriver | Level alignment with worktops |
| Gap Consistency | Tape Measure | Even spacing between fronts |
| Smoothness Test | None | Free movement without resistance |
These careful steps create storage that works perfectly. Your efforts will be rewarded with seamlessly functioning solutions.
Adjusting Drawer Horizontal Alignment
Once your storage units sit at the correct height, attention turns to their side-to-side placement. This ensures everything lines up beautifully with surrounding cabinets.
Utilising the Horizontal Adjuster (Screw C)
Locate screw C on the connection plates. This clever mechanism controls left-right movement of your storage box.
Turn it clockwise to shift the front panel towards the cabinet’s interior. Anti-clockwise rotations move it outward instead.
Make quarter-turn increments and test after each modification. Small changes prevent over-correction and ensure precision.
Aligning Drawer Fronts with Cabinet Doors
Compare gaps between your storage fronts and adjacent doors. They should appear equal when viewed from various angles.
Use a spirit level across multiple fronts to check alignment. Consistent spacing creates visual harmony throughout your space.
Sometimes door hinges need slight tweaking for perfect consistency. This ensures everything integrates seamlessly.
Maintaining Parallel Runner Alignment
Runners must remain parallel to prevent binding and wear. Measure distances between them at front and back positions.
Equal measurements guarantee smooth operation. Misaligned runners cause jamming and reduce lifespan.
Test movement by sliding your storage unit repeatedly. It should glide effortlessly without resistance.
| Alignment Aspect | Tool Required | Verification Method |
|---|---|---|
| Horizontal Positioning | Screwdriver | Visual gap comparison |
| Front Consistency | Spirit Level | Multi-unit level check |
| Runner Parallelism | Tape Measure | Front/back measurement |
| Operation Smoothness | None | Sliding test |
Step back periodically to view overall alignment. Fine adjustments create storage that looks and functions perfectly.
Horizontal positioning completes your alignment journey. Combined with vertical adjustments, it delivers professional results.
Troubleshooting Common Drawer Problems
Even the most carefully installed storage solutions can develop operational issues over time. Fortunately, many common problems have straightforward fixes that restore smooth functionality.
Most challenges respond well to systematic troubleshooting approaches. With patience and the right techniques, you can often resolve issues yourself.
Fixing Sticking or Catching Drawers
Storage units that catch or stick during operation usually need attention to their runners. First check for debris accumulation in the tracks.
Clean any obstructions gently with a soft cloth. Then verify runner alignment using your tape measure.
If problems persist, revisit screws B and C with small adjustments. Test movement after each quarter-turn modification.
Addressing Uneven Gaps Between Drawer Fronts
Inconsistent spacing between front panels disrupts your kitchen’s visual harmony. This typically indicates needing vertical or horizontal screw refinements.
Use your spirit level across multiple units to identify inconsistencies. Make tiny adjustments to achieve uniform spacing throughout.
Compare gaps beside cabinet doors for perfect integration. Sometimes neighbouring doors need slight hinge modifications for complete consistency.
Solving Drawer Front Movement Issues
Loose front panels often result from insecure attachment points. Check whether connection clips require tightening or replacement.
For top-mounted handles, additional screws through pre-drilled holes might provide extra stability. Always use gentle force to avoid damaging finishes.
Avoid over-tightening any components, particularly with painted surfaces. Excessive force can cause cracking or permanent damage.
| Common Issue | Primary Solution | Additional Checks |
|---|---|---|
| Sticking operation | Clean runners and adjust screws | Check for warped components |
| Uneven spacing | Re-adjust vertical/horizontal screws | Verify spirit level alignment |
| Loose front panel | Tighten clips or add screws | Inspect attachment plates |
| General malfunction | Repeat adjustment steps | Consult manufacturer guide |
Most challenges resolve through careful reapplication of adjustment steps. Regular maintenance prevents many issues from developing.
Test each storage unit thoroughly after modifications. If problems continue, consult your manufacturer’s instructions or consider professional assistance.
With patience and methodical troubleshooting, you can restore perfect operation throughout your kitchen storage system.
Conclusion
Perfectly aligned storage units transform your kitchen’s functionality and appearance. The process focuses on vertical and horizontal screws for precise positioning.
Using proper tools and careful preparation ensures smooth operation. This approach maintains your cabinets’ aesthetic appeal and extends their lifespan.
Regular checks and minor tweaks keep everything working beautifully over time. This rewarding DIY project enhances your daily kitchen experience.
Refer back to specific sections if challenges arise during your project. B&Q’s support resources offer additional assistance when needed.
A well-organised space makes daily tasks more enjoyable. Thank you for using this guide – we wish you every success with your units.
FAQ
What tools do I need to adjust my B&Q kitchen drawers?
You’ll typically need a screwdriver (often a Phillips head), and possibly a drill if making new holes. For specific systems, check if your model requires a specialised tool, though most use standard screws.
How do I access the adjustment screws on my drawers?
First, open the drawer fully. Look inside the drawer box on each side for the adjustment screws. They are often located near the runner mechanism. Some models may require you to partially remove the drawer front to reach them.
My drawer front is uneven with the cabinet doors. How do I fix this?
This is a common issue with horizontal alignment. Locate the horizontal adjustment screws, usually found on the brackets. Turning these screws will shift the entire drawer front left or right until it sits flush with your cabinet doors.
The drawer is sticking and doesn’t slide smoothly. What’s wrong?
This often points to an alignment problem. Check that the drawer box is sitting level and that the runners are parallel. Use the vertical adjustment screws at the rear to raise or lower that side until the movement is smooth.
Can I adjust the gaps between my drawer fronts?
Absolutely. The key is ensuring each drawer box is aligned correctly within its space. Use the adjustment screws on each side to move the box minutely, which in turn adjusts the drawer front and the gap around it for a uniform look.
What should I do if the adjustments don’t solve the problem?
First, double-check that all screws on the runners and brackets are fully tightened. If issues persist, the runner mechanism itself might be faulty. In this case, consult B&Q’s customer service for advice or potential replacement parts.


