Looking for a stylish and adaptable storage unit that fits your home perfectly? The modular design of these cabinets makes them a favourite for DIY enthusiasts. Whether you need extra space or a sleek new look, the possibilities are endless.
With a variety of sizes and finishes, these units can be tailored to suit any room. Pair them with doors, drawers, or open shelving for a personalised touch. The brand’s official design tools also help visualise your ideal setup before starting your project.
From simple upgrades to full transformations, a little creativity can turn basic storage into a standout feature. This guide will explore practical tips and inspiring ideas to help you achieve the perfect style.
Key Takeaways
- Modular design allows for endless customisation options.
- Compatible with accessories like doors and drawers.
- Official design tools help plan your layout in advance.
- Affordable way to create high-end-looking furniture.
- Ideal for maximising space in any room.
1. Introduction to IKEA Besta Hacks
Transform your living space with clever customisation ideas for modular furniture. The system offers three flexible approaches: pre-designed combinations, basic “building block” units, and accessory integrations. Whether you need a media console or sleek cabinets, the options adapt effortlessly.
Eco-conscious? The honeycomb paper-filled panels are 100% recyclable, reducing waste without compromising durability. “It’s a win for both style and sustainability,” notes a London-based interior designer.
For inspiration, consider Brooklyn creatives who wrapped their storage in chrome vinyl for just £60. Similarly, built-in solutions from bedroom makeovers prove how these designs maximise space:
You Might Also Like:


- Pre-assembled combos for quick setups
- Mix-and-match basic units for unique layouts
- Affordable upgrades like legs or lighting
Compared to designer furniture, these DIY projects save hundreds while delivering high-end looks. Ready to reimagine your home?
2. Planning Your IKEA Besta Hack
Planning is key when creating a personalised storage unit for your space. A clear roadmap saves time, money, and frustration. Whether you’re fitting a recessed alcove or designing a media console, these steps ensure your DIY project aligns with your vision.
Sketching Your Design
Start by measuring your available area. For example, a 47″ unit fits snugly into a 50″ alcove with room for trim. Sketch rough diagrams, noting dimensions and potential obstacles like sockets.
Combine hand-drawn sketches with digital tools like the brand’s online planner. This dual approach helps visualise proportions and test options before committing.
Budgeting for Supplies
List all materials, from contact paper (£30/roll) to butcher blocks. Allocate 15% extra for unexpected costs—like Dipa Halder’s chrome vinyl wrap, which required additional adhesive.
Use budget templates to track expenses. Prioritise essentials first, then add decorative touches if funds allow.
Creating a Moodboard
Collect inspiration on Pinterest or physical boards. Mix textures, colours, and hardware styles to refine your aesthetic. “A moodboard turns abstract ideas into a cohesive plan,” says a UK interior designer.
| Planning Method | Pros | Cons |
|---|---|---|
| Hand Sketches | Quick, flexible changes | Less precise scaling |
| Digital Tools | Accurate measurements | Steeper learning curve |
With measurements, budgets, and inspiration sorted, you’re ready to bring your storage vision to life.
3. Pre-Designed Combinations vs. Basic Units
Ready-made or DIY? The choice depends on your space and style goals. Modular cabinet units offer two paths: pre-assembled sets for convenience or blank-canvas basics for total creativity.
Pre-designed combos like the BESTÅ TVBOARD suit quick media setups. They’re ideal for standard spaces and busy households. “It’s plug-and-play elegance,” says a Manchester-based home stylist.
Basic units shine in unconventional layouts. For example, Source 3’s symmetrical fireplace built-ins used standalone frames to fit awkward alcoves perfectly. Consider these options:
- Pre-designed: Faster, cohesive look
- Basic units: Adapt to odd corners or heights
- Hybrid: Pair pre-made frames with custom fronts
| Type | Best For | Limitations |
|---|---|---|
| Pre-designed | Quick solutions, uniform aesthetics | Less sizing flexibility |
| Basic Units | Custom projects, unusual spaces | Requires more planning |
Whether prioritising speed or tailoring to your needs, modular storage adapts. Mix both approaches for a personalised yet polished result.
4. Essential Tools and Materials for Hacking
Gathering the right tools is the first step to transforming your storage units. Whether you’re adding sleek doors or crafting a bespoke drawer system, quality equipment ensures professional results. Here’s how to build your toolkit without breaking the bank.

Must-Have DIY Tools
Start with basics like an orbital sander for smoothing panels and a circular saw for precise cuts. A nail gun speeds up assembly, while X-Acto knives perfect vinyl wraps. “Invest in a good sanding block—it’s a game-changer for finishes,” advises a Leeds-based carpenter.
Safety matters. Always wear goggles and gloves when using power tools. Beginners should practise on scrap wood first. For chrome effects, use adhesive sprays instead of risky heat guns.
Affordable Upcycling Materials
Chrome contact paper (£15/roll) mimics metal wraps at a fraction of the cost. Butcher block countertops, like those used in Source 3’s project, add warmth and durability. Other budget-friendly picks:
- Soft-closing hinges: Prevent slamming (from £2 each)
- Desk grommets: Neaten cable holes (pack of 5 for £8)
- Replacement legs: Hairpin or mid-century styles (under £20/pair)
With these tools and materials, even novices can tackle upgrades confidently. Ready to bring your vision to life?
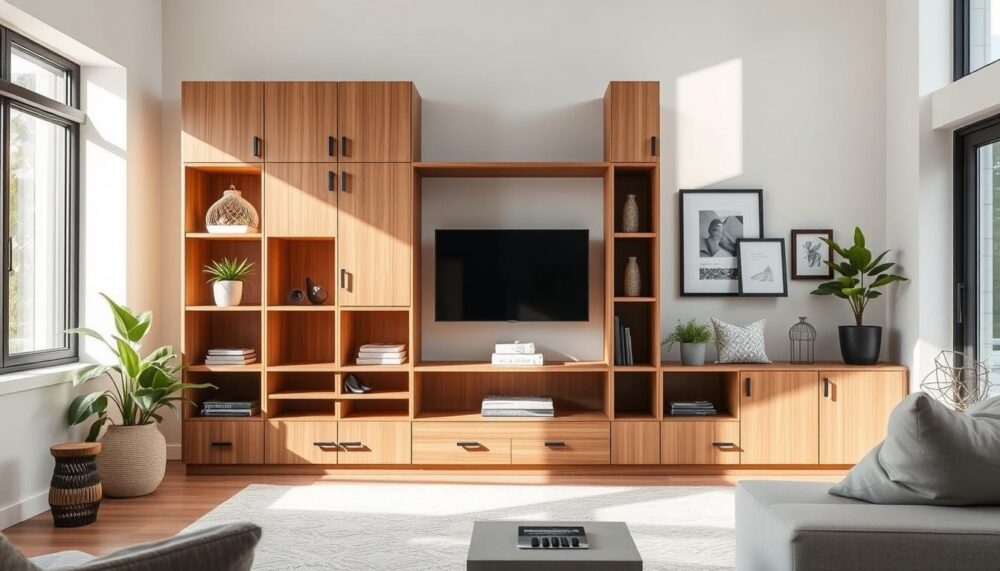
5. Top IKEA Besta Hack Ideas to Inspire You
Revamp your space with standout customisation ideas for modular units. Whether you crave a glossy media console or hidden pet storage, these projects blend function with flair. Below, we break down three showstopping transformations.
Chrome-Wrapped Media Unit
For a luxe look, chrome vinyl wraps mimic high-end finishes. Start by sanding surfaces for adhesion, then apply contact paper in sections to avoid bubbles. “A hairdryer helps smooth stubborn wrinkles,” notes a London upcycler.
Brooklyn designers achieved this for £60—proof that budget-friendly tweaks deliver designer vibes. Pair with LED strips for a futuristic glow.
Built-In Bedroom Storage
Create seamless built-ins using 1×2″ filler trim and matched baseboards. This illusion works wonders in alcoves or under eaves. Source 3’s fireplace project used this trick to blend units with original mouldings.
For more ideas, explore these IKEA Besta hacks that maximise storage in every corner.
Floating Credenza for Displays
Hidden bracket systems create weightless displays. Mount units 18″ above floors for a clean, airy feel. Add glass shelves or cane inserts (as seen in home magazines) to soften the look.
Pro tip: Use Zinsser BIN primer to prevent chipping on painted surfaces. Perfect for DIYers tackling high-traffic areas.
6. How to Add Custom Doors and Fronts
Custom doors can transform basic storage into a designer feature. Whether you prefer sleek minimalism or rustic charm, swapping standard panels personalises your space. Here’s how to achieve a seamless upgrade.

DIY vs Third-Party Fronts
For a budget-friendly approach, craft shaker-style MDF fronts using a router and wood glue. Alternatively, brands like Superfront offer pre-cut doors in trendy finishes. Consider these options:
- DIY: Full creative control, lower cost
- Third-party: Time-saving, professional finishes
Hinge Types Explained
Hidden hinges (like Blum Clip Top) create a clean look, while visible hinges suit industrial style. Use a drill jig for precise alignment. “Soft-closing hinges prevent slamming and add luxury,” notes a Birmingham joiner.
| Hinge Type | Best For | Installation Difficulty |
|---|---|---|
| Hidden | Modern, handle-free designs | Moderate (requires drilling) |
| Visible | Vintage or eclectic spaces | Easy (surface-mounted) |
Seamless Alignment Tips
Pair custom fronts with 1×2″ filler trim to blend edges with walls. Source 3’s flush technique ensures gaps disappear. For drawer fronts, use spacer blocks during fitting to maintain even margins.
Push-Open Mechanisms
Ditch handles with push-to-open catches (£5 each). Install them 50mm from the top edge for ergonomic access. Ideal for low-profile units in tight spaces.
With these techniques, even beginners can achieve a high-end style. Ready to redefine your storage?
7. Stylish Legs and Feet Upgrades
The right legs turn basic units into statement furniture pieces. Whether you prefer retro flair or modern mobility, swapping standard feet elevates both look and function. Here’s how to choose and install the perfect upgrade.
Mid-Century Modern Legs
Tapered wooden legs add retro charm to cabinet bases. Brands like Capita offer affordable options (£15–£30/set) in walnut or oak. “They mimic high-end designer furniture at a fraction of the cost,” says a Brighton upcycler.
For stability, attach legs using corner braces. Source 3’s plywood strip method hides gaps between legs and trim seamlessly.
Besta on Casters for Mobility
Locking casters (£12/set) transform units into movable toy storage or kitchen trolleys. Opt for rubber wheels to protect floors. “A 10-minute DIY job adds versatility,” notes a Manchester home organiser.
- Hairpin legs: Minimalist and sturdy (supports 50kg/leg)
- Mid-century: Warmth with 28cm height options
- Adjustable feet: Level units on uneven floors
Always check weight limits—overloading can warp frames. For credenza proportions, extend legs to 40cm using threaded inserts.
8. Creative Lighting and Shelving Tweaks
Brighten up your storage with clever lighting and shelving ideas. Small changes can make a big impact, turning basic units into eye-catching features. Here’s how to elevate your space effortlessly.
LED strip lighting under floating units adds a modern glow. Use warm white for cosy vibes or cool white for a sleek look. Self-adhesive strips make installation a breeze—just plug into a nearby socket.
Adjustable shelves create display niches for books or decor. For a luxe touch, add glass shelves. They reflect light beautifully and keep the space feeling open.
Hide cords like Source 3’s butcher block project. Drill a 2″ hole with a brass grommet for lamp wiring. “It keeps things tidy and professional,” says a DIY enthusiast.
Wireless charging pads integrated into countertops are a smart way to declutter. Embed them flush with the surface for seamless use. Perfect for modern home offices inspired by ikea desk hacks.
With these tweaks, your storage will shine—literally and figuratively. Ready to transform your panel units into something special?
9. Painting and Finishing Techniques
Give your storage units a fresh new look with the right paint and finishes. Whether you prefer a rustic charm or a sleek modern style, the right technique can elevate your DIY project. Proper preparation ensures a professional result that lasts.
Chalk Paint for a Rustic Feel
Chalk paint is perfect for creating a shabby-chic or farmhouse aesthetic. It adheres well to laminate panels without extensive sanding. For an aged effect, lightly sand edges after drying.
Use a wax sealant to protect the finish. “It adds durability while keeping that soft, matte texture,” says a Yorkshire-based upcycler. Distress the paint with fine-grit sandpaper for extra character.
High-Gloss for a Modern Edge
For a contemporary look, high-gloss finishes reflect light beautifully. Spray guns deliver a factory-like smoothness, while rollers work for smaller areas. Always apply thin, even coats to avoid drips.
Prep is key. Clean surfaces with sugar soap and lightly sand for better adhesion. A primer ensures the paint bonds properly, especially on laminate doors.
| Technique | Best For | Drying Time |
|---|---|---|
| Chalk Paint | Rustic, vintage styles | 1-2 hours |
| High-Gloss | Sleek, modern designs | 4-6 hours |
For wood veneer, grain fillers create a smooth base before staining. Butcher blocks benefit from food-safe oils, enhancing both style and longevity. Ready to transform your storage with a fresh finish?
10. Conclusion: Start Your IKEA Besta Hack Today
Ready to give your space a personal touch? With the right plan and tools, even small DIY updates—like swapping drawer fronts—can transform basic storage into a standout feature.
Take inspiration from case studies where simple tweaks created sleek, functional designs. Share your project on forums to inspire others and gather feedback.
Your dream home upgrade starts with one screwdriver twist. Dive in—your perfect setup awaits!
FAQ
What are the best ways to personalise IKEA Besta units?
You can customise them with new doors, legs, or paint. Adding panels, lighting, or unique hardware also gives a bespoke look.
Do I need special tools for a DIY hack?
Basic tools like a drill, screws, and sandpaper are essential. For advanced upgrades, a jigsaw or paint sprayer may help.
Can I use pre-made doors instead of custom fronts?
Yes! Many retailers offer ready-made fronts that fit perfectly, saving time while still achieving a high-end finish.
What’s the easiest way to modernise my storage unit?
Swapping standard legs for mid-century styles or adding sleek handles instantly updates the look.
How do I ensure my hack stays within budget?
Plan carefully, reuse materials where possible, and focus on small but impactful changes like paint or new knobs.
Can I add lighting to my Besta units?
Absolutely! LED strip lights or puck lights work well inside shelves or along the edges for a stylish glow.
What paint works best for a durable finish?
Chalk paint is great for texture, while high-gloss options give a contemporary shine. Always prime first for better adhesion.
Are floating units difficult to install?
Not if you secure them properly to wall studs. A spirit level and sturdy brackets ensure a safe, seamless fit.