Are your kitchen drawers sticking or sitting unevenly? This common issue affects functionality and the overall look of your space. With a few simple techniques, you can restore smooth operation yourself.
Proper alignment ensures everything slides effortlessly. It also keeps your storage solutions looking neat and professional. Our friendly guide makes this DIY job straightforward for any homeowner.
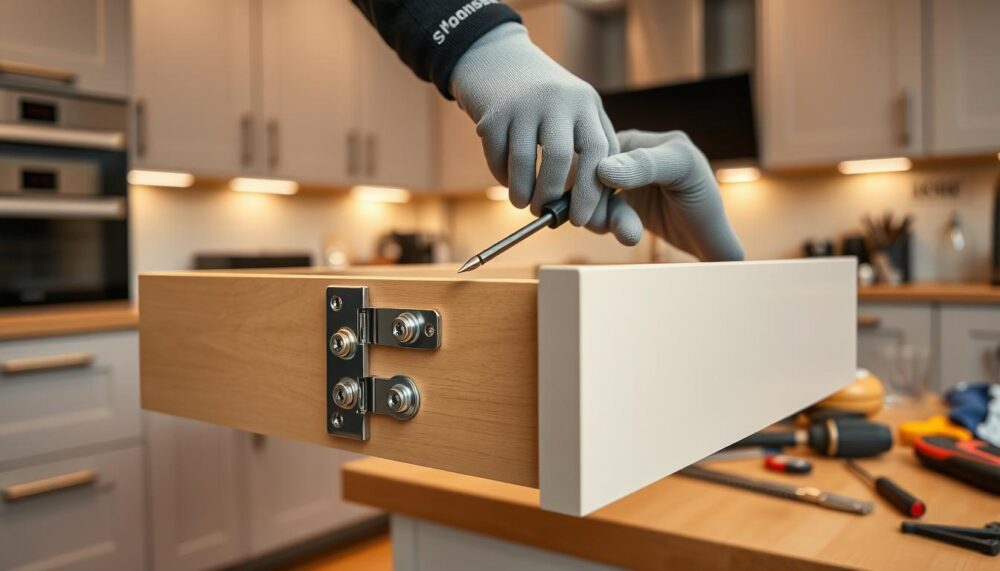
You will need basic tools like a screwdriver. Sometimes a drill helps with certain fixes. Always check for hidden pipes before starting any work.
This detailed resource offers extra support for your project. Let’s begin your journey to perfectly aligned drawers!
Key Takeaways
- Correct alignment improves both function and appearance
- Basic tools are sufficient for most adjustments
- Small quarter-turn increments produce the best results
- Always check measurements with a spirit level
- Test movement after each minor change
- Safety checks prevent potential accidents
- Manufacturer guides provide valuable specific information
Introduction to Adjusting Your B&Q Kitchen Drawers
Getting your drawers to glide perfectly makes a real difference in daily kitchen life. A smooth action saves time and frustration. It keeps your storage areas working as intended.
Correct alignment prevents jams and extends the life of your units. It also maintains that clean, professional look in your cooking space. Even small issues can lead to bigger problems over time.
You Might Also Like:


Why Proper Drawer Adjustment Matters
Seamless operation reduces wear on the moving parts. This means fewer repairs and longer-lasting cabinets. Your kitchen maintains its tidy appearance with everything sitting just right.
Misaligned drawers can stick or rub against surrounding surfaces. This causes damage to both the drawer and the cabinet frame. Proper care ensures everything functions smoothly for years.
Understanding B&Q Drawer Mechanisms
Most B&Q drawers use runners screwed inside the cabinet frames. These allow the storage unit to slide in and out effortlessly. You’ll often find adjustment screws labelled B and C for different alignments.
Vertical changes use screw B, while horizontal tweaks need screw C. You must remove small cover caps to access these adjustment points. Fine-tuning the gaps between drawer fronts creates that seamless finish.
Always support doors during any work to prevent accidents. Consult your manufacturer’s guide for specific model details. For comprehensive installation help, see our B&Q kitchen units assembly guide.
Remember – small quarter-turn increments produce the best results. Test movement after each minor change to check your progress. This approach ensures perfect alignment without over-adjusting.
Essential Tools and Preparation for Drawer Adjustment
Proper preparation makes any home improvement task more manageable. Having the correct equipment ready before starting saves time and frustration. This approach ensures your project runs smoothly from beginning to end.
Gathering the Right Tools for the Job
A well-organised workspace helps everything flow better. You will need several essential items for successful drawer alignment. Each tool serves a specific purpose in the process.
The Pozidriv screwdriver provides precision control for fine-tuning mechanisms. A quality spirit level guarantees perfect horizontal and vertical alignment. These two items form the foundation of your toolkit.
Additional equipment includes a drill for creating new fixing points when needed. Clamps offer stability during work on cabinet components. Appropriate wall fixings ensure secure installations based on your wall type.
| Tool | Purpose | Importance Level |
|---|---|---|
| Pozidriv Screwdriver | Precision adjustments | Essential |
| Spirit Level | Alignment verification | Critical |
| Drill | Creating new fixing points | Sometimes needed |
| Clamps | Stabilising components | Recommended |
| Wall Fixings | Secure installation | Wall-dependent |
Safety Considerations Before You Begin
Safety should always come first with any DIY project. Hidden pipes and cables can present serious hazards if disturbed. A quality detector helps identify these potential dangers before starting work.
Disconnect power and water supplies when working near electrical points or plumbing. This simple step prevents accidents and gives peace of mind. Supporting doors and other components during adjustments avoids unexpected movements.
Always work methodically and double-check each step. Small quarter-turn increments produce the best results without over-adjusting. Test movement after each minor change to monitor your progress effectively.
Remember that proper preparation makes the actual adjustment process much simpler. With your tools organised and safety measures in place, you can approach the task with confidence. Your storage solutions will function perfectly with careful attention to these details.
Identifying Common Drawer Problems and Their Causes
Diagnosing common problems with your storage solutions is the first step toward smooth operation. Many homeowners face similar issues regardless of their cabinet brand. Understanding these patterns helps you address them effectively.
Most storage unit difficulties stem from simple mechanical issues. They often share similarities with door alignment problems. The good news is that these are typically straightforward to fix with basic DIY skills.

Recognising Signs of Misalignment
Several clear indicators suggest your storage units need attention. The most obvious sign is when they don’t slide smoothly along their tracks. You might notice resistance or jerky movement during operation.
Visual inspection reveals other telltale signs. Uneven gaps between storage fronts suggest alignment issues. Crooked appearance when closed indicates adjustment needs.
Listen for unusual sounds during operation. Grinding or scraping noises often mean components rub against each other. This friction can damage both the moving parts and cabinet framework.
Understanding What Causes Drawer Issues
Several factors contribute to storage unit problems over time. Loose fixing points are among the most common causes. Regular use can gradually work screws loose from their positions.
Installation errors during initial setup create lasting issues. Not following manufacturer guidelines often leads to alignment problems. Incorrect front placement using attachment clips causes uneven spacing.
General wear and tear affects all mechanical components over years of use. Runner mechanisms gradually wear down with repeated operation. This natural process requires occasional maintenance to restore optimal function.
Environmental factors also play a role in storage unit performance. Humidity changes can slightly alter wood dimensions. Temperature fluctuations affect material expansion and contraction rates.
Remember to support components during inspection to prevent accidents. Identifying the root cause prepares you for the correction process. Our next sections will guide you through the resolution steps for each issue type.
How to Adjust B&Q Kitchen Drawers Vertically
Getting your storage compartments sitting at the correct height makes a significant difference to your kitchen’s overall appearance. It ensures everything lines up neatly with surrounding cabinets and worktops. This simple process creates that professional finish you desire.

Accessing the Vertical Adjustment Mechanism
Begin by locating the small plastic caps on either side of your storage unit. These protective covers hide the adjustment points that control vertical positioning. Gently prise them off using your fingernails or a flat tool.
You will now see two labelled screws – typically marked A and B. Screw B specifically controls the up-and-down movement of your compartment. This clever design allows precise height modifications without removing the entire unit.
Small quarter-turn adjustments produce the best results. Test movement after each change to monitor progress effectively.
Step-by-Step Vertical Alignment Process
Follow these clear steps to achieve perfect height alignment:
- Place your spirit level across the front of the storage compartment
- Use a Pozidriv screwdriver to turn screw B clockwise to raise the unit
- Turn anti-clockwise to lower it if sitting too high
- Check level frequently during the process
- Replace plastic caps once happy with the position
Remember to support the compartment during this work. This prevents unexpected movement and potential damage. Always work slowly with small adjustments rather than large turns.
| Adjustment Direction | Screw Movement | Visual Result |
|---|---|---|
| Raise Unit | Clockwise turns | Front sits higher |
| Lower Unit | Anti-clockwise turns | Front sits lower |
| Neutral Position | No further adjustment | Level with surroundings |
After completing vertical modifications, check horizontal alignment too. Changes in height can sometimes affect side-to-side positioning. Your spirit level will confirm everything sits perfectly in both directions.
This straightforward approach transforms misaligned storage into seamlessly integrated components. Your kitchen gains that polished, professional look with everything sitting just right. The satisfaction of completing this job yourself makes the effort worthwhile.
Horizontal Adjustment Techniques for Perfect Alignment
Perfect side-to-side alignment transforms your storage spaces from frustrating to flawless. This process ensures everything moves smoothly without rubbing or sticking. It creates that professional finish throughout your cooking area.
Lateral positioning affects both function and appearance equally. Even gaps between components make your entire kitchen look more organised. The process shares similarities with aligning cabinet doors using their hinges.
Working with Horizontal Adjustment Screws
Locate the adjustment points marked C on both sides of your storage unit. These control left-right movement with simple screwdriver turns. You’ll find them behind small plastic caps that protect the mechanism.
Use a Pozidriv screwdriver for precise control over these adjustments. Turn screw C clockwise to shift the component rightwards. Anti-clockwise turns move it left for perfect positioning.
Always make small quarter-turn increments rather than large adjustments. Test the movement after each change to monitor your progress. This careful approach prevents over-correction and ensures optimal results.
Symmetrical adjustments on both sides create that perfect uniform spacing homeowners desire.
Achieving Equal Spacing Between Drawer Fronts
Consistent gaps between components create that polished, professional look. Measure the spaces with a tape measure before starting your work. Note any variations that need correction through lateral movement.
Adjust both sides equally to maintain balance throughout the process. Even tiny differences become noticeable when everything is closed. Your spirit level confirms perfect horizontal alignment after adjustments.
This attention to detail separates amateur results from professional finishes. The satisfaction of seeing perfectly spaced storage fronts makes the effort worthwhile.
| Adjustment Direction | Screw C Movement | Visual Result |
|---|---|---|
| Move Right | Clockwise turns | Unit shifts right, left gap increases |
| Move Left | Anti-clockwise turns | Unit shifts left, right gap increases |
| Perfect Centre | No further adjustment | Equal gaps on both sides |
After completing your lateral adjustments, replace the protective caps. These small covers keep dust out and maintain your settings. They also give that finished look to your storage units.
Remember that rushed jobs often lead to further alignment issues. Take your time with this process for lasting results. Your perfectly spaced components will operate smoothly for years to come.
Conclusion: Maintaining Smoothly Operating Drawers
Your storage solutions now operate with satisfying precision thanks to your careful work. Regular checks keep everything functioning perfectly for years. A quick inspection of screws every few months prevents loosening.
Follow manufacturer guidelines for specific care instructions. This simple habit extends the life of your units. Well-maintained fronts maintain that clean, organised look.
You’ve gained valuable DIY skills that save time and money. Feel confident tackling future projects around your home. This knowledge makes daily life more enjoyable and efficient.
Always support components during any maintenance. Safety remains paramount in all household jobs. Your efforts create a harmonious and practical space.
Refer back to this guide whenever needed. Well done on mastering these essential techniques!
FAQ
What tools do I need to adjust my B&Q kitchen drawers?
You’ll typically need a screwdriver, ideally a Phillips head, and sometimes a drill. It’s also useful to have a spirit level handy to check your adjustments.
How can I tell if my kitchen drawers need adjusting?
Look for signs like drawers that stick, don’t close properly, or appear uneven. Misaligned fronts or gaps between units are also clear indicators something’s amiss.
Can I adjust the drawer fronts without removing the entire drawer?
Absolutely. Most modern designs allow you to tweak the position of the front by loosening the screws on the inside of the drawer. This lets you shift it left or right for a perfect look.
My drawer is catching on the cabinet frame; how do I fix this?
This is often a vertical alignment issue. Locate the adjustment screws on the side of the runner, usually at the rear. Turning these will raise or lower that side of the drawer for a smooth glide.
Is it difficult to adjust the hinges on cabinet doors as well?
The process is quite similar. Cabinet doors typically have adjustment screws on the hinges that allow you to move the door in, out, up, or down for a perfect fit alongside your newly aligned drawers.
What should I do if my adjustments aren’t fixing the problem?
First, double-check that you’re turning the correct screws. If the issue persists, the runner mechanism itself might be damaged or worn and could require replacement for a proper fix.