Creating your dream kitchen involves careful planning and the right tools. Many homeowners wonder about the professional methods used by leading retailers. Wickes employs sophisticated design software to help customers visualise their perfect space.
Understanding their approach offers valuable insights for your own project. This article explores the specific programmes utilised by Wickes designers. You will learn about their comprehensive planning process step by step.
Applying these professional techniques can transform your home improvement efforts. Proper planning ensures a functional and beautiful kitchen space. Wickes combines digital innovation with expert consultation services for outstanding results.
Key Takeaways
- Wickes utilises advanced design programmes for kitchen visualisation.
- Their planning process combines digital tools with expert advice.
- Homeowners can apply professional methods to their own projects.
- Proper planning creates both functional and aesthetically pleasing spaces.
- Understanding this approach helps achieve dream kitchen results.
- Wickes offers comprehensive services from initial design to final installation.
Discover the Software Behind Wickes’s Kitchen Designs
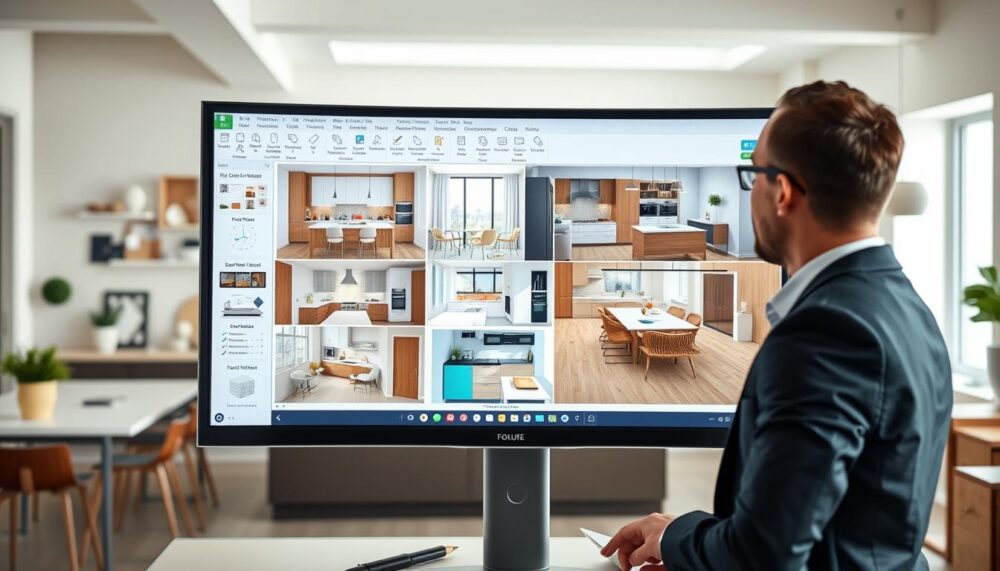
Behind every stunning kitchen transformation lies powerful digital technology. Wickes employs sophisticated tools that bring creative visions to life. Their approach combines technical precision with artistic flair.
Fusion 2020 CAD: The Designer’s Tool of Choice
Wickes professionals rely on Fusion 2020 CAD for all their projects. This advanced programme creates detailed layouts with remarkable accuracy. Designers craft spaces that perfectly match individual requirements.
The system focuses on practical solutions for real homes. It considers how families actually use their cooking areas. Every layout prioritises functionality alongside visual appeal.
You Might Also Like:


Computer graphics within the programme show ideas taking shape. Clients see how products will appear in their actual room. This visualisation prevents costly mistakes before installation begins.
Comprehensive training ensures designers master this technology. They learn to avoid common pitfalls that create impractical spaces. The result is a smooth journey from concept to completion.
| Software Feature | Customer Benefit | Design Outcome |
|---|---|---|
| 3D Visualisation | See products in your space | Confident decision making |
| Precision Measurement Tools | Perfect fit guarantee | Optimised storage solutions |
| Lifestyle Customisation | Personalised layouts | Enhanced daily functionality |
| Error Prevention System | Avoid costly mistakes | Streamlined installation process |
This professional-grade technology forms the backbone of Wickes’s service. It transforms complex planning into an enjoyable creative process. Customers receive designs that truly work for their household.
The store’s commitment to cutting-edge tools demonstrates their dedication to quality. Every kitchen scheme benefits from this sophisticated approach. It’s why so many homeowners trust their projects to these experts.
Your First Step: Using the Wickes Matchmaker Tool
Embarking on your kitchen renovation journey begins with an intuitive digital assistant. The Matchmaker Tool revolutionises how homeowners approach their space transformation. This innovative quiz provides personalised guidance from the very start.
The system asks just five simple questions about your preferences. These cover style choices, layout requirements, and desired features. Your answers generate tailored recommendations instantly.
How the Quiz Simplifies Your Design Choices
This clever tool eliminates decision fatigue that often plagues renovation projects. It analyses your responses to suggest perfect cabinet styles, worktop materials, and appliances. The recommendations include space-saving solutions like slimline dishwashers.
Expert guidance extends to clever storage options and finishing touches. You receive advice on brassware selections and lighting arrangements. The system considers both aesthetics and practical daily use.
“The Matchmaker Tool transforms overwhelming choices into clear, actionable recommendations.”
Homeowners can visualise their dream cooking space with remarkable ease. The tool empowers you to imagine possibilities beyond basic layouts. It bridges the gap between inspiration and practical implementation.
| Quiz Question | Personalised Output | Customer Benefit |
|---|---|---|
| Style preference | Cabinet recommendations | Cohesive aesthetic vision |
| Layout requirements | Space optimisation solutions | Maximum functionality |
| Appliance needs | Integrated appliance suggestions | Streamlined cooking experience |
| Storage priorities | Custom storage solutions | Clutter-free environment |
| Finishing touches | Lighting and hardware advice | Complete design harmony |
Results can be shared directly with Wickes design consultants. This seamless transition from digital tool to professional service kick-starts your project. The Matchmaker creates a solid foundation for your consultation.
This approach ensures every homeowner receives expert-level guidance. The tool democratises professional design knowledge for all customers. Your dream kitchen becomes an achievable reality from the first click.
Step 1: Precisely Measure Your Kitchen Space
The journey to your perfect cooking area begins with precise spatial assessment. Accurate measurements form the foundation of successful design planning. They ensure your new layout fits perfectly within your home’s existing structure.
Professional designers consider this step absolutely critical. It prevents costly mistakes during installation. Your dream cooking space deserves this careful attention to detail.
Gathering Your Key Dimensions
Start by measuring from floor to ceiling to understand vertical space. Note these heights at multiple points around the room. Irregular rooms may have variations that affect cabinet placement.
Measure wall to wall, including any alcoves or recesses. These features significantly impact your final layout. Record dimensions in millimetres for industry-standard accuracy.
For doors and windows, measure from corners to frames. Note heights from the floor and distances from the ceiling. These measurements determine appliance placement and traffic flow.
Recording Crucial Room Features
Document all fixed elements that cannot be moved. This includes radiators, pipes, vents, and electrical points. Note the positions of switches, plug sockets, and power outlets.
Record water, gas, and drainage supply points carefully. These determine where sinks and appliances can be positioned. Knowing what cannot be moved helps create a practical layout.
Create a comprehensive floorplan checklist before proceeding. This systematic approach prevents installation issues. It ensures your design works with your home’s existing features.
“Millimetre precision in measurement eliminates centimetre problems during installation.”
Multiple measurement points handle irregularly shaped rooms effectively. This approach captures the true nature of your space. It allows designers to work with your room’s actual dimensions.
This meticulous process transforms overwhelming renovation into manageable steps. It provides the solid foundation your project requires. Your dream cooking area becomes an achievable reality.
Step 2: Strategically Plan Your Kitchen’s Working Zones
Transforming your cooking area into an efficient workspace requires thoughtful organisation. Professional designers divide the room into three distinct functional areas. This zoning approach creates a natural flow for daily activities.
Each zone serves specific purposes while connecting seamlessly with others. This method prevents unnecessary movement during meal preparation. Your cooking experience becomes smoother and more enjoyable.

The Food Storage Zone
This area houses your refrigeration and dry goods storage. Position your fridge, freezer and pantry cabinets together logically. Include worktop space nearby for unloading shopping bags.
Keeping preparation surfaces close to storage makes perfect sense. You can immediately place items where they belong. This organisation reduces clutter and saves time.
The Cooking Zone
Your oven, hob and microwave form the heart of this section. These appliances should cluster together for convenience. Always include generous preparation surfaces between them.
Position this zone near the sink for practical reasons. You can easily clean spills and prepare ingredients. This proximity creates a logical workflow during cooking.
The Washing Zone
This area centres around your sink and dishwasher unit. Grouping plumbing elements simplifies installation considerably. It also makes maintenance more straightforward later.
Place the washing zone strategically between other areas. This positioning supports the famous “working triangle” concept. Efficiency improves dramatically with this arrangement.
“A well-planned zonal layout turns meal preparation from a chore into a pleasure.”
Professional designers recommend starting from room corners. Closed corner base units require 125mm step-out measurements. Wall units need 25mm step-out for proper installation.
This careful planning ensures everything fits perfectly. Your cooking area will function beautifully for years to come. The investment in proper zoning pays dividends daily.
Remember to position the refrigerator near the sink. This allows for washing produce directly after retrieval. Small details like this make a significant difference.
Thoughtful zone planning creates a space that works harmoniously. Every activity finds its natural place in the room. Your dream cooking area becomes both beautiful and brilliantly functional.
Step 3: Choose the Ideal Layout for Your Space
Selecting the perfect arrangement transforms how you experience your cooking environment. Different room shapes demand distinct approaches to maximise efficiency. The right configuration makes daily tasks smoother and more enjoyable.
Consider your available area and household needs carefully. Some designs suit compact rooms beautifully. Others work best in larger, open-plan settings.
Galley Kitchen Layouts
Galley arrangements excel in narrower rooms. They feature parallel runs of units with a central walkway. This clever design creates an exceptionally efficient working triangle.
Everything remains within easy reach during meal preparation. The compact nature reduces unnecessary movement. It’s ideal for smaller homes where every centimetre counts.
U-Shaped and L-Shaped Kitchen Layouts
U-shaped designs form three walls of cabinetry and appliances. They create clear central focal points while keeping zones organised. This separation maintains distinct areas for different tasks.
L-shaped configurations work wonderfully in open areas. They often incorporate islands for additional workspace. Be mindful of triangle spread to maintain efficiency.
Both options offer excellent storage solutions. They provide ample worktop space for food preparation. These layouts suit various family sizes and cooking styles.
Open-Plan Kitchen Considerations
Open-plan living requires thoughtful appliance positioning. Place key elements along different walls for better flow. Alternatively, use islands to anchor an effective triangle.
Avoid placing zones too far apart in larger layouts. This prevents excessive walking during cooking sessions. Islands can help maintain efficiency in spacious designs.
Consider how the space connects to living areas. The layout should facilitate social interaction while cooking. It should also contain cooking smells and noise effectively.
“The right kitchen layout turns meal preparation from a chore into a pleasure, creating harmony between form and function.”
Remember the working triangle principle in all configurations. The distance between sink, cooker and fridge matters greatly. Optimal spacing ensures effortless movement between tasks.
Your chosen arrangement should complement your home’s architecture. It must also accommodate your household’s specific routines. The perfect layout feels intuitive from the first use.
Organising Worktops, Appliances and Storage
A well-organised cooking space makes meal preparation effortless and enjoyable. Strategic planning of surfaces, gadgets and cupboards creates harmony in your home. Every element should work together seamlessly for maximum efficiency.
Position power outlets based on where you’ll use appliances daily. Place sockets near preparation areas for kettles and toasters. Consider air fryer and food processor locations when planning electrical points.

Worktop organisation dramatically improves functionality. Keep clear spaces near cooking zones for food preparation. Group frequently used items together for convenience.
Storage solutions should match your household’s needs. Wide drawers offer perfect homes for pots and pans. Pull-out cabinets make accessing back corners simple.
Drying racks belong next to sink areas. This placement keeps water contained and surfaces dry. It creates a logical workflow after washing dishes.
Advanced options like carousels utilise corner spaces brilliantly. They transform awkward areas into accessible storage. Everything remains within easy reach.
Floor-to-ceiling larder cupboards maximise vertical space. They provide generous storage for dry goods and equipment. These units keep your layout tidy and organised.
“Good organisation turns a chaotic cooking space into a serene environment where everything has its place.”
Accessibility features improve overall functionality. Consider different height requirements for family members. Easy-to-reach storage makes daily use more comfortable.
Proper appliance placement affects workflow significantly. Position frequently used gadgets near preparation zones. This reduces unnecessary movement during cooking.
Creating a balanced layout requires careful thought. Ensure adequate work surfaces between storage and appliances. The right worktop dimensions contribute to this harmony.
Your cooking area should reflect how you actually live. Thoughtful organisation makes every task simpler. A well-planned space brings joy to daily routines.
Bringing Your Plan to Life with Expert Help
Transforming your vision into reality requires professional guidance and support. Wickes Design Consultants offer comprehensive assistance throughout your entire project journey. Their expertise turns complex planning into an enjoyable experience.
These specialists provide complete end-to-end service from initial meetings to final installation. They begin with thorough consultations at your local store. This personalised approach ensures your unique needs receive proper attention.
Home visits form a crucial part of their service offering. Consultants take precise measurements and visualise spaces firsthand. They understand that no two homes share identical characteristics or requirements.
The FREE design appointment service makes professional advice accessible to everyone. During these sessions, consultants help clients discover inspiration for their dream spaces. They translate ideas into practical, beautiful solutions.
“Our designers build genuine relationships with customers, guiding them through every decision from initial concept to final installation.”
All consultants complete an intensive 12-week training programme. This ensures they possess the latest industry knowledge and technical skills. Their competitive compensation package attracts top talent to the profession.
Expert help prevents costly mistakes and ensures optimal results. Consultants consider every detail from workflow patterns to material selections. Their guidance creates spaces that combine beauty with functionality.
This professional support transforms the renovation process into an exciting journey. Customers receive ongoing assistance at every stage. The final result exceeds expectations while staying within budget.
Conclusion
Your dream cooking area becomes achievable through careful planning and professional methods. Wickes combines Fusion 2020 CAD precision with expert guidance for outstanding results.
From initial measurements to final layout, their process ensures functional and beautiful spaces. Digital tools like the Matchmaker simplify choices while consultants provide personalised support.
Following these steps transforms your home improvement project. You gain confidence through visualisation and professional advice. The outcome is a space that perfectly suits your lifestyle.
Begin your journey with Wickes’s FREE design service. Their comprehensive approach turns inspiration into reality. Create a cooking environment that brings daily joy to your home.
FAQ
What software do Wickes use for their kitchen designs?
Wickes designers use Fusion 2020 CAD, a professional tool that helps create detailed and accurate plans for your space.
How can I start planning my new kitchen with Wickes?
You can begin by using the Wickes Matchmaker tool online. It’s a quick quiz that helps identify your style and preferences, making the initial choices much simpler.
What are the most important measurements to take before designing my kitchen?
You’ll need the room’s length, width, and height, as well as the positions of doors, windows, and any fixed features like radiators or pipes.
How should I organise the different zones in my kitchen?
It’s best to plan distinct zones for food storage, cooking, and washing. This creates an efficient workflow and makes the space more practical to use.
Which layout works best for a small kitchen?
A galley layout is often ideal for smaller spaces, as it makes excellent use of available room and keeps everything within easy reach.
Can Wickes help me choose appliances and worktops?
Absolutely. Their experts can advise on the best appliances, worktops, and storage solutions to suit your needs, style, and budget.
Is professional help available when planning my kitchen with Wickes?
Yes, you can book a free consultation in-store or online. Their design specialists offer personalised advice to help bring your dream kitchen to life.