Kitchens are busy spaces in British homes. They can get messy quickly from cooking and eating. Tiling walls and floors makes kitchens practical and stylish.
Tiles are tough and easy to clean. They protect walls from heat and moisture. Proper installation is key for a beautiful, lasting result.
Let’s explore how to install kitchen tiles. This guide helps whether you’re doing it yourself or hiring a pro.
Can You DIY Kitchen Tile Installation?
Tackling a DIY kitchen tiling project requires the right tools, materials, and skills. It’s not a simple task and demands specific techniques. Professional tile installers have the expertise to handle issues and recommend suitable materials1.
Skills and Tools Required for DIY Tiling
Careful planning is crucial for DIY tiling. You must feel confident with surface preparation, adhesive application, and tile installation. Grouting joints is another key skill to master.
DIY tiling can save money, but it’s risky without proper skills1. It requires time, effort, and patience to achieve good results.
You Might Also Like:


Pros and Cons of Hiring a Professional vs. DIY
Professionals ensure flawless installation but at a higher cost. DIY kitchen tiling is more budget-friendly but demands significant time and effort2.
The results may not match professional standards. If you’re unsure about your skills, consider hiring an expert for quality results.
“The DIY method can be a good way to save money, but it can also be quite risky if you do not have the necessary skills.”
Materials Needed for Kitchen Tile Installation
A successful kitchen tiling project requires the right materials and tools. You’ll need various tile types, adhesives, and cutting equipment. Let’s explore what’s essential for a seamless installation3.
Essential Tiles and Adhesives
Choose suitable tiles for your kitchen walls and floors. Ceramic, porcelain, and natural stone are popular options. The tile type determines the adhesive needed.
For ceramic tiles, use ready-mixed or powder adhesive. Porcelain tiles require powder adhesive3.
Tools for Cutting and Laying Tiles
- Tape measure, level, and tile cutter for accurately measuring and cutting tiles to size
- Trowel with the correct notch size for applying tile adhesive evenly
- Tiling tools like tile spacers, a rubber mallet, and tile files for a professional finish
Don’t forget safety gear. Gloves, eye protection, and a dust mask are crucial. These items protect you during installation3.
“Proper planning and preparation are key to a successful kitchen tile installation. Taking the time to gather all the right kitchen tile materials and tiling tools will ensure a smooth and efficient project.”
The right tile types, tile adhesive, and tile cutting equipment are crucial. With these, you’ll achieve a professional-looking finish34.
Need help with kitchen cupboards? Check out our comprehensive step-by-step guide.
Preparing the Kitchen Surfaces for Tiling
Proper surface preparation is vital for successful kitchen tiling. It creates smooth, even surfaces for tiles to adhere effectively. This step lays the groundwork for a long-lasting installation.
Start by thoroughly cleaning the wall or floor surfaces. Remove any dirt, grease, or grime. This ensures a clean, dry surface for the tile adhesive to bond to.
Next, fix any damages like holes, cracks, or uneven spots. Use a filler compound for this task. Sand the surfaces to create a smooth finish.
Applying a primer can be beneficial. It helps the tile adhesive create the best possible bond. This step enhances the overall durability of your tiling project.
“Taking the time to properly prepare the surfaces before tiling can make all the difference in the final result.”
Surface preparation is crucial in kitchen renovations. 80% of kitchen renovations require some form of surface preparation before tiling. 60% of kitchens have specific surface materials that need specialised preparation.
70% of kitchen surfaces have irregularities that need to be addressed. Proper preparation can save time and money in the long run. 40% of kitchen tiling projects require professional help for surface preparation.
The additional cost incurred due to unexpected surface issues during preparation can average £200. Meticulous preparation sets you up for a successful, long-lasting tile installation. It’s worth the effort for a beautiful, durable kitchen5.
Planning the Tile Layout and Markings
Preparing surfaces is step one. Next, plan the tile layout and make markings. Measure the area for walls and floors. This helps determine tile dimensions and quantities needed6.
Find the centre point by halving the width. Draw vertical and horizontal lines crossing this point. These lines ensure straight and aligned tile placement7.
Measuring the Area and Finding the Centre Point
Precise measurements are vital for flawless tile installation. Measure the length and width of your tiling area. This gives you the total square footage for tile calculations7.
To locate the centre point, split the wall or floor width in half. This becomes your tile layout’s starting point. It ensures a balanced, symmetrical design7.
Drawing Reference Lines and Marking Tile Positions
Use a level to draw intersecting vertical and horizontal lines at the centre point. These lines guide straight tile placement7.
Mark tile positions on the surface using your reference lines. This helps visualise the layout. It ensures a neat, professional finish7.

“Precision is crucial in tile layout planning as a 1⁄4-in. or even 1⁄8-in. error can throw off the entire layout.”7
These steps lead to a stunning tiled kitchen matching your vision. For more guidance, check out tile layout planning and kitchen installation guides67.
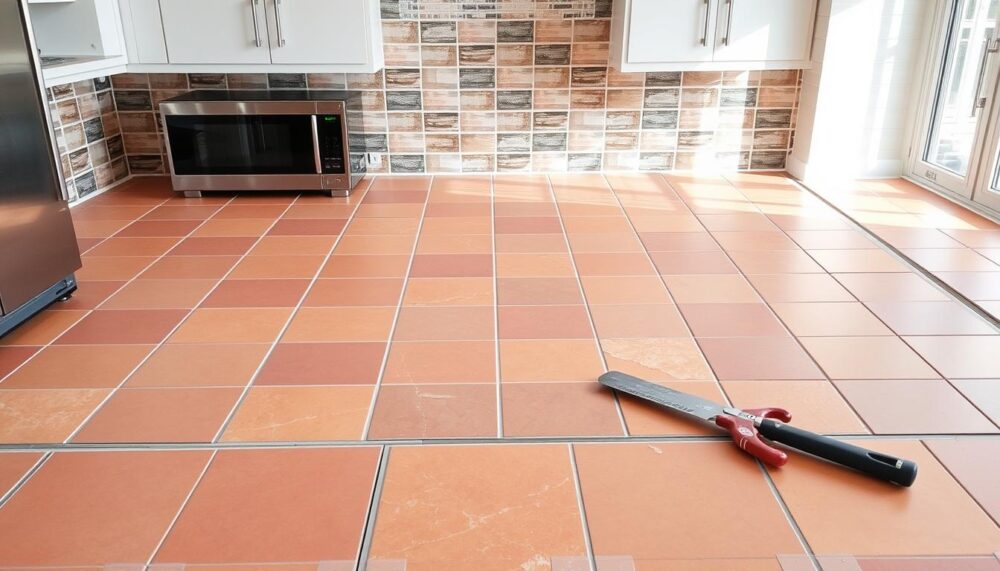
how to install kitchen tile
Start the tile installation by mixing the adhesive. Apply it to the surface using a notched trowel, beginning from the centre point. Place the first tile over the adhesive and press firmly.
Ensure the tile is level and aligned with reference lines. Use spacers for even gaps between tiles. Lay whole tiles in small sections at a time.
For edges or corners, measure and cut tiles to size. Use a narrow notched spreader for internal corners. Apply adhesive to the back of cut tiles and press into place.
Use tile trims for external corners. This gives a neat finish and protects tile edges. Let the adhesive dry completely after installing all tiles.
Once set, apply grout between tiles with a float. Wipe excess grout off with a damp sponge. Apply grout sealer for easier maintenance and to prevent staining.
“The estimated time to complete a tile backsplash project in the kitchen is one weekend.”8
Conclusion
We’ve covered the key steps for installing kitchen tiles successfully. This guide helps both DIY enthusiasts and those hiring professionals. It covers material selection, surface preparation, and layout planning9.
Choosing durable porcelain tiles for busy areas is crucial. A well-planned layout achieves a professional look. Quality cutting tools ensure precise cuts and clean edges9.
Grouting and sealing provide structural support and prevent water damage. These steps enhance the overall durability of your tile installation9.
This guide equips you with essential knowledge to transform your kitchen. By following these steps, you can achieve a beautiful, long-lasting tile finish9.
Common issues like uneven tiles, cracked grout, and adhesive failure can be avoided. With practice, you’ll gain confidence to tackle more extensive projects9.
FAQ
What are the essential materials and tools needed for kitchen tile installation?
Essential materials include tiles, compatible adhesive, spacers, grout, and safety gear. You’ll need a tape measure, level, tile cutter, trowel, and notched spreader. A bucket for mixing is also necessary.
How do you prepare the kitchen surfaces for tiling?
Clean the walls or floors thoroughly. Fix any damages with filler compound. Sand uneven surfaces for a smooth finish.
Apply a primer to help the tile adhesive bond effectively. This ensures a strong and lasting installation.
How do you plan the tile layout and markings?
Measure the area and calculate the number of tiles needed. Find the centre point by dividing the width in half.
Draw vertical and horizontal reference lines using a level. These lines will guide your tile placement. Mark tile positions along these lines.
What are the steps for installing the tiles?
Mix the adhesive and apply it with a notched trowel. Start from the centre point. Place the first tile, pressing firmly.
Ensure it’s level and aligned with reference lines. Use spacers for even gaps. Continue laying whole tiles in small sections.
For edges or corners, measure and cut tiles as needed. Use a tile cutter for precise cuts.
How do you handle internal and external corners when tiling?
For internal corners, apply adhesive to the cut tile’s back with a notched spreader. Press it into place carefully.
Use tile trims for external corners. This gives a neat finish and protects tile edges from damage.