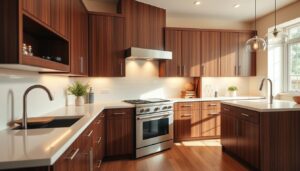
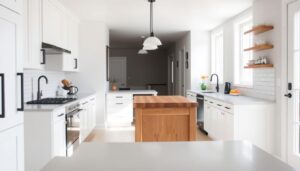
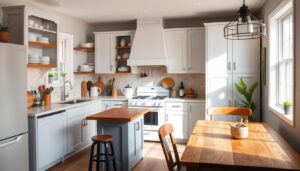
Giving your kitchen a stylish update doesn’t always require a full overhaul. Instead of replacing entire units, refreshing the doors can make a dramatic difference. Whether you prefer a modern finish or a classic touch, there are plenty of ways to achieve a stunning transformation.
Repainting, refacing, or updating hardware are just a few methods to consider. These options are not only cost-effective but also save time compared to a complete replacement. On average, UK homeowners spend between £400 and £1000 on new doors, while DIY solutions can start from as little as £50.
This guide explores 15 practical techniques to revitalise your space. From professional refinishing to simple DIY tweaks, you’ll find options to suit every budget and skill level. Best of all, keeping the original layout ensures your kitchen remains fully functional.
Key Takeaways
- Updating cabinet doors offers a budget-friendly alternative to full replacements.
- Professional refacing or DIY painting can refresh the space affordably.
- Hardware changes provide an instant style upgrade with minimal effort.
- Maintaining the existing layout preserves kitchen functionality.
- Costs vary, with DIY options starting from £50.
Introduction to Kitchen Cabinet Renovation
Revitalising your home’s heart doesn’t demand a complete strip-out. In fact, 84% of UK homeowners opt for refurbishment over full replacements.
“Updating existing fittings preserves character while cutting costs,”
Why the shift? Over 60% of British kitchens require updates within a decade. Wear and tear, coupled with evolving styles, leave many spaces feeling dated. A fresh aesthetic can give kitchen areas a modern edge without structural changes.
The psychological impact is significant. As social hubs, kitchens benefit from visual appeal. Crisp finishes or bold hardware create inviting atmospheres for gatherings.
| Option | Average Cost | Timeframe |
|---|---|---|
| Full renovation | £4,000+ | 2–4 weeks |
| Door updates | £400–£1,000 | 1–3 days |
Popular methods include:
- Painting: Instant colour transformation.
- Refacing: Veneers for a new look.
- Hardware swaps: Handles and hinges for contrast.
Sustainability adds another perk. Reusing cabinets reduces landfill waste. It’s a win for your wallet and the planet.
Assessing Your Current Cabinet Doors
Before diving into updates, a thorough evaluation of your existing fittings is essential. Look for signs of wear, material suitability, and structural integrity. This step ensures your efforts yield lasting results.
Checking for Damage and Wear
Start with a detailed inspection. Warping, cracked surfaces, or misaligned hinges hint at deeper issues. In the UK’s damp climate, moisture damage is common—check for swelling or mould.
Test weight capacity if upgrading hardware. Weak frames may struggle with heavier handles. For laminate or thermofoil doors, peeling edges signal replacement needs.
Deciding Between Repainting or Replacing
Material matters. Solid wood takes paint well, but MDF requires primer. Severe damage often justifies replacement, especially if repairs exceed 60% of new door costs.
| Option | Pros | Cons |
|---|---|---|
| Repainting | Budget-friendly (£50–£200) Customisable colours |
Time-intensive prep Not for major damage |
| Replacing | Fresh style instantly Durable solution |
Higher cost (£400–£1000) Longer lead times |
Match your choice to long-term goals. A quick paint refresh suits rentals, while replacements add value for homeowners. For cohesive style, consider updating all cabinet doors simultaneously.
Gathering the Right Tools and Materials
Quality materials are the backbone of a successful refresh. Whether tackling a DIY project or hiring help, having the correct supplies ensures efficiency and professional results. From sealant guns to precision saws, every item plays a role.
Essential Tools for DIY Renovation
British DIYers swear by a few key items. A silicone sealant gun prevents messy leaks, while magnetic screw holders keep hardware organised. For cutting veneers, a precision saw delivers clean edges.
Safety matters too. P3 particulate masks are vital when sanding MDF. Budget-conscious? Professional toolkits (£50–£120) often outperform piecemeal purchases.
Choosing Paints, Finishes and Veneers
For laminate surfaces, experts recommend Zinsser Bulls Eye 1-2-3 primer. It ensures adhesion without sanding. Popular UK brands like Farrow & Ball offer durable options for high-traffic areas.
“Dulux’s kitchen-specific range withstands daily scrubs better than standard emulsions,”
| Material | Best For | Cost per m² |
|---|---|---|
| Oak veneer | Classic styles | £15–£25 |
| Acrylic veneer | Modern looks | £20–£30 |
Walnut adds warmth, while acrylics provide a sleek finish. Always test paint samples under kitchen lighting—colours shift under LEDs.
How to Paint Kitchen Cabinet Doors
A fresh coat of paint can completely transform the appearance of your storage units without breaking the bank. Professional results typically take 5-7 days in the UK climate, but the effort pays off with a dramatic visual upgrade.
Preparing the Surface: Cleaning and Sanding
Start by removing grease with Astonish Kitchen Cleaner, a UK favourite for cutting through stubborn grime. Wipe down every surface, including hinges and recessed panels, to ensure proper paint adhesion.
Sand with 120-grit paper first to remove gloss, then switch to 220-grit for smoothing. Always work with the grain on wooden units to avoid visible scratches. Proper preparation prevents common issues like peeling or uneven texture later.
Applying Primer and Paint Coats
Quality primer creates the perfect base for your chosen colour. In humid British weather, oil-based options often outperform water-based versions for durability. Apply thin, even layers using these techniques:
- Cut in edges with an angled brush first
- Use a mini roller for flat panels
- Maintain wet edges to prevent lap marks
Two coats of paint usually suffice, with 4-6 hours drying time between applications in typical UK conditions. For high-traffic areas, consider adding a protective topcoat.
| Finish Type | Drying Time | Best For |
|---|---|---|
| Satin | 6-8 hours | Modern kitchens |
| Eggshell | 4-6 hours | Traditional styles |
Tips for a Smooth, Professional Finish
Avoid common DIY pitfalls by working in a dust-free environment and maintaining consistent brush pressure. If drips occur, sand them lightly once dry before recoating.
For those seeking to paint kitchen cabinets like a pro, keep these final pointers in mind:
- Remove doors for easier application
- Label hardware for correct reassembly
- Allow 48 hours cure time before regular use
With proper technique, your refreshed surfaces will withstand daily use while giving your space a custom look. The right second coat makes all the difference in achieving showroom-quality results.
Refacing Cabinets with Veneer
Wood veneers provide the warmth of natural materials with surprisingly simple installation. This technique transforms tired cabinet doors using thin layers of premium wood, creating luxury aesthetics at a fraction of solid timber costs. UK homeowners typically spend £12-£35 per square metre for professional-looking results.
Selecting the Right Veneer Material
Pressure-sensitive adhesive (PSA) backed options dominate the DIY market for their no-mess application. Traditional glue-on varieties offer greater flexibility for complex design projects but require more skill. Consider these popular choices:
- Oak veneer: Classic British appeal with visible grain patterns
- Walnut: Rich tones that deepen over time
- Acrylic: Modern, wipe-clean surfaces for busy households
Iron-on edge banding works wonders for refreshing door edges. Activation temperatures vary by brand—most UK-sold products bond at 120-150°C.
Step-by-Step Application Guide
Begin with thoroughly cleaned surfaces, removing all grease and dust. For PSA-backed veneers:
- Measure twice and cut once with a sharp utility knife
- Peel backing slowly while pressing firmly onto the cabinet door
- Roll with a J-roller to eliminate air bubbles
Traditional veneers require contact adhesive applied to both surfaces. Pattern-matching across multiple doors creates seamless grain continuity. Allow 24 hours curing before light use.
| Maintenance Tip | Frequency |
|---|---|
| Dust with microfiber cloth | Weekly |
| Apply beeswax finish | Every 6 months |
Unlike paint, veneered surfaces shouldn’t endure harsh cleaners. A damp cloth suffices for most spills, preserving the material’s natural beauty for years.
Updating Cabinet Hardware
Small hardware changes can dramatically alter your kitchen’s aesthetic with minimal effort. Swapping handles, knobs, or hinges modernises doors without structural work. In the UK, 73% of refurbishments include hardware updates for their cost-to-impact ratio.
Choosing Handles, Knobs and Hinges
Compatibility is key. Measure existing screw spacing—96mm and 128mm are standard UK sizes. For heavy pantry doors, opt for weight-rated options. Popular finishes include:
- Brushed nickel: Resists fingerprints, suits contemporary style.
- Antique brass: Warms traditional spaces but requires polishing.
- Concealed hinges: Create seamless lines; ideal for modern units.
“Soft-close mechanisms reduce wear by 40% compared to standard hinges,” notes a 2023 UK hardware study.
Installing New Hardware Correctly
DIY-friendly templates ensure precise drilling. Follow these steps:
- Mark holes using a jig aligned with door edges.
- Drill pilot holes to prevent wood splitting.
- Secure hardware with thread-locking adhesive for longevity.
| Hardware Type | Tool Required |
|---|---|
| Surface-mounted handles | Crosshead screwdriver |
| Recessed hinges | Forstner bit (35mm) |
Allow 2-3 hours for a full kitchen update. Test movement post-installation—adjust hinge tension if doors sag.
Adding Architectural Details
Architectural flourishes elevate ordinary storage units into statement pieces. Whether adding Victorian mouldings or contemporary beaded-board panels, these touches transform flat surfaces into design features. British homeowners increasingly embrace this approach—42% of 2023 kitchen updates incorporated dimensional detailing.
Using Moulding and Corbels
Period-accurate profiles make all the difference. Victorian mouldings feature intricate floral patterns, while Edwardian styles favour cleaner lines. This table helps identify suitable options:
| Era | Profile Type | Best For |
|---|---|---|
| Victorian | Ogee curves, acanthus leaves | Traditional homes |
| Edwardian | Bead-and-quirk, fluted | Transitional spaces |
Corbels serve dual purposes—structural support beneath shelves or purely decorative accents. For DIYers, router bits like Roman ogee or chamfer create custom edges. Always test cuts on scrap wood first.
Creating a Shaker-Style Look
This timeless style centres on clean lines and recessed panels. Achieve the effect with:
- 1/4″ MDF panels set within frames
- Layered Farrow & Ball paints (try “Purbeck Stone” over “Strong White”)
- Minimal hardware for authenticity
Bespoke joinery costs £120-£200 per door, while DIY versions run £30-£60. The latter allows customisation—some add subtle bead detailing for a British twist on the classic American design.
Installing Glass Panel Inserts
Glass panel inserts offer an elegant way to refresh storage units while maintaining functionality. This approach combines practicality with design flair, allowing you to showcase decorative items while keeping clutter concealed. Modern techniques make installation achievable for confident DIYers.
Types of Glass for Cabinet Doors
UK regulations require BS EN 12600 compliant safety glass for all installations. These options suit different aesthetics:
- Frosted glass: Achieved through sandblasting or adhesive films for privacy
- Textured patterns: Georgian bars or reeded effects add vintage charm
- Clear tempered: Ideal for displaying curated tableware collections
Consider weight carefully. Leaded glass panels may require reinforced frames in older properties. Local glaziers typically deliver within 5-7 working days compared to 10-14 days for online orders.
| Glass Type | Light Transmission | Best For |
|---|---|---|
| Obscured | 30-50% | Utility cupboards |
| Low-iron | 92% | Display cabinets |
DIY vs Professional Installation
Simple replacements suit DIY if existing frames are sound. For structural modifications, professionals ensure quality results. Key considerations:
“Integrated LED lighting strips should be hardwired by qualified electricians,” advises the UK Kitchen Safety Council.
For self-installation:
- Remove existing panels carefully to preserve frames
- Use silicone sealant for waterproof edges
- Check alignment before final tightening
This update creates a lighter look while respecting your kitchen’s original design language. Frosted options work particularly well in period properties, maintaining character while introducing contemporary elements.
Creative Ideas with Wallpaper and Decals
Transformative design solutions needn’t involve structural changes or hefty budgets. Adhesive wallcoverings and decorative decals offer temporary yet impactful ways to refresh your space. These DIY-friendly techniques deliver a fresh look in hours rather than days.
Using Adhesive Wallpaper for a Quick Update
UK brands like Graham & Brown and MuralsWallpaper lead the market with washable, peel-and-stick options. Their moisture-resistant formulations withstand kitchen humidity better than standard wallpapers. For pattern continuity:
- Use laser levels for precise template alignment
- Overlap seams by 2mm for invisible joins
- Seal edges with Mod Podge for extra durability
| Brand | Price per Roll | Removal Ease |
|---|---|---|
| Graham & Brown | £25-£40 | Residue-free |
| MuralsWallpaper | £30-£50 | Heat-activated release |
Applying Decals for a Personal Touch
Vinyl decals add personality without permanent changes. Near cooking areas, opt for heat-resistant varieties rated to 120°C. Child-friendly ideas include:
- Chalkboard decals for creative expression
- Glow-in-the-dark star constellations
- Removable growth charts
“Test decals on inconspicuous areas first—some paints may peel upon removal,” cautions a UK home décor specialist.
For easy removal, choose brands using 3M adhesive technology. These leave no marks while surviving daily wear. Whether aiming for a modern look or vintage charm, temporary solutions let you experiment with design ideas before committing.
Two-Tone Cabinet Designs
Contrasting colours create visual interest while maintaining harmony in your space. This approach allows you to experiment with bold colour schemes without overwhelming the room. British designers increasingly recommend two-tone designs for their versatility and ability to suit various home styles.
Colour Combinations That Work
Farrow & Ball’s “Railings” paired with “School House White” remains a favourite among UK homeowners. The deep navy and crisp white balance creates a timeless new look. Consider these trending palettes:
- Warm neutrals: Dulux’s 2023 Colour of the Year “Wild Wonder” with “Coconut Ice”
- Modern contrast: “Down Pipe” grey lowers with “Skimming Stone” uppers
- Nature-inspired: “Green Smoke” bases with “Pointing” tops for organic appeal
Test samples at different times of day. North-facing rooms benefit from warmer tones, while south-facing spaces handle cooler shades well.
Balancing Upper and Lower Cabinets
Dark colours on lower units ground the space, while lighter tones above enhance the sense of height. This technique proves particularly effective in British kitchens with standard 2.4m ceilings.
| Design Approach | Spatial Effect |
|---|---|
| Dark bases/light uppers | Creates illusion of higher ceilings |
| Chamfered edge transitions | Softens colour divides |
Coordinate hardware finishes for cohesion. Brushed brass handles complement both warm and cool palettes beautifully. Consider adding LED strip lighting beneath upper units to highlight the colour contrast effectively.
Distressing Techniques for a Vintage Look
Achieving an aged patina requires more than random sanding—it’s an art form with historical roots. British heritage properties showcase how authentic distressing enhances character. Modern methods replicate centuries of natural wear through controlled techniques.
Mastering Sandpaper and Glaze Effects
Start with 150-grit sandpaper on wood edges that would naturally wear—hinge sides and lower panels. For Georgian authenticity, focus wear patterns where servants historically touched surfaces. Shabby Chic styles allow more creative freedom.
Glazes deepen recesses for shadow effects. Compare formulations:
| Type | Working Time | Best For |
|---|---|---|
| Oil-based | 45 mins | Detailed carvings |
| Water-based | 20 mins | Quick projects |
“Wax resist techniques create authentic wear patterns when applied before base coats,” explains London restoration expert Marion Keene.
Creating Depth with Layered Paint
Start with a dark base colour, then apply lighter topcoats. Sand through layers selectively to reveal history. For Georgian accuracy:
- Use “French Grey” under “Old White”
- Expose 30% of base layer
- Focus wear on mock drawer pulls
Modern alternatives include:
- Chalk paint for matte finishes
- Milk paint for uneven absorption
- Metallic rubs on high points
Protect your work with Polyvine’s wax-free varnish or Liberon’s matte topcoat. These preserve the finish while allowing gentle distressing over time. The final look should whisper history rather than shout artificial aging.
Installing Under-Cabinet Lighting
Strategic lighting transforms both functionality and ambience in your cooking space. Modern solutions combine task illumination with decorative flair, particularly beneath overhead units. This upgrade enhances visibility while creating a welcoming atmosphere after dark.

Types of Lighting for Cabinets
LED tape lights dominate UK kitchens for their versatility and slim profiles. As Source 3 recommends, they offer even light distribution without visible bulbs. Consider these factors when selecting:
- IP ratings: Choose IP65-rated strips for areas near sinks
- Colour temperature: 2700K for warm tones, 4000K for daylight clarity
- Dimmer compatibility: Look for trailing-edge dimmer support
| Type | Energy Use | Best Placement |
|---|---|---|
| LED tape | 4W/m | Continuous runs |
| Puck lights | 3W each | Spot lighting |
Wiring and Placement Tips
For diy installations, measure twice before committing to positions. The ideal placement creates a 30cm gap between light strips and the wall for optimal coverage. Keep these practical considerations in mind:
“Always use a qualified electrician for hardwired installations—Part P regulations apply to kitchen circuits,” advises the UK Electrical Safety Council.
Discreet cable management maintains clean lines in your design. Self-adhesive trunking or colour-matched conduits preserve the quality finish. For rented properties, battery-operated options provide temporary solutions without modifications.
Thoughtful lighting can make compact kitchens appear more spacious. Position strips towards the front edge to maximise work surface illumination while creating depth. Integrated sensors or smart controls add convenience for busy households.
Budget-Friendly Alternatives to Replacement
Breathing new life into your space can be surprisingly affordable. According to industry data, opting for creative updates instead of full replacements saves 40% on average. These solutions preserve existing structures while delivering fresh aesthetics.
Open Shelving Conversions
Removing doors creates airy, accessible storage. First assess load-bearing capacity—wall studs typically support 12-15kg per shelf bracket in UK homes. For safe conversions:
- Use spirit levels for perfect alignment
- Choose brackets matching your style (wrought iron for rustic, chrome for modern)
- Limit shelf depth to 30cm to prevent sagging
Edge finishing elevates the quality look. Compare popular methods:
| Method | Cost per metre | Skill Level |
|---|---|---|
| Iron-on veneer | £3-£8 | Beginner |
| Decorative mouldings | £10-£25 | Intermediate |
Styling open shelves requires thought. Group items in odd numbers for visual appeal. Keep frequently used pieces at eye level. Remember, cabinets without doors demand weekly dusting in British homes.
Partial Door Removal for Modern Styles
This hybrid approach maintains some concealed storage. Cut out geometric shapes or remove every second panel for rhythm. Transition hardware ensures smooth operation:
- Pivot hinges for cantilevered sections
- Soft-close mechanisms where panels remain
- Magnetic catches for secure closure
“Partial removals create gallery-like displays while hiding less attractive items,” notes a London interior designer.
Consider glass inserts for the remaining panels. This balances openness with practicality. The cost remains modest compared to full replacements, especially when retaining original frames.
For convertible space solutions, sliding panels work well. They adapt to different needs while keeping your ideas flexible. Always sand cut edges thoroughly to prevent splinters.
Conclusion
Transforming your space becomes effortless with these clever updates. Whether repainting cabinets or adding veneers, costs range from £50 for DIY to £1,000 for pro refinishing.
Hiring experts? Most UK services complete projects in 5–7 days. For lasting results, dust surfaces weekly and reseal finishes annually.
DIY saves up to 60% versus professional installs. Yet, complex jobs like glass inserts often justify the extra spend.
Share your new look online—your home’s transformation might inspire others. Small changes truly redefine a kitchen’s vibe without overwhelming effort.
FAQ
Can I paint my cabinet doors without sanding?
While sanding ensures better adhesion, some modern primers like Zinsser Bulls Eye 1-2-3 allow painting without heavy sanding. Clean surfaces thoroughly for best results.
What’s the most durable finish for painted cabinets?
Water-based acrylic paints with a satin or semi-gloss sheen, such as Dulux Diamond Satinwood, offer excellent durability and easy cleaning.
How can I update my cabinets without replacing them?
Try refacing with veneer, adding new handles, or applying adhesive wallpaper for an affordable transformation. Open shelving is another stylish option.
What’s the best way to distress wood for a vintage look?
Lightly sand edges after painting, then apply a dark glaze like Ronseal Dark Oak Wood Stain for an aged effect.
Can I install glass inserts in solid cabinet doors?
Yes! Measure carefully, use a jigsaw to cut the panel opening, and secure bevelled glass with silicone or trim for a polished finish.
Are two-tone cabinets still in style?
Absolutely! Pairing Farrow & Ball Hague Blue lowers with crisp white uppers creates timeless contrast. Balance bold and neutral tones.
What lighting works best under cabinets?
LED strip lights from brands like Philips Hue provide bright, energy-efficient illumination. Warm white (2700K) suits most kitchens.
How do I choose new cabinet hardware?
Match the finish to existing fixtures. Brushed brass handles from Buster + Punch complement modern spaces, while ceramic knobs suit traditional styles.


