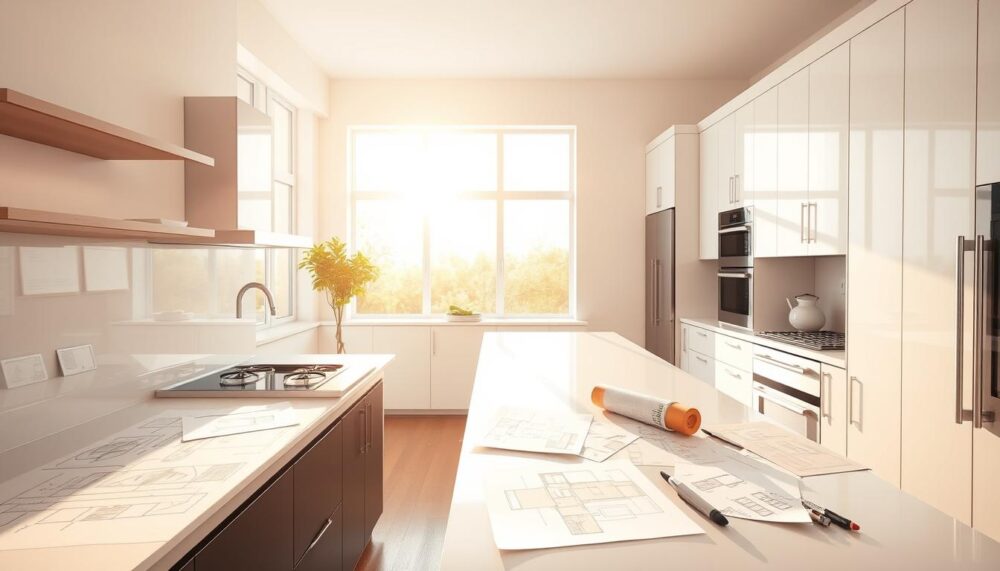
Embarking on a kitchen transformation requires careful consideration and organisation. This comprehensive guide offers a structured approach to your renovation journey.
Proper preparation helps you avoid common pitfalls and ensures a smoother process. We’ll walk you through each essential step in detail.
Transforming your space involves balancing aesthetic dreams with practical needs. Our checklist approach addresses challenges homeowners typically face during renovations.
You’ll gain confidence to create a functional, beautiful kitchen that meets your family’s requirements. Let’s begin this exciting project together.
Key Takeaways
- Thorough preparation prevents common renovation mistakes
- A step-by-step approach ensures organised project management
- Balancing aesthetics with practicality creates optimal results
- Anticipating challenges helps maintain smooth progress
- Detailed planning transforms your kitchen effectively
- Professional guidance supports confident decision-making
- Checklist methodology covers all essential considerations
Introduction: Embarking on Your Kitchen Transformation
Starting your kitchen transformation journey brings both excitement and apprehension. This space serves as the heart of your home, where daily life unfolds and memories are created.
Many homeowners dream of this project yet worry about potential disruptions. Proper preparation transforms anxiety into anticipation.
You Might Also Like:


Renovating your cooking space represents more than surface updates. It’s about crafting an environment that supports your lifestyle.
Thoughtful preparation helps manage expectations while delivering beautiful results. You’ll create a space that truly reflects your family’s needs.
“The kitchen really is the castle itself. This is where we spend our happiest moments and where we find the joy of being a family.”
Consider these emotional and practical aspects before beginning:
| Aspect | Emotional Consideration | Practical Solution |
|---|---|---|
| Space Functionality | Creating a welcoming atmosphere | Optimising workflow between key areas |
| Daily Impact | Reducing stress during meal preparation | Incorporating efficient storage solutions |
| Long-Term Value | Building a space that grows with your family | Choosing durable, timeless materials |
| Budget Management | Maintaining financial peace of mind | Allocating funds for unexpected changes |
Your vision should balance beauty with functionality. The most successful transformations consider both immediate needs and future requirements.
Remember that temporary inconvenience leads to lasting satisfaction. With careful planning, you’ll minimise disruptions while maximising results.
This guide provides everything need to navigate your project confidently. Each subsequent section builds upon these foundational concepts.
Embrace this opportunity to create a space that enhances your home life. The journey toward your dream kitchen begins with understanding these core principles.
Step 1: Define Your Renovation Goals and Vision
Before diving into selections and schedules, establish clear objectives for your project. This foundational step shapes every subsequent decision in your kitchen remodel journey.
Begin with a thoughtful evaluation of your existing cooking area. Note what functions well and what causes daily frustration. This honest assessment forms the basis of your improvement list.
Assessing Your Current Kitchen’s Strengths and Weaknesses
Grab a notebook and spend a week observing your kitchen’s performance. Notice storage shortcomings, workflow interruptions, and lighting deficiencies.
Document precise measurements and spatial limitations. These constraints will influence your new layout possibilities and cabinet configurations.
Consider how household members use the space throughout the day. Identify traffic bottlenecks and awkward transitions between key areas.
“A kitchen should be designed around what truly happens in it, not around an ideal that never materialises.”
Prioritising Functionality and Aesthetics
Create two distinct lists: practical necessities and aesthetic desires. Balance these elements to achieve both beauty and efficiency in your new kitchen.
Think beyond immediate needs to future requirements. Will your family grow? Might ageing parents join household meals? Planning for longevity ensures lasting satisfaction.
Many homeowners find guidance through comprehensive renovation guides that help classify projects by scope and ambition.
Establish non-negotiable features first. These priorities will guide your process when making trade-offs between dream elements and practical realities.
Remember that successful transformations blend emotional appeal with everyday functionality. Your vision should reflect both how you live and how you aspire to live.
Step 2: Establish a Realistic Renovation Budget
Financial planning forms the backbone of any successful home improvement project. Setting clear monetary boundaries ensures your vision remains achievable throughout the transformation.
Research indicates kitchen remodels average around $26,934 in the United States. Smaller projects might cost approximately $14,600, while extensive renovations could reach $41,485.
These figures highlight the importance of tailored financial planning. Your specific requirements will determine where your project falls within this spectrum.
Breaking Down Costs: Cabinetry, Worktops, and Labour
Cabinetry typically represents the most significant expense in any kitchen update. Quality storage solutions demand careful consideration within your overall financial plan.
Work surfaces and backsplashes require balancing aesthetic preferences with practical durability. Different materials offer varying price points and longevity.
Professional services constitute another major component of your expenditure. Skilled tradespeople ensure proper installation and finishing.
Consider this typical cost distribution for kitchen transformations:
| Expense Category | Percentage of Total Budget | Key Considerations |
|---|---|---|
| Cabinetry & Storage | 25-35% | Material quality, customisation options, hardware |
| Worktops & Backsplashes | 10-15% | Durability, maintenance requirements, aesthetic appeal |
| Professional Labour | 20-25% | Installation complexity, local rates, project duration |
| Appliances & Fixtures | 15-20% | Energy efficiency, features, integration requirements |
| Lighting & Flooring | 5-10% | Functionality, safety considerations, design coherence |
Multiple quotations from different suppliers provide valuable perspective. Comparing prices helps identify fair market rates for materials and services.
The Crucial 20% Buffer for Unexpected Expenses
Every home improvement project encounters unforeseen challenges. A contingency fund protects against unexpected discoveries during demolition or installation.
Allocate twenty percent of your total financial plan for these potential surprises. This buffer maintains financial stability when confronting hidden issues.
“Proper preparation prevents poor performance. The contingency fund isn’t optional—it’s essential insurance for your renovation investment.”
Financing options exist for homeowners needing payment flexibility. Credit programs allow spreading costs over manageable periods.
Prioritise elements offering greatest daily value and longevity. Strategic allocation ensures your money works hardest where it matters most.
Remember that quality craftsmanship and materials provide better long-term value. Your financial plan should reflect this wisdom without compromising vision.
Step 3: Choosing the Perfect Kitchen Layout
Your cooking space’s arrangement determines how comfortably you’ll move and work daily. Selecting the right configuration makes your new kitchen both beautiful and practical.
Different layouts suit various room shapes and family needs. Consider how you’ll use kitchen areas for cooking, socialising, and storage.
Think about traffic flow between key zones. The ideal arrangement minimises steps between refrigerator, sink, and cooker.
Your chosen pattern should complement existing flooring and architectural features. A well-planned kitchen layout enhances your entire home’s functionality.
The Efficient U-Shape Kitchen
This classic design features countertops along three walls. It creates excellent workflow with everything within easy reach.
U-shaped arrangements offer generous prep space and storage. They work beautifully in medium to large rooms.
The enclosed feeling provides cosy efficiency. Some homeowners find the configuration limits social interaction.
The Versatile L-Shape Kitchen
Perpendicular counters form this popular L-shaped pattern. It’s perfect for opening up smaller spaces.
This layout creates natural work triangles between key areas. The open end allows flexible furniture placement.
Many families add a small table or island later. L-shapes adapt well to various room dimensions.
The Space-Saving Galley Kitchen
Parallel countertops define this efficient galley style. It maximises every inch in narrow rooms.
The straightforward layout keeps everything within steps. This configuration suits single cooks perfectly.
Some find the enclosed feeling somewhat restrictive. Clever lighting and colours can make it feel more open.
Considering an Island Configuration
Islands create fantastic additional prep space and storage. They become natural gathering spots during meal preparation.
These features work best in larger, open-plan areas. Ensure sufficient clearance around all sides.
Islands often increase project costs slightly. Their versatility makes them popular in modern homes.
Evaluate each option against your specific requirements. The right choice balances practicality with personal preference.
| Layout Type | Best For | Work Triangle Efficiency | Social Interaction | Storage Capacity |
|---|---|---|---|---|
| U-Shape | Medium to large kitchens | Excellent | Moderate | High |
| L-Shape | Small to medium kitchens | Very Good | Good | Medium to High |
| Galley | Narrow spaces | Excellent | Limited | Medium |
| Island Configuration | Open-plan areas | Good to Very Good | Excellent | High |
Think about how your family moves through the space daily. The perfect arrangement makes meal preparation joyful rather than frustrating.
Consider future needs alongside current requirements. A thoughtful kitchen renovation serves you well for years.
Step 4: Selecting Materials and Finishes
Material choices define your kitchen’s character and longevity. This selection phase transforms your vision into tangible reality through thoughtful finishes.
Your decisions here impact daily functionality and maintenance requirements. Consider both immediate appeal and long-term performance.
Balancing aesthetics with practicality ensures lasting satisfaction. Every surface should work hard while looking beautiful.
Choosing Durable and Stylish Worktops & Backsplashes
Work surfaces endure constant use and exposure. Select materials that withstand daily demands while maintaining their beauty.
Quartz offers excellent durability with minimal maintenance. Its non-porous surface resists stains and bacterial growth.
Granite provides a luxurious natural stone appearance. Each slab features unique veining and colour variations.
Consider engineered alternatives that mimic premium materials. These options often provide better consistency and value.
Backsplashes protect walls while adding design interest. Coordinate their colour and texture with your worktop selection.
Tile materials range from ceramic to glass and metal. Each offers different visual effects and cleaning requirements.
Selecting Cabinetry for Storage and Style
Storage solutions represent a significant investment in your transformation. Cabinetry combines organisational function with visual appeal.
Custom-built units provide tailored storage for specific needs. They maximise every inch of available space beautifully.
Pre-made options offer budget-friendly alternatives. Many manufacturers provide extensive customisation within standard sizes.
Consider door styles that complement your overall design theme. Shaker profiles suit traditional and contemporary settings equally.
Finish durability matters for high-use areas. Thermofoil resists moisture while painted finishes allow colour matching.
Hardware selection enhances both function and aesthetics. Drawer runners and hinge quality impact daily satisfaction.
“The right materials don’t just look beautiful—they perform beautifully year after year, making daily life easier and more enjoyable.”
Evaluate samples in your actual kitchen lighting. Colours and textures change under different illumination conditions.
Create a cohesive look by coordinating finishes across elements. Your backsplash, worktop, and cabinetry should harmonise beautifully.
Practical considerations include stain resistance and cleaning ease. Families with young children might prioritise wipe-clean surfaces.
Remember that material choices age differently over time. Some develop patina while others maintain their original appearance.
Allocate your budget according to usage intensity. Invest more in surfaces that receive heaviest daily use.
Your selected materials ultimately define the kitchen’s character. Choose options that reflect your lifestyle and design preferences perfectly.
Step 5: A Guide on How to Plan a Kitchen Renovation with the Right Professionals
Finding skilled experts transforms your vision into reality. The team you choose significantly impacts your project’s success and satisfaction.
Professional guidance ensures technical excellence throughout the process. Their experience helps navigate challenges you might not anticipate.
Take time to research local specialists with proven track records. Look for those specialising in residential kitchen transformations.
Vetting and Selecting a Qualified Contractor
Start by requesting recommendations from friends and neighbours. Personal referrals often lead to trustworthy professionals.
Schedule meetings with at least three different contractors. Discuss their experience with similar projects and timelines.
Ask specific questions about handling unexpected issues. Inquire about their communication style and project management approach.
Request references from recent clients and follow up diligently. Previous customers provide honest insights about working relationships.
Review photographs of completed projects in their portfolio. This demonstrates their attention to detail and quality standards.
Red Flags to Avoid During Your Search
Be cautious of contractors demanding large upfront payments. Reputable professionals typically use staged payment schedules.
Avoid those lacking proper licensing or insurance coverage. These protections safeguard your investment and property.
Steer clear of professionals unwilling to provide detailed contracts. Written agreements prevent misunderstandings later.
Watch for vague estimates instead of itemised quotations. Transparency indicates professionalism and honesty.
| Selection Criteria | What to Look For | Potential Warning Signs |
|---|---|---|
| Experience & Specialisation | Portfolio of completed kitchen projects | Limited relevant experience |
| Communication Style | Regular updates and clear explanations | Unresponsive or vague communication |
| Contract Details | Comprehensive written agreement | Verbal promises only |
| Payment Terms | Reasonable deposit with progress payments | Large upfront payment demands |
| References & Reviews | Positive feedback from recent clients | Limited or negative reviews |
Establish clear expectations before work begins. Discuss daily schedules, cleanup procedures, and access arrangements.
Maintain regular check-ins throughout the project. Address concerns promptly to prevent small issues becoming major problems.
“The best contractors become partners in your vision, combining technical skill with thoughtful collaboration.”
These tips help create positive working relationships built on trust. Good communication ensures everyone stays aligned with your goals.
Remember that quality professionals worth their fees deliver peace of mind. Their expertise makes your dream space achievable.
Step 6: Planning Your Kitchen Remodel Timeline
Creating a detailed schedule keeps your project organised and manageable. A well-structured timeline helps everyone understand what happens when.
Research shows these projects typically involve significant preparation. The construction process itself follows a logical sequence of phases.
Your specific scope determines the overall duration. Smaller updates might complete faster than comprehensive transformations.
Remember that flexibility remains crucial throughout. Unexpected changes often require adjusting your original schedule.
Understanding the Phases: From Demolition to Installation
Demolition marks the exciting beginning of physical work. This phase typically lasts one to two weeks for standard projects.
Structural modifications might follow if you’re altering the layout. Electrical and plumbing updates happen during this period.
Installation begins with flooring before cabinet fitting. This sequence prevents damage to your new storage units.
Worktop fitting requires precise measurements after cabinet placement. This often involves a short waiting period for fabrication.
Final touches include painting, lighting, and appliance connections. These finishing elements bring your vision together beautifully.
Building Flexibility for Inevitable Delays
Material deliveries sometimes arrive later than expected. Weather conditions can affect transportation schedules.
Unexpected discoveries during demolition might need additional work. These surprises require professional assessment and solutions.
Permit approvals occasionally take longer than anticipated. Local authority processing times vary between regions.
Trade availability impacts scheduling during busy periods. Popular contractors often juggle multiple projects simultaneously.
“The perfect renovation schedule includes generous buffers for reality. Time flexibility reduces stress when surprises occur.”
Consider these typical duration estimates for various phases:
| Project Phase | Average Duration | Key Considerations |
|---|---|---|
| Demolition & Preparation | 1-6 weeks | Project size, structural changes, waste removal |
| Structural Work | 1-3 weeks | Wall modifications, electrical updates, plumbing changes |
| Flooring Installation | 2-3 days | Material type, subfloor preparation, drying time |
| Cabinet Installation | 3-5 days | Customisation level, complexity, alignment checks |
| Worktop Fitting | 3-5 weeks | Template creation, fabrication time, sealing requirements |
| Finishing Touches | 2-4 weeks | Painting, cleaning, final inspections, appliance setup |
Coordinate material deliveries with your construction schedule. Storage space might be limited during active work periods.
Maintain open communication with your professional team. Regular updates help manage expectations about progress.
Remember that quality work deserves adequate time. Rushing critical stages often leads to disappointing results.
Your beautiful new cooking area deserves careful attention throughout the timeline. Patience during construction ensures lasting satisfaction.
Step 7: Selecting Appliances and Fixtures
Your appliance choices transform how you interact with your cooking space daily. These selections blend practical function with personal style preferences beautifully.
Consider how your household truly uses the kitchen area. Different families have unique cooking habits and entertainment needs.
Energy efficiency deserves special attention during your selection process. Look for models carrying the Energy Star certification mark.
These units reduce environmental impact while lowering utility bills. Though sometimes costing more initially, they save money over years of use.
Focusing on Energy Efficiency and Features
Modern appliances offer impressive energy-saving technologies. Evaluate each model’s consumption ratings before making decisions.
Convection ovens circulate heat more efficiently than traditional models. They cook food faster while using less energy overall.
Refrigerators with adjustable shelving adapt to changing storage requirements. This flexibility prevents wasted space and energy.
Dishwashers featuring multilevel racks accommodate various load sizes. They clean thoroughly while conserving water and electricity.
Consider these factors when comparing appliance options:
- Annual energy consumption figures and operating costs
- Noise levels during operation, especially for open-plan spaces
- Warranty coverage and manufacturer support services
- Availability of replacement parts and repair technicians
- User interface simplicity and control accessibility
Integrating Smart Appliances for Modern Convenience
Wi-Fi enabled devices bring new convenience to meal preparation. They allow remote monitoring and control from smartphones.
Smart refrigerators can inventory contents and suggest recipes. Some models even create shopping lists when supplies run low.
Ovens with connectivity features enable preheating before arrival home. You can adjust temperatures while attending to other tasks.
Dishwashers send notifications when cycles complete. This prevents forgotten loads sitting overnight.
“Smart integration should simplify daily life, not complicate it. Choose features that genuinely match your lifestyle rather than chasing every available technology.”
Coordinate appliance finishes for a cohesive aesthetic appearance. Stainless steel offers timeless appeal while integrated models disappear behind cabinet panels.
Position units considering workflow between preparation zones. The refrigerator should access easily from both cooking and entry areas.
Remember that reliability often outweighs bleeding-edge features. Research brand reputations for durability and service support.
Your selections will serve your family for many years. Choose models that balance innovation with proven performance.
Step 8: Preparing for the Renovation Disruption
Living through a kitchen transformation requires practical adjustments. Thoughtful preparation makes this period manageable for your entire household.
Your daily routines will change temporarily during construction. A well-organised approach maintains comfort despite the disruption.
Creating a functional alternative cooking space becomes your first priority. This area keeps essential meals and beverages accessible.
Select a location away from the construction zone. Ensure it has good ventilation and adequate electrical outlets.
Setting Up a Functional Temporary Kitchen
Gather essential appliances for basic food preparation. A microwave, coffee maker, and mini-fridge form the core setup.
Position these items near a water source if possible. Access to a sink simplifies cleaning and food preparation.
Store frequently used utensils in clear plastic containers. This keeps everything organised and readily available.
Consider these essential components for your interim cooking area:
| Category | Essential Items | Practical Considerations |
|---|---|---|
| Appliances | Microwave, kettle, mini-fridge | Power requirements, counter space, noise level |
| Food Storage | Plastic containers, cool box | Accessibility, pest protection, temperature control |
| Preparation | Cutting board, basic knives | Safety, cleaning facilities, storage solutions |
| Serving | Disposable plates, cups, utensils | Waste management, cost, environmental impact |
Allow one to two days for proper organisation. Rushing this setup creates frustration later.
Protect your furniture from construction dust with covers. Seal off adjacent rooms to contain the mess.
Meal Planning and Using Disposable Tableware
Simplify your eating routine during the renovation period. Prepare meals in advance when possible.
Focus on recipes requiring minimal cooking equipment. Salads, sandwiches, and microwave meals work well.
Stock up on disposable plates and cutlery. This eliminates washing up in bathroom sinks.
Establish a comfortable eating area outside the work zone. This maintains family meal traditions during disruption.
“The temporary kitchen isn’t about gourmet meals—it’s about maintaining nourishment and routine during transformation.”
Consider these practical strategies for meal management:
- Prepare freezer meals before construction begins
- Create a simple weekly menu to reduce decision fatigue
- Keep snacks readily available for quick energy
- Use local takeaway options occasionally for variety
- Maintain regular meal times despite the changed environment
Remember this phase is temporary but important for family wellbeing. A little planning makes the experience much smoother.
Your home remains functional throughout the project. The work progresses while life continues comfortably.
Make sure everyone understands the new arrangements. Clear communication prevents frustration during this transition period.
Step 9: Navigating the Renovation Process
Executing your kitchen transformation involves careful coordination of multiple trades. This phase transforms your vision into reality through systematic installation and inspection.
Understanding the sequence prevents costly mistakes and rework. Each task builds upon the previous one’s completion.
The right order ensures structural integrity and aesthetic perfection. Your professionals will guide you through this complex phase.
The Order of Operations: Floors, Cabinets, and Counters
Flooring installation timing depends on your chosen material. Hardwood requires fitting before cabinet placement for proper expansion.
Vinyl and laminate floors typically install after cabinet fitting. This prevents damage during heavy unit installation.
Cabinet levelling becomes critical before worktop measurement. Even slight unevenness affects counter alignment and stability.
Consider this typical installation sequence:
| Phase | Key Tasks | Professional Coordination |
|---|---|---|
| Structural Preparation | Plumbing, electrical, insulation updates | Plumbers, electricians, carpenters |
| Flooring Installation | Hardwood or alternative material fitting | Flooring specialists, main contractor |
| Cabinet Fitting | Unit assembly and precise levelling | Cabinet installers, project manager |
| Countertop Installation | Precise measurement and sealing | Stone specialists, main contractor |
Material delivery schedules must align with construction progress. Late arrivals can disrupt the entire timeline.
The Importance of Professional Inspections Post-Demolition
Demolition often reveals hidden issues within walls and floors. Professional inspections at this stage prevent future problems.
Electricians should check wiring integrity while accessible. Old systems might need upgrading for modern appliance demands.
Plumbers assess pipe conditions and drainage efficiency. This prevents leaks developing behind new installations.
Structural engineers might evaluate load-bearing elements. Their assessment ensures your new layout remains safe.
“Post-demolition inspections are like preventative medicine for your home. They identify issues before they become expensive emergencies.”
Document all findings and recommended solutions. This creates a clear action plan for addressing surprises.
Effective coordination between different tradespeople ensures smooth progress. Your contractor manages this complex dance of specialists.
Regular progress monitoring helps maintain timeline adherence. Respect your professionals’ expertise while staying informed.
Clear communication addresses concerns as they arise. This collaborative approach delivers the best results.
Your beautiful new cooking space emerges through these careful steps. Each phase brings you closer to your dream kitchen.
Step 10: Smart Strategies to Save Money
Strategic financial decisions throughout your project can yield significant savings without compromising quality. Smart budgeting involves knowing where to invest and where to economise.
Thoughtful choices create beautiful results while maintaining financial control. Your dream space becomes achievable through clever resource allocation.
Focus your investment on elements receiving heaviest daily use. These high-traffic areas deserve premium quality for lasting performance.
Economise on decorative features that update easily later. This approach balances immediate impact with long-term flexibility.
Investing in High-Use Areas and Saving on Decor
Prioritise durability for components experiencing constant wear. Faucets, cabinet hardware, and work surfaces justify higher expenditure.
These elements withstand daily demands while maintaining appearance. Quality here prevents costly replacements down the line.
Decorative lighting and paint colours offer budget-friendly update opportunities. These aspects change easily as trends evolve.
Consider this investment strategy for various components:
| Component Category | Investment Priority | Rationale | Potential Savings Approach |
|---|---|---|---|
| Cabinet Hardware | High | Daily use demands durability | Choose timeless finishes over trendy options |
| Work Surfaces | High | Heavy use requires stain resistance | Select quartz over natural stone |
| Lighting Fixtures | Medium | Easily updated as styles change | Basic fixtures with decorative bulbs |
| Backsplash Tiles | Medium | Visible but replaceable | Classic subway tile instead of premium materials |
| Paint Colours | Low | Simple and inexpensive to change | Neutral bases with accent accessories |
This strategic approach maximises your budget’s impact. You achieve both immediate satisfaction and future adaptability.
Choosing Cost-Effective Alternatives to Luxury Materials
Many materials offer similar aesthetics at friendlier price points. These alternatives provide excellent performance without premium costs.
Quartz worktops mimic marble’s elegance with enhanced durability. They resist staining better than natural stone options.
Luxury vinyl plank flooring replicates wood’s warmth beautifully. It handles moisture better than traditional hardwood.
Laminate cabinet finishes now offer convincing wood grain patterns. They provide consistent appearance across all units.
“Smart material selection isn’t about settling for less—it’s about choosing wisely where quality matters most.”
Consider these additional money-saving strategies:
- Reface existing cabinets instead of full replacement
- Purchase display model appliances with full warranties
- Time your purchases around seasonal sales events
- Obtain multiple quotations for all contracted work
- Handle simple demolition tasks yourself if safe
Always balance initial savings against long-term maintenance costs. Sometimes spending slightly more upfront saves money over years.
Your beautiful new space reflects both smart choices and personal style. Strategic budgeting makes your vision achievable.
Step 11: Common Kitchen Renovation Mistakes to Avoid
Learning from others’ experiences helps you navigate potential pitfalls during your home improvement journey. Many homeowners encounter similar challenges that can impact both satisfaction and budget.
Understanding these common errors provides valuable insight for your project. You’ll make more informed decisions that align with your long-term vision.
Prioritising Style Over Function
Beautiful aesthetics shouldn’t compromise daily practicality. The most successful spaces balance visual appeal with efficient workflow.
Trend-focused choices often date quickly while classic designs endure. Consider timeless elements that will remain appealing for years.
Storage solutions deserve particular attention during planning. Inadequate organisation leads to ongoing frustration after completion.
“Form follows function—this principle remains true for kitchen design. Beautiful spaces must work beautifully first.”
Underestimating Budgets and Timelines
Realistic financial planning prevents stressful surprises during construction. Many projects encounter unexpected costs that strain resources.
Timeline estimates often prove optimistic once work begins. Building flexibility into your schedule reduces pressure when delays occur.
Consider these practical tips for avoiding common missteps:
- Research materials thoroughly before making commitments
- Balance aesthetic desires with practical needs and budget constraints
- Develop realistic expectations with appropriate contingency planning
- Account for potential complications in your timeline planning
- Maintain focus on your original goals throughout the process
Impulse decisions might compromise the overall design cohesion. Take time to consider each choice carefully before proceeding.
Learning from others’ renovation experiences provides valuable perspective. Their insights help you anticipate challenges before they arise.
Your dream space deserves careful consideration at every stage. Thoughtful planning ensures both immediate satisfaction and lasting enjoyment.
Conclusion: Enjoying Your Beautifully Renovated Kitchen
Your completed remodel now stands as the heart of your home. This transformation brings both beauty and function to your daily life.
Enjoy hosting gatherings and creating lasting memories. Your space now offers everything need for comfortable living.
Classic design choices ensure your kitchen will look fresh for years. You made smart decisions that balance style with practicality.
Take pride in achieving this milestone through careful preparation. Your beautiful new kitchen awaits many joyful moments ahead.
FAQ
How long does a typical kitchen renovation take?
A full kitchen renovation usually takes between six to twelve weeks. This includes planning, demolition, installation of new materials and appliances, and final touches. Timelines can vary based on the project’s complexity and any unexpected issues that arise.
What is the most important factor to consider when planning a new kitchen layout?
Functionality is key. Think about how you use your kitchen daily. The layout should support your cooking habits, provide efficient storage, and allow for easy movement. Popular choices like the U-shape or L-shape kitchen offer excellent workflow and practicality.
Should I set aside a contingency budget for my kitchen remodel?
Absolutely. It’s wise to allocate an extra 15-20% of your total budget for unforeseen expenses. Renovations often uncover hidden problems like outdated plumbing or electrical issues that need addressing, so having a buffer ensures you’re prepared.
How do I choose between different worktop materials?
Consider durability, maintenance, and style. Quartz offers great resilience and low upkeep, while granite provides a unique, natural look. For a budget-friendly option, laminate or vinyl can mimic more expensive materials beautifully.
What should I look for when hiring a contractor?
Check their credentials, read reviews, and ask for references. A reliable contractor should be fully insured, provide a detailed written quote, and have a portfolio of completed projects. Avoid those who pressure you or offer suspiciously low estimates.
How can I make my kitchen more energy-efficient?
Opt for appliances with high energy efficiency ratings (look for the A+++ label). LED lighting consumes less electricity, and good insulation helps maintain temperature. These choices save money on bills and reduce your environmental footprint.
Is it possible to live at home during a kitchen renovation?
Yes, but it requires preparation. Set up a temporary kitchen in another room with essentials like a microwave, kettle, and mini-fridge. Plan simple meals and use disposable plates to minimise washing up. It keeps daily life manageable during the disruption.
What is the best order of work during a kitchen installation?
Start with any structural changes, followed by plumbing and electrical work. Then install flooring, cabinets, and worktops. Finally, add the splashback, lighting, and appliances. This logical sequence helps avoid damage to new fittings and ensures a smooth process.