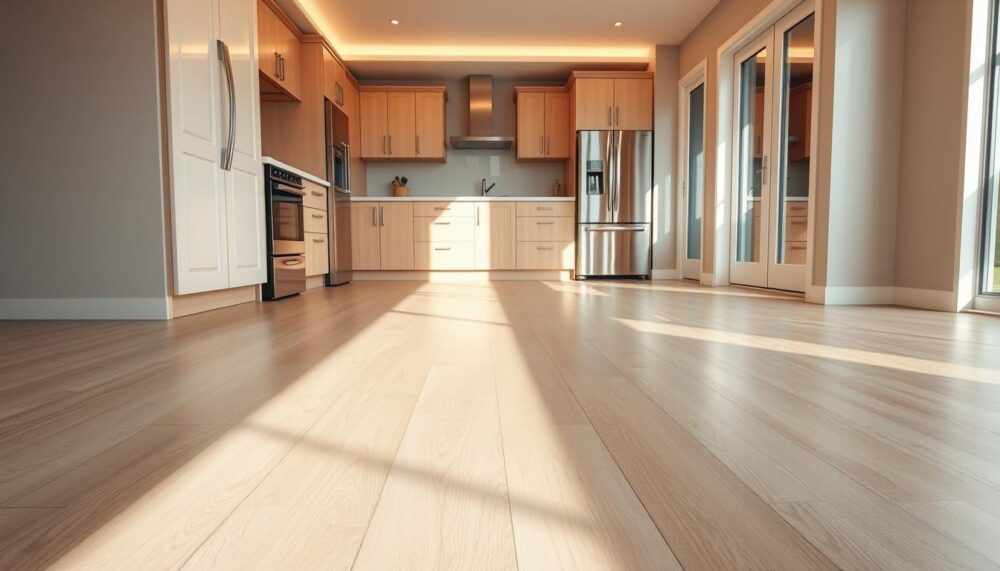
When it comes to upgrading your kitchen, choosing the right flooring is essential. Vinyl has become a popular choice due to its durability, water resistance, and affordability. It’s also a fantastic option for those who prefer a DIY approach, as the installation process is straightforward and manageable.
One of the standout features of vinyl is its versatility in design. Whether you’re aiming for a modern look or a classic finish, there’s a style to suit every taste. To achieve the best results, it’s crucial to follow a structured process, ensuring your new floor looks professional and lasts for years.
Before starting, gather essential tools like a tape measure, utility knife, and adhesive. Proper preparation, precise cutting techniques, and careful handling of tricky areas are key steps to success. Let’s explore how to transform your kitchen with this practical and stylish solution.
Key Takeaways
- Vinyl is a durable and water-resistant option for kitchen floors.
- It offers affordability and design versatility.
- DIY installation is achievable with the right tools and techniques.
- Proper preparation ensures a professional finish.
- Handling tricky areas requires patience and precision.
Introduction to Vinyl Flooring Installation
Vinyl flooring offers a blend of practicality and style for any room. Whether you’re updating your home or tackling a DIY project, understanding the basics is crucial. This material is celebrated for its durability, affordability, and ease of maintenance.
When choosing vinyl, you’ll encounter two main options: sheet vinyl and tiles. Sheet vinyl provides a seamless finish, ideal for areas prone to spills. Tiles, on the other hand, offer modular flexibility, allowing for creative designs.
You Might Also Like:


There are also different types to consider. Cushioned vinyl is softer underfoot, while rigid vinyl offers enhanced stability. Each type has specific adhesive requirements, so make sure to follow the manufacturer’s guidelines.
Preparation is key to a successful installation. The subfloor must be clean, dry, and level. Additionally, the vinyl should acclimatise in the room for at least 48 hours. This ensures it adjusts to the temperature and humidity, preventing issues later.
“Improper adhesive use can lead to lifting and uneven surfaces. Always follow the recommended application process.” – Tapi
Waterproofing is another critical factor, especially in kitchens. Vinyl is naturally water-resistant, but proper sealing around edges enhances its longevity. Pattern alignment is equally important for a polished look.
| Feature | Sheet Vinyl | Tiles |
|---|---|---|
| Finish | Seamless | Modular |
| Installation | Easier for large areas | Flexible for custom designs |
| Maintenance | Simple cleaning | Replaceable tiles |
By considering these factors, you can ensure a smooth and professional-looking installation. Whether you opt for professional fitting services or a DIY approach, vinyl flooring is a fantastic choice for any space.
Preparing Your Kitchen for Vinyl Flooring
Proper preparation is the foundation of a flawless vinyl flooring installation. Taking the time to measure accurately, acclimatise the material, and prepare the subfloor ensures a professional finish that lasts for years.
Measuring the Room
Start by calculating the total area of your kitchen. Add a buffer of 50-100mm per edge to account for any irregularities or cutting errors. Don’t forget to include alcoves and doorways in your measurements. This extra allowance ensures you have enough material to cover the entire space without unsightly gaps.

Acclimatising the Vinyl
Before installation, unroll the vinyl and let it sit in the room for 24-48 hours. This process allows the material to adjust to the temperature and humidity, preventing issues like cold shrinkage. Tapi recommends this step to ensure the vinyl lays flat and adheres properly.
Preparing the Subfloor
The subfloor must be clean, dry, and level for a successful installation. Remove any old flooring and fill cracks or uneven surfaces. For wooden subfloors, ensure the moisture content is no more than 10%. Concrete subfloors should have a relative humidity of less than 75%. If needed, use a self-levelling compound to create a smooth surface. For more detailed guidance, check out this guide on preparing the subfloor.
Finally, check for dampness and address it if present. Proper preparation ensures your new flooring looks professional and stands the test of time.
How to Install Vinyl Flooring in the Kitchen
Getting the placement right is crucial for a seamless finish. Proper alignment, precise cutting, and secure fixing ensure your new floor looks professional and lasts for years. Let’s break down the steps to achieve this.
Starting Against the Longest Wall
Begin by aligning the sheet parallel to the longest wall in the room. Leave a 25mm gap around the edges to allow for scribing. This gap accommodates any irregularities in the wall and ensures a snug fit. Use a scribing gauge, such as B&Q’s nail-and-wood gauge method, to mark the line accurately.
Cutting and Trimming the Vinyl
Once the sheet is in place, focus on cutting and trimming. Create triangular notches at internal corners for a neat finish. Use a bolster chisel to smooth out any creases. For excess material, trim it with a utility knife angled at 45° for clean edges.
Securing the Vinyl
For cushioned vinyl, apply glue to the edges and joins to ensure it stays in place. ‘Stay flat’ vinyl, however, requires no adhesive. After application, roll the vinyl with a soft broom to remove air bubbles and ensure even adhesion. Tapi recommends this step for a polished finish.
- Align the sheet parallel to the longest wall.
- Leave a 25mm gap for scribing.
- Use a utility knife for precise cutting.
- Apply glue to edges and joins for cushioned vinyl.
- Roll the vinyl with a soft broom for a smooth finish.
By following these steps, you can achieve a professional-looking installation that enhances your kitchen’s appeal. Patience and precision are key to ensuring your new floor stands the test of time.
Handling Tricky Areas During Installation
Navigating tricky areas during installation can make or break the final look of your project. Whether it’s fitting around fixtures, pipes, or door frames, precision is key. With the right techniques, you can achieve a seamless finish that enhances the overall appeal of your space.
Fitting Around Toilets and Basins
When working around toilets or basins, start by folding the material back. Make radial cuts around the pedestal base to ensure a snug fit. Once the material is in place, seal the edges with silicone to prevent moisture from seeping through. This method ensures a clean and professional look.
Fitting Around Pipes
Pipes can be particularly challenging. Use B&Q’s slit-and-notch method for a precise fit. Make a straight cut toward the pipe, then create small notches to accommodate it. Trim any excess material for a neat finish. This technique ensures the material lies flat and looks seamless.
Fitting Around Door Frames
Door frames require careful attention. Make vertical cuts and install a threshold bar for a polished finish. Ensure the material ends halfway under the door to create a smooth transition. This approach not only looks professional but also enhances durability.
For larger rooms, Tapi recommends using double-sided tape to secure joins. This prevents lifting and ensures the material stays in place. Additionally, B&Q’s external corner method involves a 50-100mm upturn, creased with a bolster chisel for a clean finish.
| Area | Technique |
|---|---|
| Toilets/Basins | Radial cuts, silicone sealing |
| Pipes | Slit-and-notch method |
| Door Frames | Vertical cuts, threshold bar |
By following these steps, you can tackle even the most challenging areas with confidence. For more detailed guidance, check out this guide on steps to install vinyl flooring in the.
Conclusion
Transforming your space with vinyl is a rewarding project when done right. Proper measurement, acclimatisation, and precision cutting are essential steps to ensure a flawless finish. These efforts pay off with a floor that’s both durable and stylish.
Vinyl’s benefits, such as waterproofing, ease of maintenance, and design flexibility, make it a practical choice for busy areas. For complex layouts, consider professional fitting services like Tapi’s £6.75/m² option to achieve the best results.
Always use manufacturer-recommended adhesives and sealants to enhance longevity. For a personalised touch, explore patterned vinyl options to match your unique style. For more tips, check out this detailed guide.
With patience and attention to detail, your new floor will elevate your space for years to come.
FAQ
What tools are needed for vinyl flooring installation?
You’ll need a utility knife, measuring tape, straight edge, adhesive, and a roller. Having a spirit level and chalk line can also help ensure accuracy.
How do I prepare the subfloor before laying vinyl?
Clean the subfloor thoroughly, removing any debris or dust. Ensure it’s level and smooth, as imperfections can show through the finished surface.
Should vinyl be acclimatised before installation?
Yes, leave the material in the room for at least 24 hours. This allows it to adjust to the temperature and humidity, preventing warping or gaps later.
How do I cut vinyl flooring to fit around obstacles?
Use a utility knife to make precise cuts. For pipes or corners, create a template with paper first, then transfer the shape onto the vinyl.
Can vinyl flooring be installed over existing tiles?
Yes, as long as the tiles are level and firmly fixed. However, any loose or damaged tiles should be removed or repaired beforehand.
How do I ensure the edges are secure?
Apply adhesive evenly along the edges and use a roller to press the material firmly into place. This prevents lifting or gaps over time.
What’s the best way to handle corners and door frames?
Make small, precise cuts with a utility knife. For door frames, undercut the trim slightly to slide the vinyl underneath for a seamless finish.
How long does it take for the adhesive to dry?
Drying times vary by product, but most adhesives require 24-48 hours. Avoid walking on the surface during this period to ensure a strong bond.