Proper drainage in your kitchen is essential for maintaining a functional and leak-free space. Whether you’re replacing an old system or setting up a new one, understanding the basics can save you time and money. With the right tools and materials, this DIY task becomes manageable for most homeowners.
Using items like pliers, wrenches, and plumber’s putty, you can ensure a secure fit. Deep basin sinks may present challenges, but with careful planning, these can be overcome. The key is to approach the project with confidence and attention to detail.
By mastering this skill, you’ll not only improve your home’s plumbing but also gain the satisfaction of completing a practical task. Let’s dive into the essentials to help you get started.
Key Takeaways
- Proper installation prevents leaks and ensures efficient drainage.
- Essential tools include pliers, wrenches, and plumber’s putty.
- Deep basin sinks may require additional adjustments.
- Confidence and planning are crucial for success.
- This DIY project can save time and money.
Introduction to Installing a Kitchen Drain
Understanding the basics of your kitchen sink drain system is the first step towards a successful home improvement project. A properly functioning drain ensures efficient water flow and prevents leaks, making it a vital part of your kitchen.
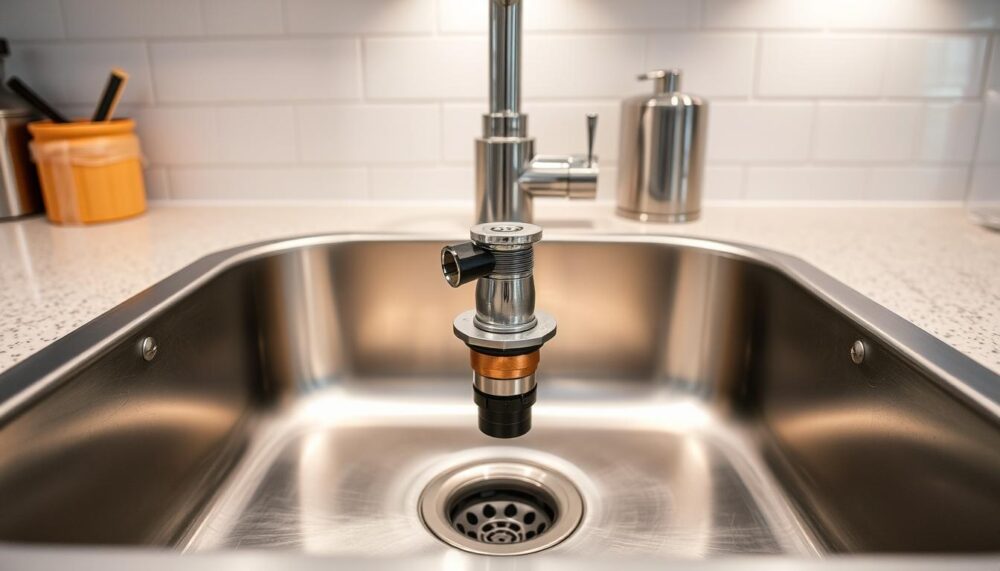
The primary components of a sink drain include the basket strainer, tailpiece, and P-trap. The basket strainer sits inside the sink, while the P-trap prevents unpleasant odours from entering your home. Measuring the sink depth is crucial to ensure the tailpiece fits correctly.
Deep basin or apron sinks may require additional adjustments. If the wall drain position needs altering, it’s best to seek professional help. DIY plumbing can be rewarding, but safety should always come first.
You Might Also Like:


“Always wear protective gloves and goggles when working with plumbing tools to avoid injuries.”
Here’s a quick overview of the typical time commitment for this project:
| Task | Time Required |
|---|---|
| Measuring and Adjusting | 30 minutes |
| Component Installation | 1-2 hours |
| Testing for Leaks | 15 minutes |
By familiarising yourself with these basics, you’ll be well-prepared to tackle this project with confidence.
Essential Tools and Materials
Having the right tools and materials is crucial for a smooth plumbing project. Proper preparation ensures efficiency and reduces the risk of errors. Whether you’re a seasoned DIYer or a beginner, this guide will help you gather everything you need.
List of Tools
Start with the basics. A pair of pliers is indispensable for gripping and tightening components. An adjustable spanner, often referred to as a wrench in other regions, is essential for loosening or tightening nuts and bolts. For tight spaces under the sink, a basin wrench is particularly useful.
Other tools include a screwdriver set, a hacksaw for cutting pipes, and a measuring tape for accurate fittings. Don’t forget a bucket to catch any residual water during the process.
List of Materials
Your materials list should include a basket strainer, which sits inside the sink to catch debris. A brass tailpiece is durable and resistant to corrosion, making it a reliable choice. You’ll also need a nut and rubber ring to secure the strainer in place.
Plumber putty is vital for creating a watertight seal around the strainer. For the pipe connections, choose between plastic or metal fittings. Plastic is lightweight and cost-effective, while metal offers greater durability.
Safety is paramount. Always wear BS EN-certified gloves and goggles to protect yourself during the project. With these tools and materials, you’re ready to tackle the task with confidence.
Preparing for Installation
Before starting any plumbing project, preparation is key to success. Taking the time to set up your workspace and ensure safety measures are in place will make the entire process smoother. This section covers essential steps to get you ready for the task ahead.
Clearing the Area
Start by removing any items stored under the sink. This creates a clutter-free workspace and allows easy access to the connections. Use a bucket to catch any residual water that may spill during the process.
Dispose of old plumbing components responsibly. Many local councils in the UK offer recycling services for metal and plastic parts. This ensures your home remains eco-friendly.
Shutting Off the Water Supply
Locate the UK-style isolation valve, typically found under the sink or near the main water supply. Turn it clockwise to shut off the water. This prevents accidental leaks during the installation.
Make sure to test the valve by turning on the tap. If no water flows, you’ve successfully shut off the supply. Always double-check to avoid surprises later.
Here’s a quick checklist to ensure you’re fully prepared:
| Task | Status |
|---|---|
| Clear the workspace | ✓ |
| Shut off the water supply | ✓ |
| Prepare tools and materials | ✓ |
| Wear safety gear | ✓ |
By following these steps, you’ll create a safe and efficient environment for your project. Preparation not only saves time but also ensures a professional finish.
Step-by-Step Guide on How to Install a Kitchen Drain
Replacing a kitchen sink’s drainage system requires careful attention to detail and the right techniques. This guide walks you through each step, ensuring a smooth and efficient process. Whether you’re tackling this for the first time or refreshing your skills, these instructions will help you achieve a professional finish.
Removing the Old Drain
Start by disconnecting the existing drain assembly. Use a craft knife to carefully cut through the old sealant without damaging the sink surface. Loosen the nuts holding the pipe in place with pliers or a wrench. If your setup includes a dishwasher drainline or food disposal unit, disconnect these as well.
Once the components are loose, gently remove the old drain from the bottom of the sink. Clean the area thoroughly to ensure a smooth surface for the new installation. This step is crucial for preventing leaks and ensuring a secure fit.
Installing the New Basket Strainer
Apply a sealing strip or silicone sealant around the edge of the new basket strainer. This creates a watertight seal, preventing leaks. Insert the strainer into the sink opening and secure it from underneath using the provided nut and rubber ring.
For added durability, consider using plumber’s putty. Roll it into a thin rope and place it around the strainer’s flange. Tighten the nut evenly to ensure the strainer sits flush with the sink surface. Avoid over-tightening, as this can damage the components.
Connecting the Tailpiece and P-Trap
Measure and adjust the tailpiece length if necessary, especially for deep farmhouse sinks. Assemble the trap adapter onto the sink drain, ensuring proper alignment with the UK-standard waste pipe diameters. Cut and fit PVC pipes as needed, using PVC primer and cement for secure connections.
Attach the P-trap to the tailpiece, ensuring all connections are tight. This component prevents unpleasant odours from entering your home while allowing efficient water flow. Double-check each joint to ensure a leak-proof assembly.
| Task | Key Tips |
|---|---|
| Removing Old Drain | Use a craft knife to avoid damaging the sink. |
| Installing Basket Strainer | Apply plumber’s putty for a watertight seal. |
| Connecting Tailpiece and P-Trap | Ensure proper alignment with waste pipe diameters. |
By following these steps, you’ll achieve a functional and leak-free drainage system. For more detailed guidance on kitchen sink pipes, explore our comprehensive resource.
Ensuring a Leak-Proof Connection
Achieving a leak-free plumbing system is vital for long-term functionality and peace of mind. Properly sealed connections prevent water damage and maintain efficient drainage. Here’s how to ensure your setup is secure and reliable.
Start by following British standard torque specifications for compression fittings. Over-tightening nuts can damage threads, while under-tightening may cause leaks. Use a torque wrench to achieve the correct tension, ensuring a snug fit without excessive force.
Identify common leak points in UK plumbing systems. These often occur at the washer or where pipes join. Inspect these areas carefully during installation. Applying Teflon tape to threads can enhance the seal, especially in metal fittings.
Consider food-safe sealant alternatives to traditional putty. Silicone-based options are durable and non-toxic, making them ideal for kitchen applications. Apply a thin, even layer around the basket strainer for a watertight seal.
Follow a sequential tightening order for optimal results. Begin with the basket strainer, then move to the tailpiece and P-trap. This method ensures even pressure distribution across all connections.
Finally, conduct a 24-hour leak test. Fill the sink with water and let it drain completely. Check for any signs of moisture or dripping. If leaks persist, revisit the affected areas and adjust as needed.
| Component | Torque Specification |
|---|---|
| Compression Fittings | 15-20 Nm |
| Basket Strainer Nut | 10-12 Nm |
| P-Trap Connections | 8-10 Nm |
By following these steps, you’ll create a robust and leak-free plumbing system. Attention to detail and proper techniques are key to success.
Common Mistakes to Avoid
Avoiding common pitfalls during plumbing projects can save you time, money, and frustration. Even small errors can lead to leaks, inefficiency, or costly repairs. Here are five critical mistakes to watch out for.
Over-tightening plastic fittings is a frequent error. Excessive force can crack or warp the parts, compromising the seal. Use a torque wrench to apply the correct pressure, ensuring a secure fit without damage.
Proper disposal of excess putty is essential. In the UK, it must be disposed of according to local regulations. Leaving residue can clog drains or create uneven surfaces, leading to leaks.

Ventilation requirements under UK building codes are often overlooked. Poor airflow can cause pressure imbalances, affecting water flow. Ensure your system meets these standards for optimal performance.
Compatibility issues between European and British pipe threads can arise. Mismatched friction rings or fittings may not seal properly. Always double-check specifications before purchasing components.
Finally, recognise when DIY becomes counterproductive. Complex issues, such as P-trap alignment, may require a professional plumber. Attempting these tasks without expertise can lead to further complications.
| Mistake | Solution |
|---|---|
| Over-tightening fittings | Use a torque wrench |
| Excess putty disposal | Follow UK regulations |
| Ventilation requirements | Adhere to building codes |
| Thread compatibility | Verify specifications |
| Complex issues | Consult a professional |
By avoiding these mistakes, you’ll ensure a smoother and more successful plumbing project. Attention to detail and proper techniques are key to achieving a professional finish.
Advanced Tips for a Professional Finish
Taking your plumbing project to the next level requires a blend of precision and expert techniques. Whether you’re aiming for durability or a polished look, these advanced tips will help you achieve a professional finish.
Using Thread Compound
Thread compounds are essential for creating secure and leak-free fittings. Always choose products that meet BS EN standards for safety and reliability. Apply the compound evenly to the threads before tightening. This ensures a strong seal, especially for plastic or metal connections.
For copper fittings, consider professional soldering techniques. This method provides a durable bond, ideal for high-pressure systems. Remember to clean the surfaces thoroughly before applying solder for the best results.
Installing an Air Gap
An air gap is a crucial component under UK water bylaws, preventing backflow contamination. Position it between the dishwasher and the waste pipe, ensuring it’s at least 20mm above the flood level. This simple addition enhances safety and compliance.
Follow these steps for a smooth process:
- Measure the required height for the air gap.
- Secure it firmly to prevent movement.
- Test the system to ensure proper functionality.
“A well-installed air gap is a small detail that makes a big difference in plumbing safety.”
For those seeking a luxury upgrade, consider brushed brass finishes. These add a touch of elegance while maintaining functionality. Additionally, soundproofing techniques for drain pipes can reduce noise, creating a quieter kitchen environment.
By incorporating these advanced tips, you’ll elevate your plumbing project to a pro level. Attention to detail and the right techniques ensure a polished and efficient system.
DIY vs. Professional Installation
Deciding between DIY and hiring a professional plumber can significantly impact your home improvement project. While DIY can save money, certain tasks require expertise to ensure safety and compliance with UK building regulations.
Here’s a breakdown of key considerations:
- Cost Comparison: DIY plumbing may reduce labour costs, but mistakes can lead to expensive repairs. Professional services, though pricier, guarantee quality work that lasts longer.
- Building Regulations: Some plumbing tasks, like integrating combi-boiler systems, require certified installers. Always check local regulations before starting.
- Insurance Implications: Self-installed plumbing might void warranties or insurance claims if issues arise. Professionals provide peace of mind with their expertise.
- Complex Scenarios: Deep sink installations or exterior plumbing are best handled by experts to avoid complications.
- Finding Certified Plumbers: Look for TrustMark registered professionals to ensure high standards and reliability.
For complex tasks, it’s worth investing time in finding the right professional plumber. As highlighted in this guide, certain plumbing jobs are best left to the experts to ensure long-term functionality and safety.
“Hiring a certified plumber not only ensures compliance but also protects your home from potential hazards.”
By weighing the pros and cons, you can make an informed decision that suits your needs and budget. Whether you choose DIY or professional help, always prioritise quality and safety.
Conclusion
Completing your plumbing project successfully brings both functionality and peace of mind. Safety remains a top priority—always wear protective gear and follow UK building regulations. Regular maintenance, especially in areas with hard water, ensures your system stays efficient.
Embarking on this home improvement journey not only saves money but also reduces environmental impact. Properly installed systems prevent leaks and conserve water, contributing to a greener home.
For further guidance, consult resources like CIPHE guides. With the right tools and knowledge, your DIY efforts can achieve professional results. Take pride in your work and enjoy the benefits of a well-functioning kitchen setup.
FAQ
What tools are needed for replacing a sink drain?
You’ll need pliers, an adjustable wrench, a screwdriver, and plumber’s putty. These tools help remove the old assembly and secure the new one.
Can I use any type of putty for the basket strainer?
Always use plumber’s putty, as it creates a watertight seal around the strainer. Avoid other types of putty, as they may not withstand water exposure.
How do I ensure the connections are leak-proof?
Tighten all nuts securely but avoid over-tightening, which can damage the fittings. Use a rubber gasket and friction ring to prevent leaks.
Should I replace the P-trap when installing a new drain?
It’s a good idea to replace the P-trap if it’s old or corroded. This ensures a clean, leak-free connection with the new drain assembly.
Is it necessary to shut off the water supply before starting?
Yes, always shut off the water supply to avoid spills or accidents. This step is crucial for a smooth and safe installation process.
Can I install a new drain without professional help?
Yes, with the right tools and careful attention, you can handle this project yourself. However, if you’re unsure, consulting a professional plumber is advisable.
What’s the purpose of the friction ring in the drain assembly?
The friction ring helps secure the basket strainer in place, ensuring a tight fit and preventing leaks between the sink and the strainer.
How do I remove excess plumber’s putty after installation?
Wipe away any excess putty with a damp cloth. This ensures a clean finish and prevents debris from clogging the drain.
What’s the best way to test for leaks after installation?
Run water through the sink and check all connections for drips. Tighten any fittings if you notice leaks, and ensure everything is secure.
Can I use metal fittings instead of plastic for the drain pipe?
Plastic fittings are more common and easier to work with, but metal fittings can be used if preferred. Ensure they’re compatible with your plumbing system.