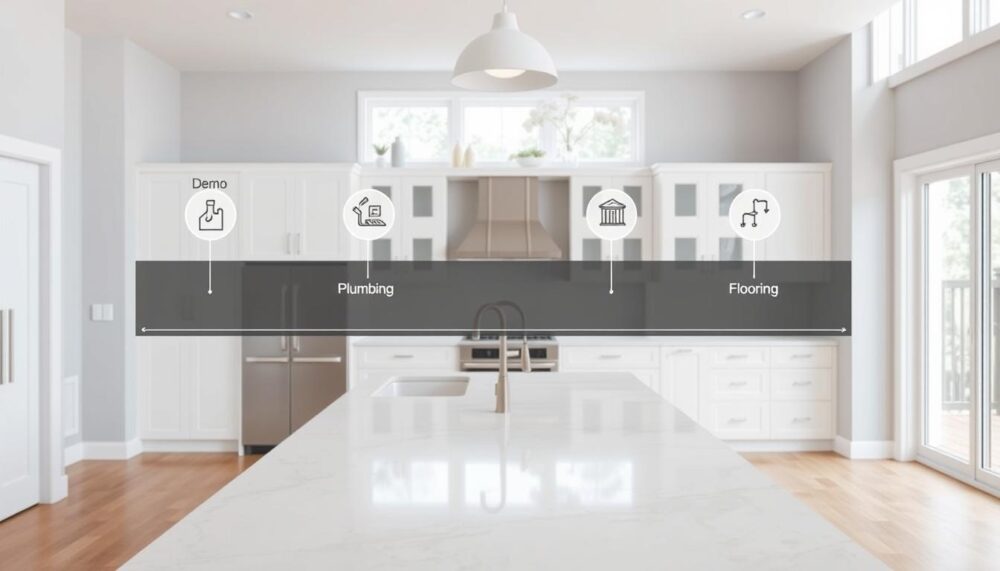
Embarking on a new kitchen project can be both exciting and daunting. One of the most common questions homeowners ask is about the time required to complete the transformation. On average, a full kitchen renovation in the UK takes around four weeks. However, this timeline can vary significantly based on several factors.
The complexity of the project plays a crucial role in determining the duration. Simple tasks like door replacements can be completed in as little as one week. On the other hand, more complex projects involving structural changes may extend beyond the typical four-week period. The planning phase also impacts the overall timeline, as it depends on the speed of decision-making and the intricacy of the design.
For those looking for quicker options, companies like The Kitchen Makeover Company offer efficient solutions that can significantly reduce the time required. Understanding these variables can help set realistic expectations and ensure a smoother renovation process.
Key Takeaways
- The average timeline for a full kitchen renovation in the UK is four weeks.
- Project complexity, material choices, and structural changes are key variables affecting duration.
- Simple door replacements can be completed in one week.
- The planning phase duration depends on decision-making speed and design complexity.
- Companies like The Kitchen Makeover Company offer quicker renovation options.
Planning and Design: The Foundation of Your Kitchen Renovation
Effective planning sets the stage for a seamless transformation. The initial phase of any project involves understanding your needs, setting a budget, and collaborating with professionals to bring your vision to life. This stage is critical for ensuring the final result aligns with your expectations and lifestyle.
Understanding Your Needs and Budget
Start by assessing your current space. Measure the dimensions and note any structural limitations. This helps in creating a realistic budget, which should include a contingency of 10-15% for unexpected costs. Gathering inspiration from magazines or online platforms can also clarify your vision.
Working with a Designer or Contractor
Collaborating with a specialist designer or contractor is invaluable. They can provide expert advice on layout optimisation and material selection. Reviewing their portfolio ensures their style aligns with your preferences. For more insights, explore kitchen renovation from concept to completion.
You Might Also Like:


Finalising the Layout and Materials
Once the design is approved, focus on selecting materials that balance aesthetics and durability. For example, quartz worktops offer both style and resilience. Finalising appliance specifications early ensures electrical and plumbing requirements are met without delays.
“A well-planned design not only enhances functionality but also adds value to your home.”
By following these steps, you can ensure your project runs smoothly and efficiently. Remember, the planning phase is the backbone of a successful transformation.
Demolition and Removal: Clearing the Space for Your New Kitchen
Demolition marks the beginning of your kitchen transformation. This phase involves removing outdated elements to make way for fresh designs. It’s a critical part of the project, ensuring the space is ready for the next steps.
https://www.youtube.com/watch?v=9HhigxwRChw
Ripping Out the Old Kitchen
Start by safely disconnecting utilities. For gas lines, ensure a Gas Safe registered professional handles the work. This step prevents accidents and ensures compliance with safety standards. Document existing pipework and wiring locations for reference during the rebuild.
Handling Waste and Recycling
Sorting materials for recycling is essential. Separate metals, plastics, and construction waste to minimise environmental impact. Hiring licensed waste carriers avoids fines of £400 or more for improper disposal. Skip hire costs typically range between £150 and £300.
Preparing for Structural Changes
Check for asbestos in homes built before 2000, especially when removing old flooring or ceilings. Address structural issues like damp proofing or load-bearing wall modifications. These tasks may add 2-3 days to the timeline but are crucial for a durable result.
“Proper preparation during demolition ensures a smoother rebuild and avoids costly delays.”
Protect adjacent rooms from dust using plastic sheeting and negative air pressure. This keeps the rest of your home clean and safe. By following these steps, you’ll set the stage for a successful transformation.
Plumbing and Electrical Work: Laying the Groundwork
The next crucial phase in your project involves plumbing and electrical work. These installations are essential for creating a functional and efficient space. Proper planning and execution here can save time and prevent future issues.
First Fix Plumbing: Installing Pipework
The first step in plumbing is installing the pipework. This typically takes one day. Use push-fit systems for faster installation compared to traditional soldered joints. Install isolation valves on all water feeds for easier maintenance later.
First Fix Electrical: Wiring and Sockets
Electrical work usually requires two days. Position sockets 150mm above worktop height to comply with UK building regulations. Run separate circuits for high-power appliances like induction hobs, using a 32A circuit for safety.
Time-Saving Tips for Plumbing and Electrical Work
Here are some practical tips to streamline the process:
- Label all circuit breakers clearly during consumer unit upgrades.
- Pre-wire for smart home features, such as under-cabinet lighting controls.
- Conduct preliminary pressure tests and continuity checks before plastering.
“Efficient plumbing and electrical work ensures a smooth transformation and avoids costly delays.”
By following these steps, you can ensure the groundwork is laid perfectly for the next stages of your project.
Plastering and Painting: Creating a Smooth Finish
Achieving a flawless surface is essential for a polished look in your space. This stage involves plastering and painting, which not only enhance aesthetics but also ensure durability. Proper execution here can make a significant difference in the final finish.

Applying New Plaster to Walls and Ceilings
Plastering typically takes two days, followed by two drying days. For period UK homes, consider breathable lime plaster to prevent damp issues. Start with a bonding coat on uneven surfaces before applying the finishing plaster. Maintaining a room temperature of 18-21°C ensures optimal curing.
Mist Coating and Final Paint Application
Once the plaster is dry, apply a mist coat using a 70:30 paint-water ratio. This seals the surface and prepares it for the final paint. Choose kitchen-specific paints with mould resistance and wipeable finishes for longevity. Moisture-resistant plasterboard is ideal behind sinks and cooking areas.
Ensuring a Durable and Aesthetic Finish
Allow full curing time before installing cabinets to prevent moisture trapping. This step is a crucial part of the process, ensuring the materials remain intact. A well-executed finish not only looks great but also stands the test of time.
| Task | Duration | Cost |
|---|---|---|
| Plastering | 2 days + 2 drying days | £300-£600 |
| Mist Coating | 1 day | £50-£100 |
| Final Painting | 1-2 days | £100-£200 |
“A smooth finish is the hallmark of a well-executed project, combining aesthetics with practicality.”
Kitchen Installation: Bringing Your Vision to Life
The installation phase is where your space truly starts to take shape. This stage involves fitting cabinets, installing appliances, and ensuring everything aligns perfectly. It’s a meticulous process that requires precision and attention to detail.
Fitting Cabinets and Countertops
Start by assembling flat-pack cabinets using laser levels for perfect alignment. Leave a 3mm expansion gap between wall units and ceilings to accommodate any movement. Using carcase screws instead of nails allows for easier adjustments in the future.
When it comes to countertops, granite is a popular choice, costing £200 or more per linear metre. Ensure all measurements are accurate before cutting, and seal natural stone surfaces with impregnating sealants to protect them from stains.
Installing Appliances and Sinks
Position appliances with integrated ventilation gaps as per the manufacturer’s specifications. This ensures proper airflow and prevents overheating. Coordinate delivery dates with the installation schedule to avoid storage issues.
For sinks, ensure the plumbing is correctly aligned before securing them in place. This step is crucial to prevent leaks and ensure smooth functionality.
Templating for Custom Worktops
Create temporary plywood templates before cutting stone worktops. This ensures precision and minimises waste. Double-check all measurements to avoid costly mistakes.
“Precision during installation ensures a seamless finish and long-lasting durability.”
By following these steps, you can ensure your installation is efficient and meets your expectations. This phase typically takes around five days, depending on the complexity of the work.
Final Touches: Completing Your Kitchen Renovation
The final touches are where your project truly comes together, ensuring every detail is perfect. This phase involves completing the plumbing and electrical work, addressing minor issues, and adding decorative elements. It’s the stage that transforms a functional space into a polished, cohesive design.
Second Fix Plumbing and Electrical Work
During the second fix, all remaining plumbing and electrical connections are completed. This includes connecting appliance fittings using manufacturer-supplied hoses and testing all circuits with a multimeter. These tasks typically take one day each and ensure everything is operational before the final finish.
Snagging: Addressing Minor Issues
Snagging is the process of identifying and resolving small imperfections. Create a snagging list to check cabinet alignment, grout consistency, and door operation. This step usually takes one day but may extend the timeline slightly. It’s essential for achieving a flawless finish.
Adding Decorative Elements and Hardware
This is where personality meets practicality. Install soft-close mechanisms on drawers and cabinet doors for a premium feel. Apply silicone sealants with professional tools for clean lines. Hang pendant lights at 750-900mm above kitchen islands for optimal task lighting. These details elevate the overall design.
- Connect final appliance fittings using manufacturer-supplied hoses.
- Test all electrical circuits with a multimeter before faceplate installation.
- Install soft-close mechanisms on drawers and cabinet doors.
- Hang pendant lights at 750-900mm above kitchen islands.
- Conduct final cleaning with pH-neutral products to protect surfaces.
“Attention to detail during the final touches ensures a polished and functional space that stands the test of time.”
By focusing on these final steps, you can ensure your project is completed to the highest standard. The result will be a beautifully finished space that combines functionality with style.
Conclusion: Enjoying Your New Kitchen
Transforming your cooking space into a dream area is a rewarding journey. A full kitchen overhaul typically takes around four weeks, but this can vary based on the complexity of your project. Proper planning and professional management are key to staying on track.
Contingency planning is essential to handle unexpected delays. For larger projects, consider a phased approach, such as completing flooring and cabinets separately. This ensures smoother progress and reduces stress.
Always work with UK-certified tradespeople through schemes like TrustMark or NICEIC. Their expertise guarantees quality work and compliance with safety standards. Investing time in proper planning pays off in the long run, ensuring a durable and functional space.
For personalised advice, consult professionals who can tailor the timeline to your needs. Once complete, your new kitchen renovation will not only enhance your cooking experience but also add significant value to your home. Celebrate the transformation and enjoy your beautifully updated space!
FAQ
What is the first step in a kitchen renovation project?
The first step is planning and design. This involves understanding your needs, setting a budget, and working with a designer or contractor to finalise the layout and materials.
How long does the demolition phase usually take?
The demolition phase typically takes a few days, depending on the size of the kitchen and the extent of the work required. This includes ripping out the old kitchen and preparing for structural changes.
What is involved in the plumbing and electrical work?
This phase includes first fix plumbing, such as installing pipework, and first fix electrical work, like wiring and sockets. Proper planning can save time during this stage.
How important is plastering and painting in the renovation process?
Plastering and painting are crucial for creating a smooth and durable finish. This step involves applying new plaster, mist coating, and final paint application to ensure an aesthetic result.
What happens during the kitchen installation phase?
During this phase, cabinets and countertops are fitted, appliances and sinks are installed, and templating for custom worktops is done. This is where your vision starts to come to life.
What are the final touches in a kitchen renovation?
Final touches include second fix plumbing and electrical work, snagging to address minor issues, and adding decorative elements and hardware to complete the look.
How can I ensure my renovation stays on budget?
To stay on budget, plan meticulously, get multiple quotes, and choose materials and appliances that offer good value. Regularly review costs with your project manager.
What types of materials are best for kitchen countertops?
Popular choices include granite, quartz, and laminate. Each material has its pros and cons, so consider durability, maintenance, and cost when making your decision.
How do I handle waste and recycling during demolition?
Proper waste management is essential. Hire a skip or use a waste removal service to dispose of debris responsibly. Recycling materials like metal and wood can also be eco-friendly.
What should I consider when choosing kitchen appliances?
Consider energy efficiency, size, and functionality. Ensure the appliances fit your layout and meet your cooking needs. Brands like Bosch and Samsung offer reliable options.