Taking on a DIY bathroom renovation can be a rewarding way to save money. Before diving in, understanding the process ensures efficiency and safety. Proper planning prevents costly mistakes and keeps the project on track.
Handling debris and disconnecting utilities are key challenges. Heavy lifting and dust control require careful preparation. Renting a skip is often necessary for waste disposal, especially under UK regulations.
With the right tools and precautions, a small bathroom can be cleared in one or two days. Prioritising safety measures minimises risks, making the project manageable for homeowners.
Key Takeaways
- DIY demolition reduces renovation costs significantly.
- Safety gear and proper tools are essential.
- Disconnecting utilities prevents hazards.
- Skip hire simplifies waste disposal in the UK.
- Small bathrooms typically take 1-2 days to clear.
Introduction to Bathroom Demolition
Understanding the reasons behind the project helps streamline the process. Whether it’s outdated fixtures, a cramped layout, or water damage, a bathroom demolition can breathe new life into your home. Planning ahead ensures minimal disruptions and a smoother way forward.
There are two main approaches: partial and full gutting. Partial demolition focuses on specific areas, like removing tiles or a vanity. Full gutting strips the room to its bare structure, ideal for complete overhauls.
| Type | Scope | Best For |
|---|---|---|
| Partial | Targeted removals (e.g., fixtures, tiles) | Cosmetic updates |
| Full | Complete strip-out (walls, flooring, plumbing) | Structural changes |
Older UK homes may hide hazards like mould, asbestos, or lead paint. Professional testing is wise before starting work. Always alert neighbours in shared buildings to avoid noise complaints.
You Might Also Like:


Legal considerations matter too. Follow local building regulations and hire licensed skip services for waste disposal. Skipping these steps could lead to fines or delays.
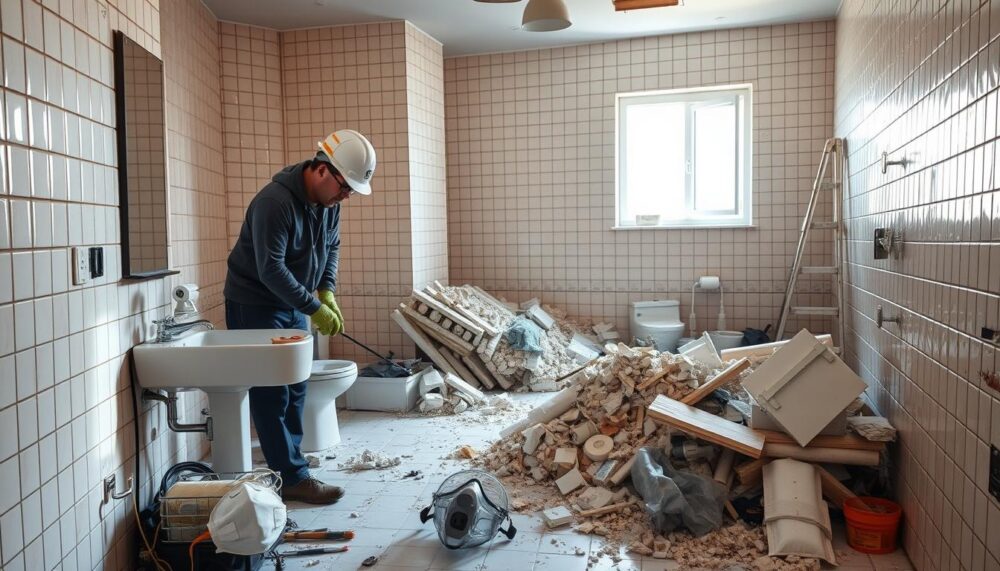
Essential Tools and Safety Gear
Safety and efficiency start with selecting the correct tools and protective equipment. Whether you’re tackling tiles or dismantling fixtures, the right gear reduces risks and speeds up the process.
Must-Have Tools for Demolition
Essential tools include:
- Pry bar: Ideal for lifting floorboards or prying off wall fixtures.
- Reciprocating saw: Cuts through fibreglass showers or pipes effortlessly.
- Utility knife: Handy for slicing through caulk or carpet adhesive.
- Adjustable wrench: Loosens plumbing connections without damage.
For UK homeowners, heavy-duty gloves are a smart addition—sharp edges and debris are common in older properties.
Safety Equipment
Don’t overlook safety gear. Basic protection includes:
- Respirators: Tile dust and mould spores are harmful when inhaled.
- Goggles: Shield eyes from flying debris.
- Steel-toe boots: Protect feet from heavy falling objects.
“Testing for lead paint is mandatory in pre-1978 homes. It’s a small step that prevents major health hazards.”
Renting specialised tools like jigsaws can save money for one-off projects. Always prioritise safety over speed—accidents cost more than equipment.
Pre-Demolition Prep Work
Before swinging the first hammer, smart prep work sets the stage for smooth demolition. Tackling these steps upfront minimises risks and keeps your project on track.
Clearing the Space
Start by removing all movable items. Empty cabinets, take down mirrors, and store fittings safely. This prevents breakage and creates a clutter-free workspace.
Lay heavy-duty tarps to shield the floor from scratches or debris. For older house builds, inspect for hazardous materials like asbestos beforehand.
Shutting Off Utilities
Safety first—locate the main water supply valve and shut off the flow. Drain pipes to avoid leaks. For electricity, switch off the consumer unit’s bathroom circuit.
“Isolating water lines at the stopcock is quicker than using the main valve in emergencies.”
Renting a Skip or Dumpster
Most UK projects require a skip rental. A 4-6-yard skip suits average bathrooms. Check local permits—some councils require licences for roadside placement.
Book early to align with your start date. Separate recyclables like tiles to reduce waste costs.
Step-by-Step Guide: How to Demolish a Bathroom for Renovation
Starting with fixtures makes demolition manageable. Tackling the vanity and toilet first clears space for larger tasks. Proper disconnection avoids water damage and simplifies waste disposal.

Removing the Vanity and Sink
Begin by cutting caulk seals around the vanity with a utility knife. Disconnect the supply lines and P-trap using an adjustable wrench. Older UK homes may have stubborn bolts—WD-40 helps loosen them.
Pry the vanity from the wall gently to avoid damaging plaster. Salvage reusable fittings for resale or donation. Cast-iron pipes, common in vintage properties, require extra care during removal.
Taking Out the Toilet
Shut off the water supply and drain the tank. Unscrew the flange bolts; if rusted, apply WD-40 and use a socket wrench. Lift the toilet carefully—seal the drain with rags to block sewer gases.
| Tool | Use |
|---|---|
| Adjustable wrench | Loosens P-trap and supply lines |
| Utility knife | Cuts caulk and adhesive |
| WD-40 | Frees rusted bolts |
“Label disconnected pipes with tape—it saves time during reinstallation.”
For more tools for vanity removal, check our detailed guide. Keep adjacent rooms protected by laying dust sheets during heavy lifting.
Demolishing Walls and Tiles
Tackling walls and tiles requires precision to avoid costly mistakes. Whether removing dated ceramics or altering layouts, methodical steps prevent damage to underlying structures. Proper techniques also minimise dust and debris spread.
Breaking Down Tile Surfaces
Start at the edges with a hammer and chisel. Angle tools away from walls to protect plasterboard. For stubborn tile adhesive, a reciprocating saw with a scraper blade speeds up the process.
Shower areas often have cement board backing. Pry it loose carefully—wear gloves to avoid fibre irritation. Salvage intact tiles for reuse or recycling to reduce skip costs.
Cutting Through Drywall
Mark studs with a stud finder before cutting. Use a utility knife to score drywall, then snap sections outward. This controls debris and avoids electrical wires hidden behind.
For load-bearing walls, consult a structural engineer. Unsupported removals risk ceiling sagging or worse. Temporary supports (e.g., acrow props) are wise for older UK homes.
“Seal doorways with plastic sheeting—it keeps dust contained and makes cleanup easier.”
Dispose of gypsum plasterboard separately to meet UK waste regulations. Vacuum as you work to maintain dust management. A damp cloth final wipe captures lingering particles.
Removing the Bathtub or Shower
Bathtub and shower removal presents unique challenges that demand careful handling. Whether dealing with lightweight acrylic or bulky cast-iron units, methodical steps prevent damage to floors and plumbing. Always inspect for hidden leaks or rot before proceeding—this saves costly repairs later.

Detaching Fibreglass or Acrylic Units
Start by removing shower doors and frames. Unscrew hinges and tracks carefully to avoid cracking tiles. For fibreglass enclosures, a jigsaw makes cutting them into manageable sections easier.
Stubborn acrylic tubs may resist prying. Use a crowbar with a cloth pad to protect surfaces. Scoring adhesive with a utility knife helps release bonded edges without splintering the material.
Handling Heavy Lifting
Cast-iron tubs, common in Victorian homes, require heavy lifting teamwork. Position furniture sliders underneath to glide the tub out smoothly. Protect floors with plywood sheets to prevent scratches.
“Two-person lifts reduce strain—communicate clearly to avoid dropped loads or injuries.”
Once removed, check for water damage or mould in the subfloor. Addressing these early ensures a solid foundation for your new installation.
Disposing of Debris Responsibly
Responsible debris disposal completes a successful demolition project. Sorting materials streamlines waste management and cuts costs. Separate recyclables like tiles and metal from general waste—many UK recycling centres accept these for free.
For larger projects, skip hire is efficient. A 6-yard skip fits most bathroom clearances. Compare prices: council tips (local dumps) charge by weight, while skip rentals offer fixed rates. Always check regulations—asbestos-containing materials require licensed disposal.
| Option | Cost Estimate | Best For |
|---|---|---|
| Skip Hire | £200–£300 | Full demolitions |
| Council Tip | £50–£100 (per trip) | Small loads |
“Donate usable fixtures to charities like the British Heart Foundation. It’s eco-friendly and supports good causes.”
Avoid fly-tipping—illegal dumping risks £400 fines. Use licensed waste carriers; verify their credentials via the Environment Agency’s public register. Proper disposal keeps your renovation green and compliant.
Post-Demolition Cleanup
Once the dust settles, thorough cleaning ensures your space is ready for the next phase. Proper dust removal and careful inspection prevent future issues. A meticulous approach now saves time and money later.
Sweeping and Vacuuming Dust
Silica dust from tiles and drywall can linger in the air. Use a shop vac with a HEPA filter to capture fine particles. These vacuums trap 99.97% of dust, making them ideal for post-renovation cleaning.
Wipe down walls and ceilings with a damp cloth. Pay special attention to corners and crevices where dust accumulates. This step ensures a clean slate for painting or tiling.
Inspecting for Hidden Damage
Look for signs of hidden damage, such as water stains or soft spots in the floor. Rot and mould often hide behind walls or under fixtures. Addressing these early prevents costly repairs during the rebuild.
Check exposed plumbing for leaks or corrosion. A quick plumbing check now avoids surprises later. Ensure wiring is up to code—outdated systems pose fire risks.
“A thorough inspection now catches small issues before they become big problems.”
- Sanitise drain pipes with a baking soda and vinegar mix to prevent odours.
- Level uneven floors and patch holes in walls for a smooth finish.
- Conduct a final safety walkthrough before handing over to contractors.
For more tips on efficient cleanup, explore our guide on construction clean-up. Proper preparation sets the stage for a flawless renovation.
Conclusion
Completing a successful renovation starts with smart planning and ends with pride in your work. Shutting off utilities, methodical teardowns, and proper cleanup set the foundation for a smooth rebuild. Celebrate the DIY satisfaction of transforming your space.
Know when to call in professional help. Complex tasks like asbestos removal or structural changes demand expertise. Coordinate with plumbers and tilers early to avoid delays.
Always put safety first. Rushing leads to mistakes—take breaks to stay sharp. For more on timing each phase, see our guide on bathroom renovation timelines.
FAQ
What safety gear is needed for bathroom demolition?
Essential safety gear includes gloves, goggles, a dust mask, and sturdy footwear. Protective clothing helps prevent injuries from sharp debris.
How do I shut off the water supply before starting?
Locate the isolation valve near the toilet or sink and turn it clockwise. For the main supply, shut off the stopcock in your home.
What’s the best way to remove tiles without damaging walls?
Use a pry bar or chisel to gently lift tiles from the edges. A utility knife helps cut through adhesive for cleaner removal.
Can I dispose of bathroom debris in a regular skip?
Yes, but check with your skip hire company first. Heavy materials like ceramics may require a specific waste disposal permit.
How long does a typical bathroom demolition take?
Most projects take 1-2 days, depending on size. Complex jobs with large showers or tiled walls may extend the timeline.
Should I remove the toilet myself?
Yes, but disconnect the water supply and drain the tank first. Use a wrench to loosen bolts at the base before lifting it away.
What tools are essential for removing a vanity unit?
A screwdriver, pry bar, and utility knife help detach screws, caulk, and adhesive. Enlist help for heavier units to avoid strain.
How do I handle asbestos in older bathrooms?
If you suspect asbestos, stop work immediately. Contact a licensed professional for safe testing and removal to avoid health risks.
What’s the best method for cleaning post-demolition dust?
Sweep large debris first, then use a vacuum with a HEPA filter. Wipe surfaces with a damp cloth to capture fine particles.
Can I reuse any materials after demolition?
Salvageable items like mirrors, fixtures, or tiles can be repurposed. Check for damage before deciding to keep them.