Tiling a kitchen floor can transform your space. It’s a DIY job that needs basic skills and preparation. This guide will help you install tile flooring like a pro.
Industry experts suggest tougher tiles for splashbacks. Calmer tones suit bathrooms and wetrooms well1.
Always order 10% extra tiles. This covers breakages and ensures you have enough for the project1.
Safety is vital when installing tiles. Wear safety goggles, gloves, and a dust mask1. Eurotiles & Bathrooms, a top supplier, offers expert guidance and materials for your project1.
Introduction
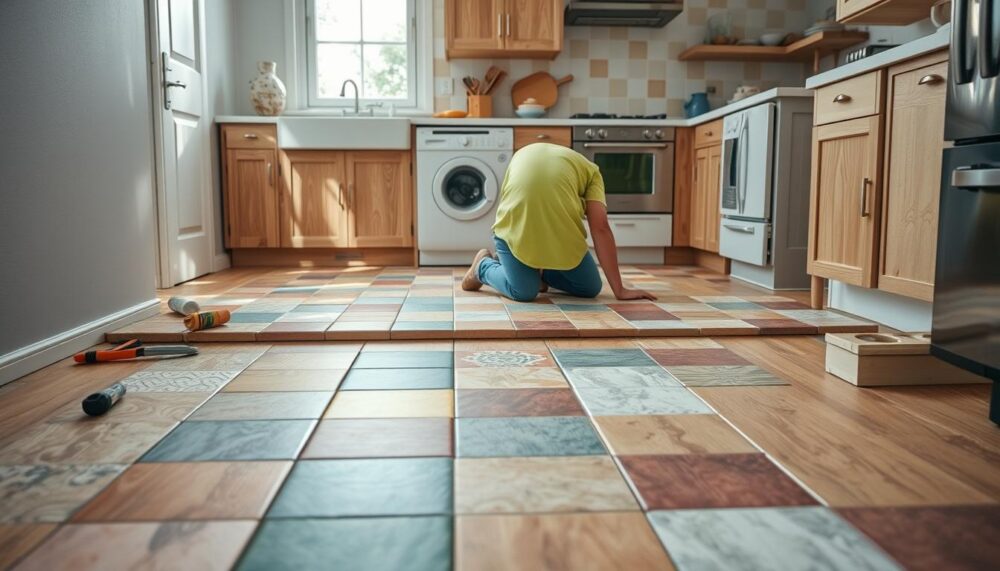
Tiling a kitchen floor is a popular DIY kitchen tiling project for homeowners. The process of applying adhesive and laying tiles is fairly simple2. Yet, some aspects can be tricky for beginners.
Achieving a professional finish might require expert skills2. However, with proper preparation and techniques, DIY enthusiasts can get great results2.
You Might Also Like:


Kitchen floor tiling offers increased durability and easy maintenance. It also provides various design options to match your kitchen’s style2.
Common challenges include physical demands and the need for specialised tools. Costly mistakes can occur if the installation isn’t done properly2.
Tiling a floor is considered a relatively straightforward DIY job
However, it can be tricky and requires some basic skills
Even beginners can successfully tile their kitchen floor with the right approach. The key is thorough research and gathering necessary tools and materials2.
Be prepared to invest time and effort for a high-quality result3. With dedication, you can create a beautiful, long-lasting kitchen floor.
Preparation and Materials Needed
Proper preparation and materials are vital for a successful kitchen floor tiling project. Professionals are often preferred for kitchen tile. They have the expertise to handle issues and select appropriate materials4.
DIY enthusiasts must plan carefully. Tasks include surface preparation, adhesive application, tile installation, and grouting. These steps prevent problems like uneven or loose tiles4.
You’ll need various tools and materials. These include a pencil, chalk, water, sugar soap, buckets, gloves, and protective floor covering. Tile adhesive, grout, spacers, a spirit level, and a tape measure are also essential4.
Other necessities are tile cutters, a notched trowel, screws, and a timber baton. A flexible sealant, caulking gun, wet saw, and drill with mixer attachment may be required. Floor tiles are thicker than wall tiles to withstand foot traffic4.
Wall tile spacers are typically 1/16 to 1/8 inch. Floor spacers are larger, usually 1/8 or 1/4 inch. This ensures better tile support and alignment4.
Proper floor preparation is crucial. Remove existing tiles, fix cracks, and ensure the surface is clean and level. Wear safety gear like gloves, eye protection, and a dust mask when working4.
Follow the product label for tile adhesive drying time. Mix grout according to manufacturer’s instructions. Carefully wipe off excess grout after application4.
The success of your kitchen tile project depends on proper tool and material selection. Using the right techniques ensures a well-executed installation4. With the correct tools for tiling kitchen floor, materials for tiling kitchen, and preparing to tile kitchen, you’ll create a stunning, durable floor.
Preparing the Floor Surface
Proper floor preparation is essential before tiling. Check if the surface is suitable for tiles. Assess evenness, need for repairs, and floor strength to support the tiles.
Concrete floors may require old tile removal and crack filling. Level uneven sections with flooring screed. Wooden floors must be strong, stable, and rot-free for tiling.
Tiling over existing tiles is generally not recommended. Underfloor heating can affect screed and adhesive choices. Select flexible products to handle temperature changes5.
Plaster can hold 20kg/m² for tiling, including adhesive and grout weight. Plasterboard supports up to 32kg/m². Replace it with 12mm No More Ply for a solid, waterproof surface6.
Concrete bases for tiling should be at least 6 weeks old. Cement-based screed needs 4 weeks before tiling. Anhydrite screed requires sanding and double priming6.
Wall surfaces must be clean and free of loose tiles. Concrete bases for wall tiling need 6 weeks to set. Plywood for walls must meet specific standards6.
Proper floor preparation ensures a stable foundation for your kitchen tiles. This leads to a flawless, professional-looking finish that will last for years.
Cutting and Laying the Tiles
It’s time to start cutting and laying tiles once the floor is ready. Careful measurement and planning are crucial. This helps minimise the number of cut tiles, which can be tricky to work with7.
Use a tile cutter or wet saw for clean, straight cuts. This ensures a professional-looking finish8. Apply adhesive or mortar in small sections. Use a notched trowel to create ridges for better tile grip9.
- Place tiles carefully, ensuring they’re level and evenly spaced with tile spacers9.
- Lay tiles in a specific pattern, working your way out of the room. Avoid stepping on freshly laid tiles9.
Ceramic, porcelain, and quarry tiles are ideal for kitchens, bathrooms, hallways, and conservatories. They’re tough and easy to maintain7. Tiles can be fixed to various surfaces if they’re even, flat, dry, and damp-free7.
“Tile popularity has continued to grow, becoming a frequently sought-after material in all areas of the house in recent years.”8
For precise cuts, use a lever-action flat-bed cutter or heavy-duty tile cutter9. When tiling timber floors, reinforce with 13mm-thick exterior grade plywood. Fix with 4mm gauge 25mm screws or nails at 30cm intervals9.
Measure the area accurately, including alcoves, for proper tile coverage9. Wait 24 hours before walking on newly laid tiles. Tile half a room per day to avoid disrupting the entire space9.
How to Install Tile Floor in Kitchen
Installing a tile floor can transform your kitchen. The process involves preparing the surface, laying tiles, and grouting joints. Let’s explore the key steps for a successful tile floor installation.
Follow these guidelines to achieve a professional-looking result. With proper preparation and attention to detail, you can create a stunning kitchen floor.
- Prepare the Floor Surface: Thoroughly clean the floor, addressing any cracks or uneven areas. This creates a smooth, level base for the tiles10.
- Plan the Layout: Measure the room and determine the centre point, then work outwards to plan the tile pattern. This helps ensure even spacing and a balanced design10.
- Cut Tiles to Fit: Use a tile cutter or wet saw to neatly trim tiles around edges and obstacles. This ensures a clean, professional finish10.
- Apply Adhesive: Spread the tile adhesive or mortar using a notched trowel. Work in small sections to maintain control10.
- Lay the Tiles: Carefully place the tiles, ensuring they are level and evenly spaced. Use tile spacers to maintain consistent grout lines10.
- Allow to Dry: Let the tiles dry completely before proceeding to the grouting stage10.
The tiling a kitchen floor process may require some basic skills. However, with proper planning and execution, you can achieve excellent results.
Your DIY kitchen floor tiling project can be a rewarding experience. Take your time and follow each step carefully for the best outcome101112.
Grouting and Finishing
Grouting is vital for any tiling project. It protects tiles from dirt, moisture, and wear. Proper preparation ensures a smooth grouting process.
Mix grout as per manufacturer’s instructions. Apply it generously and diagonally with a trowel. Work in small areas for even coverage.
Remove excess grout with a squeegee or dry sponge. This step is crucial for a clean finish.
- Clean the tile surface with a moist sponge for an even finish.
- Tool the grout with a dry sponge for a smooth, polished look.
- De-haze with a microfibre towel after an hour to remove residue.
- Allow grout to dry completely for best results.
Grouting creates a high-quality finish in DIY tiling projects. It’s essential for natural stone and porcelain-effect tiles. Grout acts as a cushion, preventing tile expansion due to temperature changes.
For wall tiles, you’ll need specific equipment. Floor tile grouting is similar, but gaps may be wider. Use water-resistant grout in wet areas.
Calculate grout needed beforehand to avoid running out mid-job. Use silicon sealant for inside corners, especially in bathrooms. Choose a grout colour that complements your tiles.
These steps ensure a professional-looking finishing touches for tiled kitchen floor. Light grey grout is often a versatile choice.
Follow these practices for a professional-looking grouted kitchen floor that lasts. Your tiled surface will stand the test of time1314.
Tips and Tricks
Perfect kitchen tile installation needs careful planning. Maximise whole tiles and minimise cuts. Score tiles with a carbide-tipped scorer for clean edges.
Use tile spacers for consistent grout lines. Don’t step on tiles until adhesive cures. Apply a thin adhesive layer with the trowel’s flat edge.
Create ridges with the notched edge for better grip. Work in small sections for control and precision. Proper planning and attention to detail are crucial.
- Maximise the use of whole tiles and minimise cuts by carefully planning the layout15.
- Score tiles with a carbide-tipped scorer before snapping for a clean edge15.
- Use tile spacers to ensure consistent grout lines and avoid stepping on tiles until the adhesive has fully cured15.
- Apply a thin layer of adhesive with the flat edge of the trowel before using the notched edge to create ridges for better grip15.
- Work in small, manageable sections to maintain control and precision15.

“Proper planning, preparation, and attention to detail are crucial for achieving professional-looking results.”
These expert tips ensure flawless kitchen tile installation. Use the right tools and focus on details. Your DIY project will create a beautiful, long-lasting surface.
Conclusion
A stunning tile floor can greatly enhance your kitchen’s look and feel16. Porcelain, ceramic, and glass tiles work well for backsplashes16. Durable, non-slip tiles are best for kitchen flooring16.
This article guides you through installing a tile floor in your kitchen17. It covers tile types, tools, materials, and key techniques17. Take your time and plan carefully for a lasting, attractive finish161717.
A well-tiled kitchen can boost your property’s value16. Smooth, sealed tiles resist bacteria and mould, ensuring a clean environment16. Various colours and textures let you customise your kitchen design16.
Properly installed tiles protect kitchen surfaces from damage16. You can DIY or hire professionals for your kitchen tiling project. Either way, tiled floors will enhance your living space.
FAQ
What is the process of tiling a kitchen floor?
Tiling a kitchen floor involves several key steps. These include preparing the surface, cutting and laying tiles. The process also covers grouting joints and applying protective sealant.
What tools and materials are needed for tiling a kitchen floor?
Tiling requires various tools and materials. You’ll need a pencil, water, sugar soap, and a small bucket. Protective gloves and floor covering are essential.
Tile adhesive, grout, spacers, and a grout float are crucial. A spirit level, tape measure, and tile cutters are necessary. Don’t forget a notched trowel, screws, and timber baton.
You’ll also need flexible sealant, a caulking gun, and a wet saw. A drill with a mixer attachment completes your toolkit.
How do I prepare the floor surface for tiling?
Proper floor preparation is vital for successful tile installation. Remove existing tiles and fix any cracks or unevenness. Ensure the surface is clean, dry, and level before starting.
What are the key steps in cutting and laying the tiles?
Use a tile cutter or wet saw for clean, straight cuts. Apply adhesive in small sections with a notched trowel. Place tiles carefully, ensuring they’re level and evenly spaced with tile spacers.
How do I grout and finish the tile installation?
After tiles dry, grout the joints using sanded grout. Apply with a rubber float and remove excess with a damp cloth. Consider applying a protective sealant to maintain the tiles’ appearance.
What are some tips and tricks for achieving a professional-looking tile installation?
Plan the layout to minimise cuts. Use tile spacers for consistent grout lines. Apply a thin adhesive layer before using the notched trowel. Work in small sections for better control and precision.