Fitting a kitchen worktop by yourself may seem tough. Yet, with proper prep and knowing your materials, it becomes an enjoyable DIY task. This guide makes it easier to understand how to install kitchen worktops, especially laminate, solid wood, and compact laminate types. Learning which worktop you need and getting the right tools can help you fit it correctly.
The cost to do it yourself can change a lot. You might spend £200 on a small laminate worktop or more than £1000 for quartz ones. Think about the cost of getting a pro1 to do it when planning your budget. Materials like granite and quartz are better left to experts to install. However, laminate and wood can be great for DIY2.
Understanding Kitchen Worktop Options
Choosing a kitchen worktop involves exploring various types. The market offers different materials, each with its own benefits. Considerations like cost and toughness vary from laminate to solid wood and more.
Different Types of Kitchen Worktops
The types of kitchen worktops include:
- Laminate Worktops: A budget-friendly choice, you can find laminate worktops starting at £1903. They’re available in many styles and finishes.
- Solid Wood Worktops: Solid wood brings durability and a natural look. It requires regular oiling to maintain its beauty.
- Stone Worktops: Options like granite or marble are pricier, beginning at £680 per square meter4. They add timeless elegance but often need professional fitting.
- Composite Quartz Worktops: Starting at £200 per square meter, these mimic natural stone and come in a variety of colours3.
- Recycled Plastic Worktops: Eco-friendly and made from 100% recycled materials, costing about £205 per square meter3.
- Porcelain Worktops: These thin worktops start at 3mm and are priced around £240 per square meter3, giving a modern look.
Material Suitability for DIY Installation
Laminate, solid wood, and compact laminate are often chosen by DIY enthusiasts. They’re easier to handle. Yet, each type demands precise preparation, like exact measurements. This is crucial for a perfect installation.
While some materials require a professional’s touch, others can be managed by experienced DIYers with the right equipment.
You Might Also Like:


Preparation Before Installation
Before you start installing a kitchen worktop, you need to prepare properly. This means planning your worktop carefully and having all your materials and tools ready. Knowing your kitchen’s size and layout helps you make good decisions during the process.
Planning Your Work Surface Needs
When planning, think about what you need from your work surface. Consider the placement of appliances and how the worktop will fit with them. Deciding on where to put sinks, hobs, and electrical outlets is crucial. Taking clear measurements of the space will help you make a precise plan for putting in your worktop5.
Measurements and Cutting Guidelines
It’s very important to measure worktops accurately for a smooth installation. A digital laser measure can give you very exact measurements. Before you start cutting, try practicing on spare pieces to get used to your tools6.
Follow the guidelines for cutting to get neat edges. Remember to place joints away from sinks and appliances to prevent issues6.
Remember to take your time to ensure accuracy, as mistakes can cause delays and extra costs. If you’re using heavy materials, think about how their weight will affect your kitchen5. Doing this correctly will give your kitchen a perfect look and make it more functional.
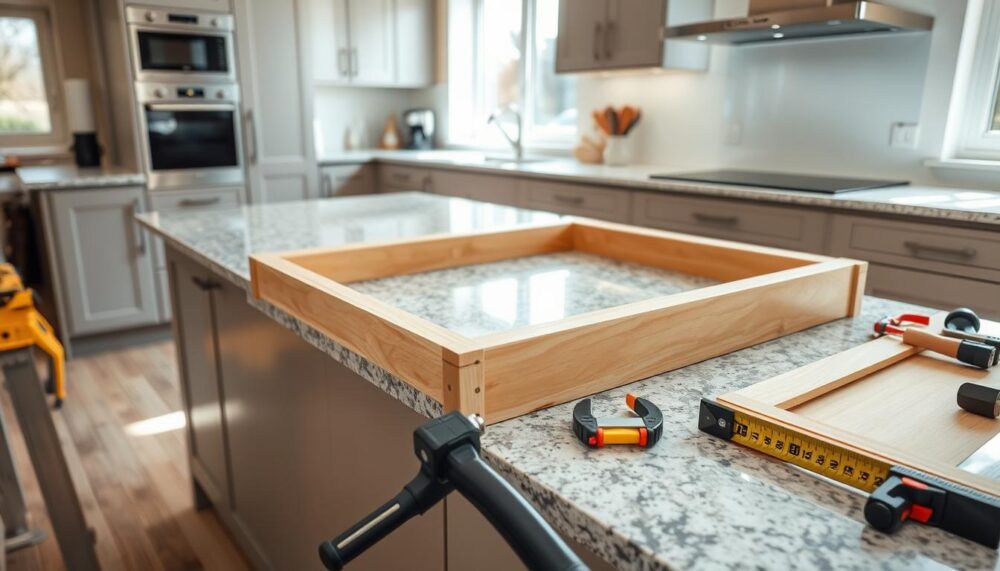
Choosing the Right Tools for the Job
When fitting a kitchen worktop, it’s vital to pick the right tools. You’ll need certain tools and safety gear to make sure the job goes well and safely.
Essential Tools for Installing Kitchen Worktops
- Circular saw with a fine-tooth blade
- Jigsaw for detailed cuts
- Clamps to secure the worktop
- Measuring tape and spirit level for accuracy
- Drill with appropriate bits
- Pencil for marking
- Work gloves to protect your hands
- Wood glue and silicone sealant for joining and sealing
Always check your tools a few days before beginning to avoid delays. This advice comes from Savoy Timber. Proper prep stops problems and makes everything go smoothly7.
Safety Equipment Recommendations
It’s important to use the right safety gear for DIY tasks:
- Goggles for eye protection
- Dust masks to protect from particles
- Ear protection for noisy tools
Such safety steps are key when using tools and materials. This ensures you work safer and get better results when fitting your kitchen worktop.
Remember, precise measurements are key to ensure your worktop fits just right. This avoids problems later on8.
How to Install Kitchen Worktop
Installing a kitchen worktop can make your kitchen look and work better. It’s important to follow steps carefully to avoid mistakes. These errors can mess up your project.
Step-by-Step Installation Process
Start by measuring your space correctly. You should allow for a 10mm-20mm overhang for trimming. Also, plan for a 25mm overhang at each end of the worktop9. Then, cut the worktop accurately, by the maker’s guidelines, to reduce mistakes. Drill holes with a 12mm bit at each sink corner for a snug fit9.
To join worktop pieces, use three fixing plates for firmness. Screw the worktop from below with brackets. For laminate tops, put three screws at both the back and front of each cabinet10. It’s crucial to correctly apply finishing strips at the edges. Follow the directions given. After setting it up, let the worktop settle for about 24 hours10.
Common Mistakes to Avoid
Several errors can slow you down. Wrong measurements can cause the worktop to fit badly, so measure twice before cutting. Forgetting to leave 2-3mm expansion gaps can cause bending, especially near pipes10. Incorrectly aligned joints may necessitate avoidable adjustments.
Also, avoid screwing too tightly as it might damage the worktop over time. With good attention to these points, you can install a kitchen worktop that’s both elegant and strong.
Specific Installation for Different Worktop Materials
Installing kitchen worktops means knowing the right method for each type. You’ll get a pro look in your home by correctly installing laminate, solid wood, and compact laminate worktops.
Installation of Laminate Worktops
With laminate worktop installation, careful cutting and lining up are key. Using pre-cut edges helps get the best fit. You’ll need tools like a circular saw and clamps for neat edges and a tight fit. Don’t forget to leave space for the worktops to expand near walls.
Installation of Solid Wood Worktops
Solid wood worktop fitting considers wood’s natural changes. Using PVA glue and connectors stops it from warping or cracking. This keeps the wood stable and makes your kitchen look great.
Installation of Compact Laminate Worktops
For compact laminate installation, you’ll use a different glue instead of screws. This method ensures a strong bond. Paying close attention to prep work gives your kitchen a polished finish.
By following these specific tips, your worktop will last long and look stunning. Plus, it’ll make your kitchen stand out111213.
Finishing Touches After Installation
After installing the worktop, focus on the finishing touches. Proper worktop edging can make your kitchen look and last better. Applying laminate strips to the edges with adhesive gives a tidy finish.
Edging and Jointing Techniques
Use aluminium strips or filler for smooth worktop connections. Seal the joints against moisture and stains. This step is crucial for maintaining and improving your kitchen’s appearance.
Long-Term Maintenance Tips
Regular upkeep keeps your worktop in top condition. If it’s wood, oil it often to preserve its look and durability. The team fitting it will guide you on how to care for it properly. Considering a MineralX Quartz care kit is wise for everyday cleaning.
Looking after your worktop well improves its usefulness over time. For more advice, check out this DIY kitchen worktop installation guide. It’s full of tips for a flawless finish14.

Follow these steps to make your worktop the highlight of your kitchen for many years.
Knowing how to care for your worktop boosts its life and functionality.
Conclusion
Getting your kitchen worktop installation right involves careful planning and choosing the proper materials. Whether you go for laminate, solid wood, or granite, knowing each material’s unique traits and how to install them boosts your DIY confidence. It’s also vital to measure accurately and use tools correctly. Also, ensure good air flow. This all helps in getting a sturdy and attractive worktop that serves you well15.
Remember, some heavier materials like granite and quartz might need extra support brackets. This helps in spreading the weight evenly and makes your worktop last longer15. Also, if you’re not confident in your DIY ability, consider hiring pros. It can save you time and prevent expensive errors16.
To finish your kitchen worktop perfectly, it’s all about careful work, regular upkeep, and knowing about the materials. By following best practices from start to finish, you’ll end up with a beautiful and useful worktop. It will show off your personal style and last for years17.
FAQ
What materials are best for DIY kitchen worktop installation?
Laminate, solid wood, and compact laminate are great for DIY kitchen worktops. They are easier to install than natural stone. Stone worktops usually need a professional to fit them.
How should I prepare my kitchen before installing a worktop?
Start by measuring your kitchen carefully and plan your worktop layout. Make sure you have all the necessary tools. A digital laser measure can give you precise measurements.
What are common mistakes to avoid during worktop fitting?
Avoid inaccurate measurements, forgetting expansion space, and misaligning joints. Always follow the manufacturer’s guidelines to dodge these pitfalls.
What essential tools do I need for installing a kitchen worktop?
You’ll need a circular saw, jigsaw, clamps, goggles, and dust masks. Include PVA glue, silicone sealant, and adhesive for a successful install.
How can I maintain my solid wood worktop for longevity?
Keep your solid wood worktop in top shape by regularly oiling it. This protects it from moisture and reduces wear.
What are the installation techniques specific to laminate worktops?
Accurate cutting and alignment matter a lot for laminate worktops. Use factory-cut edges for a sleek look. Detail attention is key during setup.
How do I ensure the joints between worktop sections are seamless?
For seamless joints, use strips of proffiled aluminium or filler. Apply adhesive on edges for a better finish.
Are there any specific cutting guidelines I should follow?
Plan your cuts to be 100mm from sinks and appliances. Practice on offcuts to get comfortable with your tools and ensure neat edges.