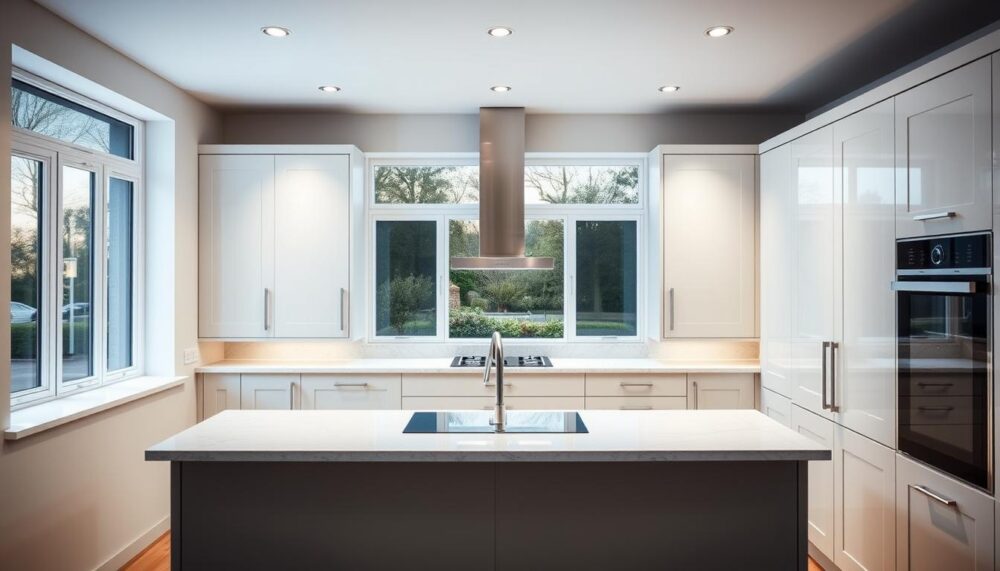
Welcome to your comprehensive guide for fitting B&Q kitchen units. This tutorial is specially crafted for beginners tackling their first DIY kitchen project.
We’ll guide you through the entire process from start to finish. You’ll gain the confidence and knowledge needed to create a functional and stylish cooking space.
Our friendly advice covers everything from tool preparation to step-by-step assembly. You’ll also learn how to troubleshoot common issues that might pop up during your installation.
Whether you’re renovating your entire cooking area or just updating certain pieces, our guidance will help you save time and avoid costly errors. Taking your time with measurements and following instructions carefully ensures a professional-looking finish.
By the end of this guide, you’ll be equipped to handle your DIY project with ease. Let’s transform your cooking space into an area you’ll love spending time in!
Key Takeaways
- Proper preparation with tools and measurements is essential for success
- Following instructions carefully prevents common installation mistakes
- B&Q offers popular kitchen solutions suitable for UK homes
- Taking your time during the process ensures professional results
- This guide provides expert tips for a smooth installation experience
- Attention to detail creates both functional and aesthetically pleasing units
- Beginners can achieve excellent results with our step-by-step approach
Gathering Your Tools and Preparing Your Space
Getting everything ready before starting makes your project much smoother. Proper preparation prevents frustration and ensures everything goes according to plan.
This phase involves three main aspects: collecting your equipment, making safety checks, and creating a detailed layout plan. Each element contributes to a successful installation.
Essential Tools for the Job
Having the right equipment makes all the difference. Your toolkit should include both basic and specialised items.
Start with a quality spirit level for accurate alignment. You’ll also need a drill, clamp, and masking tape for various tasks during the process.
Don’t forget safety equipment like a cable and pipe detector. This helps avoid damaging hidden utilities behind walls.
Here’s a complete checklist of what you’ll need:
| Tool Type | Specific Items | Purpose |
|---|---|---|
| Measuring Tools | Spirit level, tape measure | Ensuring accurate placement |
| Fastening Equipment | 15 mm screws, brackets, wall fixings | Securing units properly |
| Power Tools | Drill, hammer drill | Making fixings and adjustments |
| Safety Gear | Cable detector, gloves | Protecting yourself and your property |
| Accessories | Masking tape, clamp | Holding pieces during work |
Important Pre-Installation Checks
Safety comes first in any DIY project. Begin by disconnecting power and water supplies to the area.
Remove any existing units completely. This gives you a clean slate to work with and prevents compatibility issues.
Consider applying the first coat of paint to walls and ceilings now. It’s much easier before your new cabinets are in place.
Check your wall type to select appropriate fixings. Different walls require specific fixing types for secure installation.
Planning Your Kitchen Layout
Careful planning is the most crucial step in your project. It determines how everything will function together.
Create a detailed drawing on graph paper first. Include all measurements and note the position of windows, doors, and utilities.
Consider how cabinet doors will open and interact with other elements. Think about traffic flow and workspace functionality.
Standard sizes make planning easier, but always double-check your specific units’ dimensions. Manufacturer instructions provide exact specifications.
Use your spirit level during planning to mark guidelines on walls. This ensures everything will be perfectly aligned during installation.
Taking time with planning saves hours later. It helps avoid problems that could affect your project’s finish and timeline.
A Step-by-Step Guide on How to Assemble B&Q Kitchen Units
Now we dive into the practical stages of fitting your cabinets. This systematic approach ensures your installation proceeds smoothly and efficiently.
Each phase builds upon the previous one, creating a solid foundation for your cooking space. Attention to detail here guarantees excellent results.
Step 1: Marking Your Guidelines and Levelling
Begin by establishing your reference line on the wall. This crucial step sets the foundation for everything that follows.
Use your spirit level to draw a perfectly horizontal guideline. Account for the cabinet’s height including adjustable legs.
This reference line ensures all units will sit at the correct height. It’s your blueprint for achieving that professional finish.
Step 2: Positioning and Levelling the Base Units
Start with corner cabinets when placing your pieces. They often determine the layout of surrounding units.
Move assembled cabinets into their planned positions. Adjust the legs until the top aligns with your guideline.
Frequently check with your spirit level during this process. Proper levelling ensures doors will operate smoothly later.
This careful approach prevents many common pitfalls associated with DIY installations.
Step 3: Fixing Units Together and Installing Corner Posts
Secure adjoining cabinets using clamps for stability. This keeps everything perfectly aligned during fixing.
Drill pilot holes between hinge mounting points. Use the appropriate screws to connect cabinets firmly together.
B&Q offers specialised connector bolts for extra security. These create a robust connection between units.
Fit corner posts where cabinets meet at angles. These components hide gaps and enhance stability.
They contribute significantly to the seamless look of your final installation.
Step 4: Securing Units to the Wall
Attach brackets to secure cabinets against the wall. Mark drilling positions carefully before proceeding.
Always check for hidden pipes and cables using your detector. This prevents expensive and dangerous accidents.
Select wall fixings suitable for your wall type. Angle screws slightly downward for easier access during tightening.
This final securing step completes your base installation. You’ll need to verify everything remains level throughout.
Whether you’re tackling a compact galley or large family kitchen, this methodical approach delivers excellent results. Taking time at each stage ensures your installation will withstand daily use for years to come.
For additional guidance on specific techniques, consult B&Q’s comprehensive installation manual which offers detailed visual references.
Installing Wall Units and Achieving Perfect Alignment
Mounting your wall cabinets requires precision and careful attention to detail. This stage transforms your space into a fully functional cooking area with ample storage.
Proper alignment creates a seamless look that enhances your kitchen’s overall appeal. Following these steps ensures your installation appears professional and operates smoothly.
Marking Out for Wall Cabinets
Begin by measuring upwards from your base unit tops. Account for worktop thickness when determining the wall cabinet’s bottom position.
Use your spirit level to create perfect horizontal guidelines. These marks serve as your reference points throughout the installation.
Draw vertical lines where cabinets will meet. This helps maintain consistent spacing and alignment across your arrangement.
If you have tall housing units, ensure everything aligns properly. This creates a cohesive design throughout your cooking space.
Fixing the Wall Brackets Securely
Consult the manufacturer’s instructions for bracket placement. Most units require two brackets positioned in the top corners.
Mark drilling positions carefully before proceeding. Always use your cable detector to avoid hidden utilities.
Select appropriate fixings for your wall type. Different materials require specific screws and anchors for secure mounting.
Here’s a quick reference for bracket installation:
| Wall Type | Recommended Fixings | Safety Considerations |
|---|---|---|
| Plasterboard | Plasterboard anchors | Use cavity detectors |
| Solid Brick | Heavy-duty wall plugs | Check for mortar joints |
| Concrete | Concrete screws | Wear safety goggles |
| Timber Stud | Long wood screws | Locate stud centres |
Hanging and Adjusting the Wall Units
Gently hook your cabinets onto the mounted brackets. Have a helper support the weight during this process.
Locate the adjustment screws in the top internal corners. These allow you to fine-tune the cabinet’s position.
Place your spirit level across the front and top edges. Make small adjustments until everything sits perfectly level.
Check that doors will open without obstruction. Proper alignment prevents clashes between adjacent units.
Corner installations might need extra attention. Ensure supporting posts align correctly with neighbouring cabinets.
This careful approach protects your walls and maintains the cabinet finish. Your effort now creates a beautiful and functional space.
Taking time with adjustments ensures everything operates smoothly. You’ll achieve that professional look you desire for your home.
Fitting Drawers, Doors, and Finishing Touches
This exciting phase brings your project to life with functional storage and beautiful surfaces. Adding these elements transforms your installation from structural framework to complete cooking space.
Careful attention here makes all the difference to your final result. You’ll create smooth-operating storage solutions that enhance daily use.
Instanding Drawer Runners and Assembling Drawers
Begin by fixing runners inside your cabinet frames. Ensure they sit perfectly parallel using your measuring tape.
Test the sliding action before proceeding further. Smooth movement indicates correct positioning.
Follow the manufacturer’s instructions for assembling drawer boxes. Different unit types might have specific requirements.
Attach fronts according to guidance provided. Small adjustments ensure perfect alignment with surrounding elements.
Soft-close mechanisms simply click into place. They prevent slamming and extend your cabinet’s lifespan.
Fitting and Hanging Cabinet Doors
Insert hinges into pre-cut circular holes. Use a try square to verify 90-degree angles.
Secure hinges firmly with appropriate screws. Loose fittings cause alignment issues later.
Mount hinge plates onto cabinet side panels. Pre-drilled holes simplify this process.
Connect door assemblies to mounted plates. Make initial adjustments for basic positioning.
Fine-tune gaps between adjacent doors. Uniform spacing creates that professional appearance.
Consider your overall kitchen layout during placement. Ensure doors open freely without obstruction.
Replacing old units offers wonderful opportunities for modernisation. New designs provide improved functionality and contemporary styling.
B&Q’s range includes various options to suit different preferences. Their guidelines offer specific details for each product type.
With patience and attention, this phase takes little minutes per unit. You’ll achieve excellent results that enhance your space’s usability and aesthetics.
Making Adjustments and Troubleshooting Common Issues
Even with careful installation, your cabinets might need some final tweaking. This stage transforms good results into professional-looking finishes that operate smoothly.
Minor adjustments ensure everything works perfectly for years to come. Taking time here makes all the difference to your cooking space’s functionality.
Fine-Tuning Door Alignment
Modern hinges offer excellent adjustment capabilities. Locate the screws on the part touching the cabinet frame.
Side-to-side movement requires turning the horizontal adjustment. Always adjust both top and bottom hinges equally.
Vertical positioning changes with the up-and-down screw. Support the door gently while making these adjustments.
In-and-out movement controls the gap size. This affects how your door sits against neighbouring units.
Your spirit level helps verify perfect alignment. Check both horizontal and vertical positioning.
Small tweaks create that seamless design appearance. They ensure smooth operation without rubbing or sagging.
Solving Common Door and Drawer Problems
Occasional issues might appear after initial installation. Most have straightforward solutions using basic techniques.
Sticking drawers often need runner alignment checks. Ensure they sit perfectly parallel within the frame.
Doors not closing fully might need hinge repositioning. Consult manufacturer instructions for specific guidance.
Corner posts sometimes require minor realignment. This ensures clean lines where cabinets meet.
B&Q offers various hinge options with different adjustment methods. Familiarise yourself with your specific type.
Remember to support components during adjustments. This prevents damage to both the unit and your walls.
These troubleshooting techniques save time and frustration. They help achieve the perfect finish for your cooking space.
“The difference between good and great installations often lies in those final adjustments. Taking extra minutes here creates years of smooth operation.”
Mastering these techniques ensures your design looks professional and functions flawlessly. Your attention to detail now pays dividends in daily use.
With these skills, you can confidently handle most common issues. Your DIY installation will rival professional results.
Conclusion
You’ve mastered the complete fitting process from start to finish. Your dedication has transformed your home with beautiful, functional storage solutions.
Following the instructions carefully ensures your installation remains sturdy for years. Remember to consult manufacturer guidelines for your specific unit type.
Keep this guide handy for future reference or adjustments. Your new space reflects both practical planning and personal style.
We hope your DIY journey felt rewarding and built confidence. Enjoy your refreshed home environment and the satisfaction of a job well done!
FAQ
What are the most common mistakes to avoid when installing B&Q kitchen units?
The most frequent issues involve not using a spirit level properly, leading to wonky cabinets. Another common pitfall is failing to check wall and floor levels before starting. Always take your time with initial measurements to prevent alignment headaches later.
Do I need any specialist tools for the installation process?
While many tasks can be done with basic DIY tools, a good spirit level is absolutely essential for a professional finish. You’ll also need a power drill and possibly a jigsaw for cutting plinths or making adjustments for pipework.
How do I handle fitting cabinets on an uneven floor?
A> B&Q base units have adjustable legs that allow you to compensate for an uneven floor. Use your spirit level across the front and sides of the unit, and adjust each leg individually until the cabinet is perfectly level before fixing it in place.
What’s the best way to ensure my wall units are hung securely?
Always fix the wall brackets into solid wall studs or use appropriate heavy-duty wall plugs for masonry. Never rely on plasterboard alone to support the weight. Use a stud finder to locate the timber battens for the most secure fixing points.
Can I install the kitchen units myself, or should I hire a professional?
Many confident DIYers successfully install their own B&Q kitchen using the provided instructions. If you’re comfortable with tasks like drilling, levelling, and making precise adjustments, it’s a achievable project. If your space has significant challenges, however, seeking professional help might be wise.
How long does it typically take to assemble and install a full kitchen?
The time required varies greatly depending on the size and complexity of your design. A small, straightforward kitchen might take a dedicated weekend. A larger project with many cabinets, appliances, and worktops will naturally require more time. Always allow extra time for planning and making adjustments.


