More UK homeowners are embracing DIY bathroom renovations, with 42% attempting partial upgrades themselves. This trend isn’t surprising—strategic DIY work can save up to £3,500, as shown in case studies from BuildPro. But is it feasible without professional help?
Success depends on planning, skill level, and time commitment. For instance, a Manchester homeowner completed a full remodel over six weekends. Tiling, plumbing, and flooring are common tasks tackled independently.
This guide explores essential steps, from budgeting to troubleshooting, helping you decide if a DIY renovation aligns with your goals. Let’s dive in!
Key Takeaways
- 42% of UK homeowners attempt partial bathroom upgrades themselves.
- Strategic DIY projects can save approximately £3,500.
- Skills in tiling, plumbing, or flooring increase success rates.
- Proper planning reduces risks and delays.
- Real-life examples prove feasibility with dedication.
Introduction: Is a DIY Bathroom Renovation Right for You?
A Rabbit Skip Hire survey reveals 63% of UK DIYers misjudge renovation timelines. This gap between expectation and reality makes honest self-assessment crucial before starting a bathroom renovation.
Costs often drive the decision. Professional quotes average £8,000, while DIY spend hovers around £4,500. However, savings vanish if mistakes require fixes. Ask yourself:
- Do you understand basic plumbing or tiling?
- Can you identify electrical safety risks?
- Is your home’s infrastructure modern or Victorian-era?
Period properties demand extra caution. Outdated pipework or uneven walls complicate home improvement efforts. For such cases, hybrid approaches work best—handle demolition yourself but hire professionals for wetroom installations.
Allocate 4–6 weeks for a full remodel. Rushing leads to errors, while delays strain budgets. Weighing these factors ensures your project aligns with skills and goals.
Planning Your Bathroom Renovation
Smart preparation prevents 80% of common renovation headaches. Proper planning transforms overwhelming projects into manageable tasks. Start by mapping each phase with realistic timelines.
Setting a Realistic Budget
BuildPro’s 30/20/50 rule offers clarity: allocate 30% for fixtures, 20% contingency, and 50% for labour and materials. This approach prevents mid-project financial surprises.
A typical breakdown might include:
- £1,500 for quality tiles
- £800 for sanitaryware
- £1,200 reserved for skilled trades
“Underestimating costs is the fastest way to abandon projects halfway,” notes BuildPro’s cost analyst.
Design Inspiration and Layout Considerations
Great design balances aesthetics with functionality. Consider traffic flow—position toilets at least 400mm from walls and ensure shower screens have proper clearance.
Maximise small spaces with:
- Recessed shelving in stud walls
- Space-saving corner sink units
- Mirrored cabinets for extra storage
Obtaining Necessary Permissions
UK building regulations require compliance, especially for electrical work (Part P). Modern homes often fall under permitted development rights, but check these exceptions:
- Listed buildings need conservation consent
- Shared walls require party wall agreements
- Wetroom installations may need planning permission
Local council websites provide definitive guidance for your area.
Essential Tools and Materials for the Job
Professional renovators swear by their toolkit—here’s what you’ll need for a smooth DIY bathroom upgrade. Skimping on equipment or materials often leads to uneven tiles, leaks, or worse. Invest wisely to avoid costly redos.
Must-Have Tools for DIY Bathroom Renovations
Liz Kane, a London-based contractor, insists on three essentials: an SDS drill for stubborn concrete floors, a laser level for precision tiling, and tanking kits to waterproof wet areas. Her clients save 20% on labour by using these correctly.
Other critical tools include:
- Notched trowels: Vary sizes for adhesive thickness (6mm for walls, 10mm for floors).
- RCD-protected power tools: Non-negotiable for electrical safety near water.
- Asbestos testing kits: Vital for pre-1980s homes to avoid hazardous exposure.
“A £200 laser level pays for itself in saved tile wastage,” notes Kane. “Amateurs often guess measurements—professionals never do.”
Choosing the Right Materials: Tiles, Fixtures, and More
Not all tiles suit high-moisture zones. Opt for PEI 3+ ceramic or porcelain for floors—they resist cracks and slips. Moisture-resistant plasterboard prevents mould behind walls.
When selecting fixtures, balance cost and quality:
- Taps: Crosswater’s brass fittings outlast unbranded alternatives by decades.
- Grout: Epoxy-based types repel stains in high-traffic areas.
- Adhesives: Flexible variants accommodate wall movement in older homes.
Use online calculators to estimate tile wastage (add 10% for cuts) and grout coverage. Overbuying wastes cash; underbuying stalls progress.
Preparing Your Space: Demolition and Waste Management
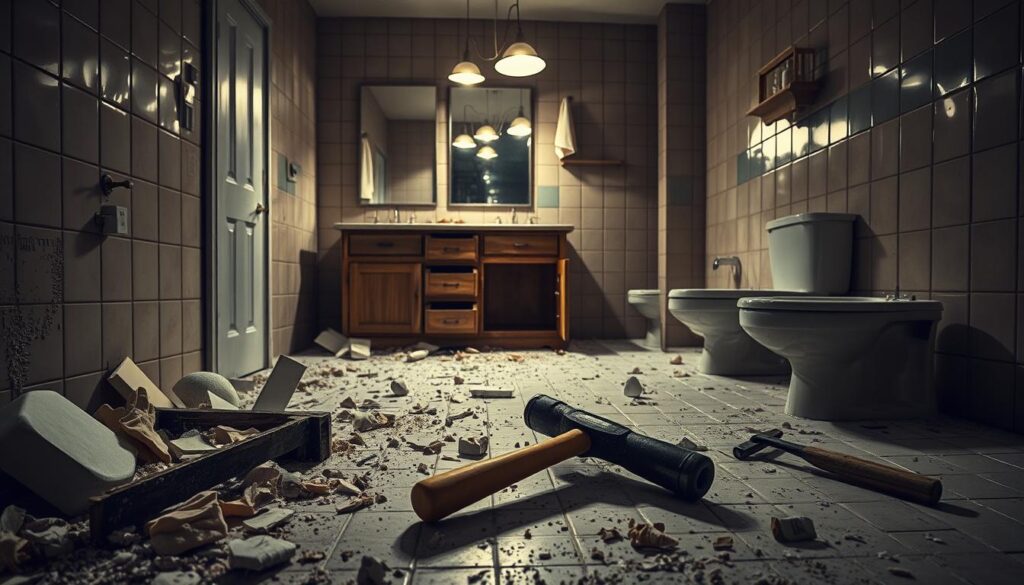
Proper waste management can make or break your DIY bathroom project before the real work begins. According to Rabbit Skip Hire, a 6-yard skip typically handles waste from medium-sized renovations. Start by protecting adjacent rooms with dust sheets and sealing doorways.

Safely Removing Old Fixtures and Fittings
Follow this sequence to avoid damage:
- Isolate utilities: Shut off water and electricity at the mains before dismantling.
- Prioritise hazards: Test for lead paint in pre-1960s homes; hire specialists for cast iron bath removal.
- Work methodically: Strip tiles before removing wall fixtures to minimise debris.
“The demolition phase usually takes 1–2 days, but rushed work doubles repair costs,” notes
.
Hiring a Skip for Efficient Waste Disposal
Choose skip sizes based on your project scope:
- 4-yard: Compact for cloakroom remodels
- 6-yard: Ideal for standard bathroom renovations
- 8-yard: Necessary for full-family bathroom overhauls
Save up to 30% by coordinating skip hire with other home improvements. Remember to separate gypsum plasterboard—UK regulations require its specialist recycling.
Can I Renovate My Bathroom Myself? Tackling Plumbing and Electrical Work
Handling plumbing and electrical work requires careful consideration of both skill and legal requirements. While some tasks are DIY-friendly, others demand certified professionals to avoid safety hazards or compliance issues.
Basic Plumbing Adjustments You Can DIY
Simple plumbing tasks, like replacing taps or installing push-fit waste pipes, are manageable with basic tools. Compression fittings are ideal for beginners—they require no soldering and can be adjusted easily.
Key considerations for DIY water systems:
- Drainage gradients: Maintain a 1:40 fall on waste pipes to prevent blockages.
- Leak prevention: Use PTFE tape on threaded joints for a watertight seal.
- Cost savings: Push-fit connector kits (£40) vs hiring a plumber (£120/day).
“A poorly angled waste pipe causes 80% of drainage issues in DIY projects,” notes
.
When to Call a Professional Electrician
NICEIC reports reveal 23% of DIY electrical work fails inspection—often due to incorrect shower circuit wiring or unsafe fixtures. UK law mandates Part P certification for bathroom electrics, including:
- Zone regulations: IP-rated lights near showers (IP65 minimum).
- Circuit upgrades: Older homes often need consumer unit replacements.
For complex tasks like underfloor heating wiring, hiring a certified electrician ensures compliance and safety.
Installing New Bathroom Fixtures
Fitting new bathroom fixtures requires precision to avoid costly leaks and misalignments. Whether upgrading a shower, toilet, or sink, proper techniques ensure longevity and functionality. Start by gathering tools like silicone sealant, adjustable wrenches, and a spirit level.

Step-by-Step Guide to Fitting a Shower or Bathtub
Shower trays demand a stable base—choose between a sand/cement bed for solid floors or adjustable legs for easy levelling. BuildPro recommends flexible hoses for basin connections, simplifying install new setups.
Key steps:
- Waterproofing: Apply tanking membrane around trays to prevent seepage.
- Levelling: Use plastic shims under uneven floors for balance.
- Sealing: Allow 24 hours for silicone to cure before use.
How to Install a Toilet and Sink Correctly
For toilets, modern rubber gaskets replace traditional wax rings, reducing mess. Position the pan carefully, ensuring waste pipes align with a 1:40 gradient.
Sink installation tips:
- Waste traps: Opt for bottle traps in tight spaces; P-traps suit deeper cabinets.
- Flexible connectors: Simplify plumbing with push-fit pipes.
- Final checks: Test for leaks by running water for 5 minutes.
“A misaligned waste pipe causes 80% of post-installation leaks,” notes
.
Waterproofing and Tiling: Protecting Your Bathroom
Waterproofing and tiling form the backbone of any durable bathroom renovation. Neglecting these steps risks water seepage and structural damage, especially in showers and wet areas. Proper techniques ensure longevity while enhancing aesthetics.
Applying Waterproofing Membranes
Schluter Systems recommends a 200mm upstand at junctions where walls meet floors. This prevents moisture from seeping into vulnerable gaps. Two main tanking systems exist:
- Paint-on membranes: Quick to apply but require meticulous coverage.
- Sheet membranes: More durable, ideal for high-moisture zones like showers.
“A poorly waterproofed shower leaks within months—always seal niches before tiling,” advises
.
Tips for Perfect Bathroom Tiling
Start with layout planning. Centred patterns suit large walls, while offset designs hide imperfections in small spaces. Use these techniques:
- Cutting: Diamond blades for porcelain; scoring tools for ceramics.
- Grout: Epoxy resists stains, while cement-based options suit budgets.
- Niche construction: Frame and waterproof recessed shelves before tiling.
Allow adhesives to cure fully—rushing this step causes tiles to shift. A spirit level ensures even rows, avoiding costly rework.
Adding the Finishing Touches
Attention to detail separates professional-looking results from amateur finishes. This phase elevates your bathroom’s functionality and style, turning a renovation into a polished home improvement.
Painting and Sealing for a Lasting Finish
Farrow & Ball’s mould-resistant painting range ensures durability in humid environments. Prep walls thoroughly:
- Clean surfaces: Sugar soap removes grease and old adhesive.
- Seal knots: Prevent resin bleed with specialist primer.
- Ventilation: Install a 15L/sec extractor fan to minimise moisture.
“Two thin coats outperform one thick layer—patience prevents drips,” advises
.
Installing Mirrors, Lighting, and Accessories
Maximise space with strategically placed mirrors and task lighting. Follow these standards:
| Fixture | Ideal Placement |
|---|---|
| Mirrors | Centred 120cm above floor |
| Task lighting | 500 lux at mirror zones |
| Towel rails | 450mm height for ergonomics |
For safety, use mirrors with backing film and IP44-rated fixtures near water sources. Align accessories symmetrically for a cohesive look.
Cost-Saving Tips for Your DIY Bathroom Renovation
Cutting costs doesn’t mean cutting corners—strategic choices make all the difference. A well-planned budget ensures quality results without overspending. From reglazing baths to sourcing reclaimed fixtures, savvy approaches keep costs low and aesthetics high.
Refurbishing vs Replacing Fixtures
London contractor Liz Kane swears by reglazing: “A £300 refresh beats a £1,000 replacement.” Consider these refurbishment options:
- Chrome plating: Restores taps and rails for 60% less than new.
- Acrylic resurfacing: Covers scratches on baths with a 10-year guarantee.
- Reclaimed treasures: Vintage roll-top baths add character for half the price.
“Modified fixtures void warranties—check insurance terms before altering,” advises
.
Where to Splurge and Where to Save
Allocate funds wisely to avoid future headaches. Invest in durability, but skip unnecessary luxuries.
| Priority | Recommendation |
|---|---|
| Thermal insulation | Prevents mould and cuts heating bills |
| Mixer taps | Brass cores last decades |
| Storage solutions | Recessed niches save space |
Steer clear of cheap sealants—annual reapplication costs more long-term. For diy enthusiasts, reclaimed tiles or second-hand vanities offer style without the markup.
Common Pitfalls and How to Avoid Them
NHBC data highlights ventilation as a critical yet overlooked renovation factor. Nearly 31% of defects stem from poor airflow or damp-proofing issues. Recognising these traps early saves time, money, and frustration.
Mistakes in Measuring and Planning
Rushed measurements lead to ill-fitting fixtures or wasted materials. Always account for service voids behind walls—these hidden spaces house pipes and cables. Common oversights include:
- Door clearance: Ensure doors swing freely after installing bulky vanities.
- Tile gaps: Leave 2mm expansion joints to prevent cracks.
- Insurance risks: Unapproved structural work may void policies.
“A laser measure eliminates guesswork. Even 5mm errors compound across multiple tiles,” notes
.
Overlooking Ventilation and Damp Proofing
Condensation traps form where warm, moist air meets cold surfaces. Uninsulated cold bridges—like metal window frames—are prime culprits. Prevent mould with:
- Extractor fans: Choose humidity-controlled models (minimum 15L/sec).
- Tanking kits: Apply these before tiling wet areas.
- Thermal breaks: Insulate pipes to reduce sweating.
Neglecting these steps risks long-term damage. Proper airflow isn’t just about comfort—it’s a safeguard for your home’s integrity.
Conclusion: Enjoying Your Newly Renovated Bathroom
Completing a DIY bathroom renovation brings immense satisfaction. Follow BuildPro’s post-project checklist to ensure lasting results. Start with a snagging list—note any minor fixes needed before daily use begins.
Maintenance keeps your space pristine. Reseal silicone joints every 18 months to prevent water damage. Test drainage flow rates during the final inspection. Slow drains often signal hidden blockages.
Keep all receipts and warranties organised. Proper documentation adds value if you sell your home. Celebrate your achievement with spa-inspired touches—luxury towels and scented candles elevate the experience.
For more home improvement inspiration, explore our detailed renovation guide. Consider complementary updates, like refreshing hallways, to maintain consistency throughout your home.
FAQ
How much does a DIY bathroom renovation typically cost?
Costs vary based on materials and scope, but a basic refresh may start around £1,500, while a full overhaul with premium fixtures can exceed £5,000. Always budget for unexpected expenses.
Do I need planning permission for a bathroom renovation?
Most interior renovations don’t require permission unless you’re altering the structure. Check local regulations, especially for listed buildings or conservation areas.
What’s the most challenging part of a DIY bathroom project?
Plumbing and electrical work often pose the biggest hurdles. While DIY-friendly kits exist, complex tasks like relocating pipes should be left to professionals.
How long does a bathroom renovation usually take?
A straightforward update might take 1–2 weeks, but extensive remodels with tiling or structural changes can span 4–6 weeks. Plan for disruptions to daily routines.
Can I reuse old fixtures to save money?
A> Yes! Refurbishing taps, repainting cabinets, or regrouting tiles cuts costs. However, replace severely damaged items to avoid leaks or mould issues later.
What’s the best way to prevent water damage during renovations?
Use waterproof membranes behind tiles, seal joints with silicone, and ensure proper slope in shower trays. Always test for leaks before finishing.
Should I install underfloor heating myself?
Electric mats are DIY-friendly, but wet systems require professional fitting. Consider energy efficiency and floor height adjustments before deciding.
How do I choose the right tiles for my bathroom?
Opt for porcelain or ceramic tiles in wet areas—they’re water-resistant. Larger tiles reduce grout lines (easier cleaning), while textured surfaces improve slip resistance.


