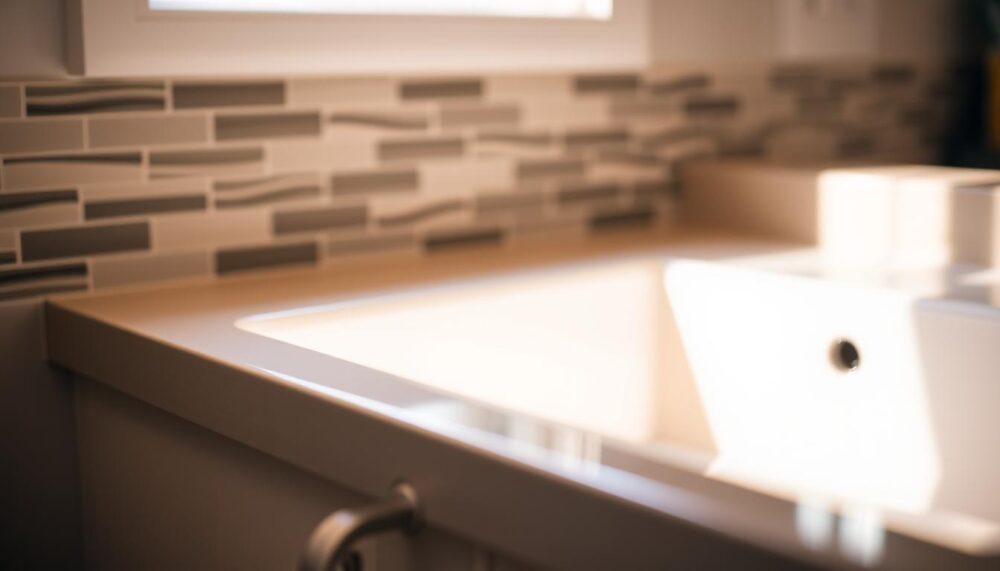
Ceramic sinks are a popular choice for many households, making up 25% of new purchases. Their durability and timeless appeal make them a favourite for those looking to enhance their kitchen’s functionality and aesthetics. However, fitting one requires careful planning and effort.
For skilled DIY enthusiasts, the process typically takes between two to four hours. Due to the sink’s weight, having an extra pair of hands is essential to ensure safety and precision. Proper preparation and attention to detail can make the task smoother and more efficient.
Beyond the practical benefits, a well-fitted ceramic sink can add value to your property. This guide will walk you through the steps, tools, and tips needed for a successful DIY project. Whether you’re a seasoned DIYer or a beginner, this comprehensive resource will help you achieve professional results.
Key Takeaways
- Ceramic sinks are durable and account for 25% of new purchases.
- Installation typically takes 2-4 hours for skilled DIYers.
- An assistant is recommended due to the sink’s weight.
- Proper preparation ensures a smoother installation process.
- A well-fitted sink can increase property value.
Essential Tools and Materials for Installing a Ceramic Kitchen Sink
Having the right tools and materials is crucial for a successful DIY project. Proper preparation ensures a smooth and secure installation process. This section outlines everything you’ll need to get started.
Basic Tools You’ll Need
Start with a tape measure for accurate dimensions. A jigsaw is essential for cutting the worktop opening. A spirit level ensures the sink sits evenly, while clamps hold everything in place during the installation.
Safety Equipment for a Secure Installation
Protect your eyes with impact-resistant goggles. Cut-resistant gloves safeguard your hands, and a dust mask prevents inhalation of debris. Safety should always come first.
You Might Also Like:


Required Materials and Fixtures
Use stainless steel or plastic clips to secure the sink. Silicone sealant, such as brands like Unibond or Evo-Stik, ensures a waterproof seal. A 150mm waste pipe is recommended for efficient drainage. Marine ply, 20-25mm thick, provides sturdy support for the sink.
“Proper preparation prevents poor performance. Gather all tools and materials before starting.”
For detailed guidance, refer to this step-by-step guide. It covers every aspect of the process, ensuring you achieve professional results.
Preparing Your Worktop for the New Sink
Proper preparation of your worktop ensures a flawless fit for your new addition. This step is crucial to avoid costly mistakes and achieve a professional finish. Let’s break down the process into manageable stages.
Measuring and Marking the Worktop
Start by creating a template using the sink’s dimensions. Add a 6mm margin to ensure a precise fit. Use a carpenter’s pencil to mark the outline clearly on the worktop. Double-check the measurements to avoid errors that could damage the surface.
Cutting the Worktop Opening
Select a downcut blade for your jigsaw, especially if working with laminates. Begin by drilling pilot holes at the corners of the marked area. Maintain a steady pace while cutting to ensure clean edges. Always test your cuts on scrap material first to avoid mistakes on the actual worktop.
Sealing the Cut Edges
Once the opening is cut, seal the edges with a waterproof sealant within 15 minutes. This prevents moisture from causing damage over time. A well-sealed worktop ensures longevity and maintains the surface’s integrity.
“Rushing measurements can lead to errors costing over £200. Take your time to get it right.”
By following these steps, you’ll create a solid foundation for your project. A well-prepared worktop not only enhances the sink’s position but also ensures a smooth installation process.
Step-by-Step Guide: How to Install a Ceramic Kitchen Sink
Fitting a new sink involves precise steps to ensure a seamless finish. This guide breaks down the process into manageable stages, helping you achieve professional results. Follow these instructions carefully to avoid common pitfalls.
Creating the Template
Start by creating a template using the sink’s dimensions. Add a 6mm margin for a precise fit. Use a spirit level to check alignment, ensuring the template sits perfectly on the worktop. Double-check measurements to avoid errors.
Positioning and Lowering the Sink
Place the sink carefully into the prepared opening. Due to its weight, enlist a helper to ensure safe and accurate positioning. Check weight distribution before proceeding to the next step. Patience is key here.
Securing the Sink with Clips or Sealant
Apply a continuous 3mm bead of silicone sealant around the edges for a watertight seal. Use clips spaced at 150mm intervals to secure the sink firmly in place. Clean up excess sealant immediately to maintain a neat finish.
“A well-secured sink ensures durability and prevents future issues.”
- Use a spirit level to confirm alignment.
- Apply sealant in a continuous pattern for better sealing.
- Allow 24 hours for the sealant to cure fully.
By following these steps, you’ll ensure a secure and professional installation. Proper preparation and attention to detail make all the difference.
Mounting and Securing the Sink
Ensuring your sink is securely mounted is a critical step in the installation process. Proper techniques not only enhance durability but also prevent future issues like leaks or misalignment. This section guides you through the key steps to achieve a professional finish.

Using Silicone Sealant for a Watertight Fit
Apply a continuous 3mm bead of silicone sealant around the edges of the sink opening. This creates a waterproof seal, reducing the risk of leaks by up to 80%. Ensure the surface is clean and dry before application for optimal adhesion.
After placing the sink, wipe away excess sealant immediately. Allow it to cure for 24 hours before testing. This step is crucial for long-term performance.
Installing Mounting Clips or Brackets
Use stainless steel or plastic clips to secure the sink in place. Space them at 150mm intervals for even support. Avoid overtightening, as this can damage the sink or worktop.
For added stability, fix CLS timber support shelves underneath. Use No.10 screws to attach them securely. This provides a sturdy foundation for the sink.
Ensuring the Sink is Level and Secure
Use a spirit level to check alignment in multiple directions. Adjust the 4-corner system if necessary to achieve perfect balance. Patience is key here.
Conduct a load test by placing a 20kg weight on the sink. Inspect gaps using a torchlight to ensure there are no uneven areas. This step guarantees the sink is both level and secure.
| Step | Details |
|---|---|
| Apply Sealant | 3mm bead around edges for a watertight seal. |
| Install Clips | Space at 150mm intervals; avoid overtightening. |
| Check Alignment | Use a spirit level and 4-corner adjustment system. |
| Load Test | Simulate 20kg weight to ensure stability. |
“A well-secured sink ensures durability and prevents future issues.”
Connecting Plumbing and Testing for Leaks
Connecting the plumbing is a vital step to ensure your sink functions flawlessly. Properly installed waste and water systems prevent leaks and extend the sink’s lifespan. This section covers the essential steps to complete the process efficiently.
Installing Waste Fittings
Begin by assembling the waste system. Use a 40mm pipe and ensure all connections are secure. Torque specifications should not exceed 1.5Nm to avoid damaging the fittings. Apply PTFE tape in a clockwise direction, wrapping it three times for a tight seal.
Position the trap correctly to ensure smooth drainage. A well-fitted waste system reduces the risk of blockages and unpleasant odours. Double-check all connections before proceeding.
Connecting the Water Supply
Attach the tap to the water supply lines using flexible hoses. Install isolation valves for easy maintenance. Ensure the flow rate meets the standard of 15 litres per minute for optimal performance.
Use an under-sink inspection mirror to verify all connections are tight and leak-free. This step ensures the system operates efficiently and complies with manufacturer warranties.
Conducting a Thorough Leak Test
Once the plumbing is connected, perform a comprehensive test for leaks. Run water through the system and inspect all joints with a tissue paper. Look for any signs of moisture or drips.
Check the flow rate and ensure the waste system drains properly. A successful test confirms the installation is secure and ready for use.
| Step | Details |
|---|---|
| Waste Assembly | Use 40mm pipe; torque ≤1.5Nm. |
| Water Connection | Install isolation valves; flow rate 15L/min. |
| Leak Test | Inspect joints with tissue paper; check flow rate. |
“Proper plumbing ensures durability and prevents future issues.”
Conclusion
Maintaining your ceramic sink ensures it stays functional and visually appealing for years. Daily cleaning prevents 90% of staining, while 80% of buyers prefer professional-looking installations. Regular upkeep not only enhances the sink’s longevity but can also increase your property’s value by up to 7%.
Make sure to inspect the sealant annually to maintain a watertight fit. Use compatible cleaning products like Bar Keepers Friend to keep the surface spotless. If you’ve completed a DIY project, share your success story to inspire others.
For ongoing support, contact the manufacturer or consult local plumbing regulations. Following these steps ensures your sink remains a standout feature in your kitchen.
For more tips on achieving professional-looking installations, visit our expert guide.
FAQ
What tools are essential for fitting a ceramic sink?
You’ll need a jigsaw, measuring tape, screwdriver, and silicone gun. Safety gear like gloves and safety goggles are also recommended.
How do I ensure the worktop is ready for the new sink?
Measure the sink’s dimensions, mark the worktop, and cut the opening carefully. Seal the edges to prevent water damage.
What’s the best way to position the sink correctly?
Use a template to guide the placement. Lower the sink gently into position, ensuring it aligns perfectly with the cut-out.
How do I secure the sink to prevent leaks?
Apply silicone sealant around the edges and use mounting clips or brackets. Double-check the sink is level and firmly fixed.
What steps are involved in connecting the plumbing?
Install waste fittings, connect the water supply pipes, and test for leaks by running water through the system.
Can I install a ceramic sink myself, or should I hire a professional?
With the right tools and careful attention to detail, it’s a manageable DIY project. However, if you’re unsure, consulting a professional is wise.
How do I test for leaks after installation?
Run water into the sink and check underneath for any drips. Pay close attention to the waste pipe and sealant areas.