Fancy a fresh look for your kitchen? Installing a new tap can do wonders. This guide will help you tackle the job with confidence1.
Most homeowners with basic DIY skills can replace a kitchen tap. It’s a straightforward task that can solve dripping issues or update your style1.
Before you start, familiarise yourself with different tap types2. Mixer taps blend hot and cold water. Separate taps for hot and cold are another common option1.
Once you’ve chosen your ideal tap, you’re ready to begin the installation process.
Reasons for Changing Your Kitchen Taps
Kitchen taps endure heavy daily use, leading to wear and tear. A whopping 80% show signs of deterioration from regular use3. When these vital fixtures malfunction, it’s time for replacement.
Dripping Tap
A dripping tap is a major reason for replacement. It wastes water and can increase utility bills. About 60% of kitchen tap replacements stem from issues like limescale, leaks, and low pressure3.
You Might Also Like:


Fixing a dripping tap might involve replacing the washer or the entire tap. Quick action can prevent water damage and further problems.
Renovating Your Kitchen
Kitchen renovations offer a chance to refresh your cooking space. 40% of people choose new styles or colours when replacing taps3. New taps can revitalise your kitchen and match your design vision.
Whether you prefer modern sleekness or vintage charm, a new tap can make a big difference. It’s a small change that can transform your kitchen’s look.
Homeowners have many options when replacing kitchen taps. Plumbworld offers various choices, from standard mixers to taps with pull-out sprays and boiling water functions3. The right tap can enhance both style and functionality in your kitchen.
Preparing to Replace Your Kitchen Tap
Replacing a kitchen tap needn’t be daunting. With proper preparation, it’s quite straightforward. The crucial first step is to turn off the water supply to the tap4.
You can do this at the individual isolating valves or main stopcock. This ensures safe working conditions and prevents water leaks during installation.
Next, clear the area under the sink5. Remove any items that might hinder your access to the tap. This includes cleaning products, utensils, and sink plumbing.
Creating a clutter-free space gives you ample room to work. You’ll be able to manoeuvre efficiently during the replacement process.
- Turn off the water supply to the tap
- Clear the work area underneath the sink
- Gather the necessary tools, such as adjustable pliers, a wrench, and plumber’s tape4
- Wear safety goggles to protect your eyes4
You’re now ready to remove the old tap and install the new one. Take your time and follow instructions carefully.
Double-check your work to ensure a successful, leak-free installation6.
“The key to a successful kitchen tap replacement is thorough preparation and attention to detail.”
Removing the Old Kitchen Tap
Replacing your kitchen tap can be a fun DIY project. It starts with taking out the old one. This involves disconnecting water lines and unscrewing the tap from the sink.
Disconnecting the Water Supply Lines
First, turn off the water supply to the kitchen tap. Find the shut-off valves under the sink and turn them clockwise6. For flexible hoses, unscrew them from the tap.
If you have standard pipes, use a basin wrench to loosen the nuts. This will free the water lines from the tap.
Unscrewing the Tap from the Sink
After disconnecting the water supply, remove the tap from the sink5. Use a basin wrench to loosen the nuts holding the tap in place. Lift the tap gently to detach it from the sink.
These steps will help you remove the old tap smoothly. Take your time and work carefully. This will ensure a successful tap replacement65.
Choosing the Right Replacement Tap
Selecting a new kitchen tap requires careful thought. The size and fit must match your sink’s configuration. Measure your existing setup, as sinks can have one, two, or no tap holes.
Tap finishes come in various options. These include chrome, stainless steel, brushed nickel, and more. Choose a finish that complements your kitchen’s style for a cohesive look.
Kitchen taps are typically larger than bathroom taps. This provides more clearance space between the spout and sink.
Functionality is another important factor to consider when selecting a new kitchen tap.7 Mixer taps can save money on energy bills. They use less hot water compared to separate taps.
Pull-out kitchen taps suit all homes. They’re especially useful in busy kitchens. However, kitchen pillar taps aren’t recommended for homes with small children.
Installation time varies for different tap types. Standard taps take about thirty minutes to install. Filter or boiling water taps may need a few hours.
Consider the tap’s size, fit, finish, style, and functionality. This ensures you choose a replacement that looks great and meets your kitchen’s needs.
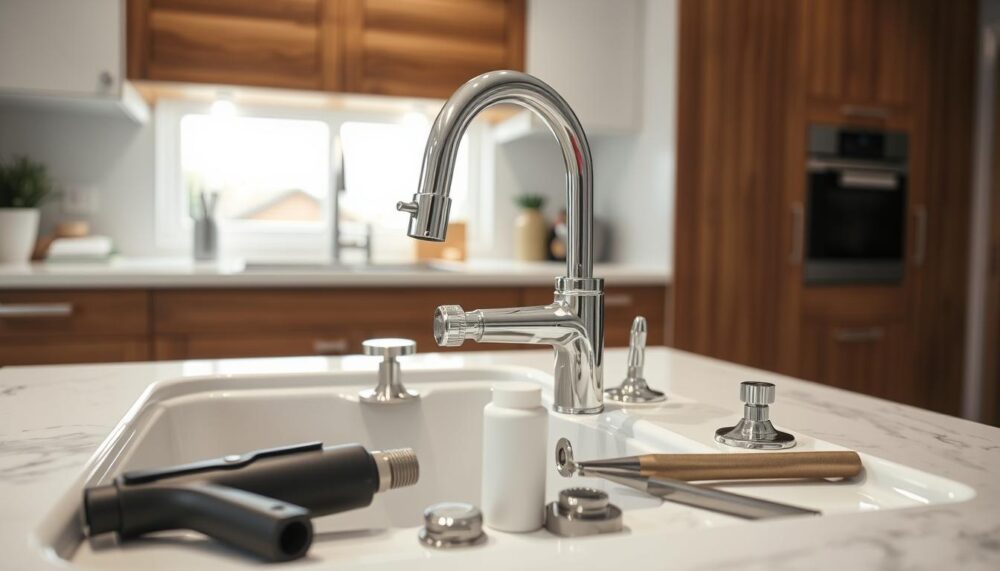
Installing the New Kitchen Tap
A new kitchen tap can revitalise your kitchen. The installation process needs careful attention. Let’s explore how to fit your new tap efficiently.
Assembling the Tap
Start by assembling the new tap. Place the plastic seal under the tap. This ensures a snug fit on the sink surface8.
Use a 17 mm open-end wrench to tighten the tap. Be careful not to over-tighten the nut8.
Securing the Tap to the Sink
Position the assembled tap in the sink hole. Make sure it’s correctly aligned8. Use a box spanner to tighten the nut underneath the sink9.
Reconnecting the Water Supply
Reconnect the hot and cold water supply lines to the new tap9. Check for kinks or bends in the hoses. These can block water flow8.
Turn on the water supply and check for leaks. Tighten connections further if you spot any drips9.
These steps will help you install your new kitchen tap successfully. Take your time and use the right tools. Pay attention to details for a smooth installation.
“The key to a successful kitchen tap installation is attention to detail and a methodical approach.”
how to install a kitchen sink tap
Swapping out your kitchen sink tap can be a simple DIY task. It can help you save money on professional fees. This guide will show you how to fit a new kitchen sink tap yourself.
- Prepare the Work Area: Turn off the water supply to the sink and clear the area around the tap to create a clean, unobstructed workspace6.
- Remove the Old Tap: Disconnect the water supply lines, then unscrew the tap from the sink6.
- Choose the Right Replacement Tap: Measure the hole size in your sink and select a tap that fits. Consider factors like design, finish, and features to find the perfect replacement10.
- Install the New Tap: Assemble the tap according to the manufacturer’s instructions, then secure it to the sink8. Reconnect the water supply lines, ensuring a watertight seal8.
Safety should be your top concern during the installation process. If you’re unsure about any step, it’s wise to ask a professional plumber.
With the right tools and some patience, you can fit your new tap successfully. Your new tap will then serve you well for many years.
“Installing a new kitchen tap yourself can be a rewarding and cost-effective project, as long as you follow the proper steps and take safety precautions.”

Conclusion
Kitchen tap replacement is a manageable DIY project for most homeowners. With simple steps and the right tools, you can update your kitchen’s look in hours11. An adjustable spanner and monobloc tap spanner set are essential for this task12.
This home improvement project can save you £150 to £400 in professional fees13. Proper preparation includes turning off the water supply and disconnecting the old tap12. You’ll achieve a modern look for your kitchen with these steps.
The process may seem challenging, but the results are rewarding. Research, gather tools, and follow best practices for success. You’ll enjoy improved water flow and adjustable spray options with your new tap13.
This guide equips both seasoned DIY enthusiasts and beginners with the necessary information. You can confidently transform your kitchen with a kitchen tap replacement. The satisfaction of completing this task yourself is truly worth the effort.
FAQ
What are the common reasons for changing kitchen taps?
Dripping taps waste water and need replacing. Kitchen renovations often include new taps. Updating taps can refresh your kitchen’s look.
How do I prepare to replace my kitchen tap?
Turn off the water supply to the tap. Use individual isolating valves or the main stopcock.
Clear the area under the sink. This provides space and easy access for replacement.
How do I remove the old kitchen tap?
Disconnect the water supply lines. This applies to standard pipes and flexible hoses.
Use a basin wrench or box spanner. Unscrew the tap from the sink with these tools.
What should I consider when choosing a replacement tap for my kitchen?
Consider the tap’s height and finish. Check the number of holes in your sink deck.
Ensure the new tap fits perfectly. It should complement your overall kitchen design.
How do I install the new kitchen tap?
Assemble the tap, including the plastic seal. Tighten it to the sink using a box spanner.
Reconnect the hot and cold water supply lines. Ensure connections are secure and leak-free.
What are the key steps involved in installing a new kitchen sink tap?
Prepare the work area and disconnect the old tap. Choose the right replacement tap.
Assemble and secure the new tap to the sink. Reconnect the water supply lines properly.